At conventions, my inner bias-tape corners generated by far the most “wtf, how did you do that?” reactions. Learning this little bit of black magic makes a number of otherwise maddening JRPG and anime designs significantly more approachable. You should already be comfortable with applying bias tape in a straight line and around outer corners before attempting this.
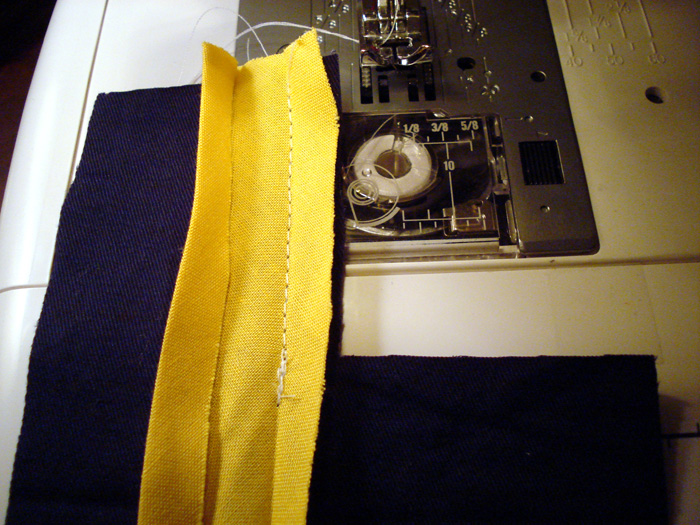
Start as you would for an outer corner: line up the bias tape and sew directly to the marked corner point. Stop exactly at the intersection. Fold the bias tape at a 90-degree angle, then sew to the same point from the other side. Be precise!
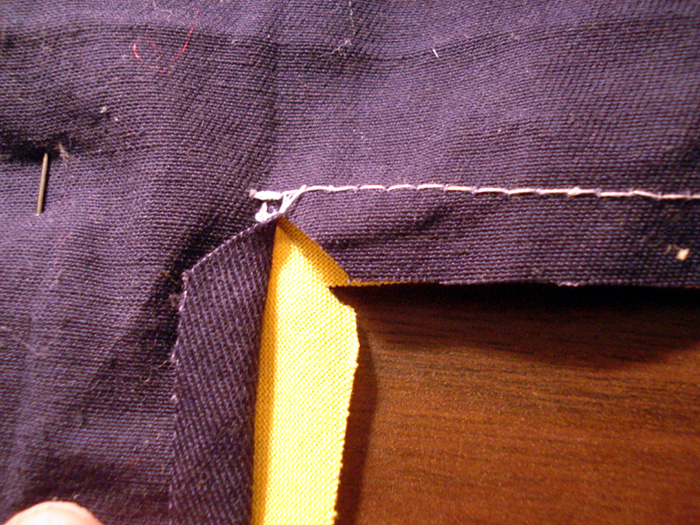
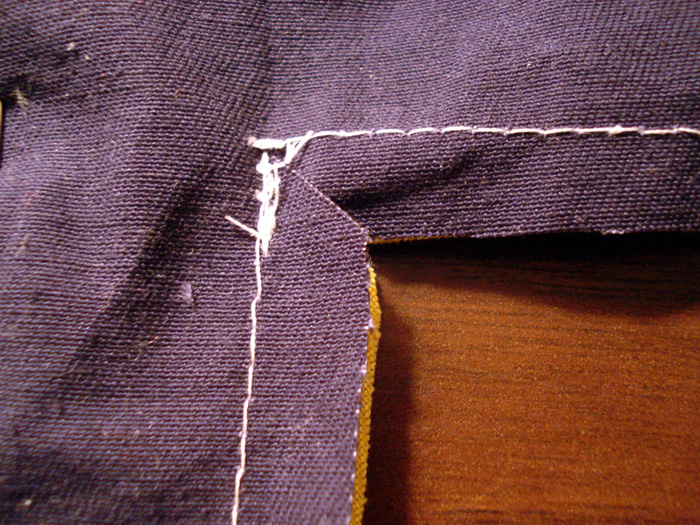
At this point, the back of your fabric should look like this. Carefully clip the garment fabric to the point at a 45-degree angle. Do not cut the bias tape. Clip the garment fabric only.
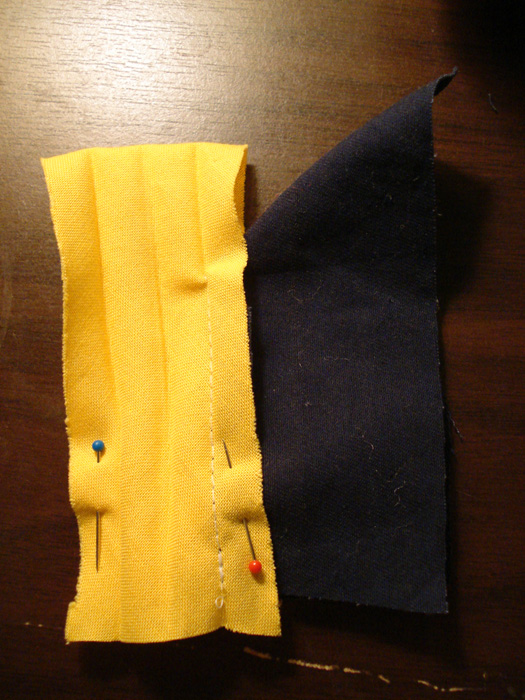
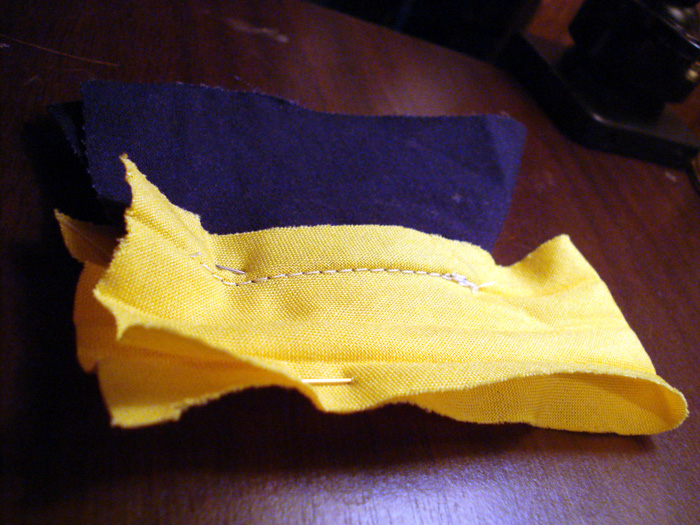
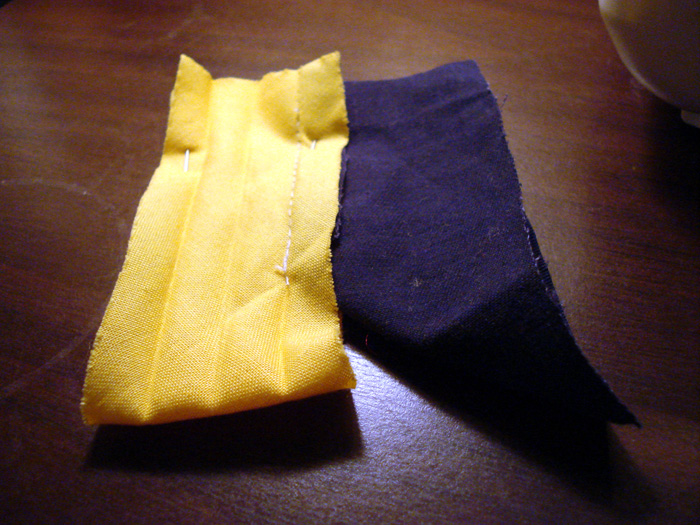
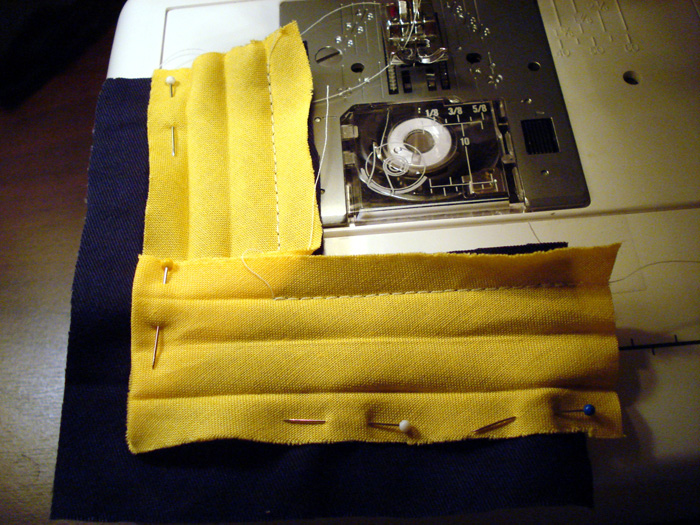
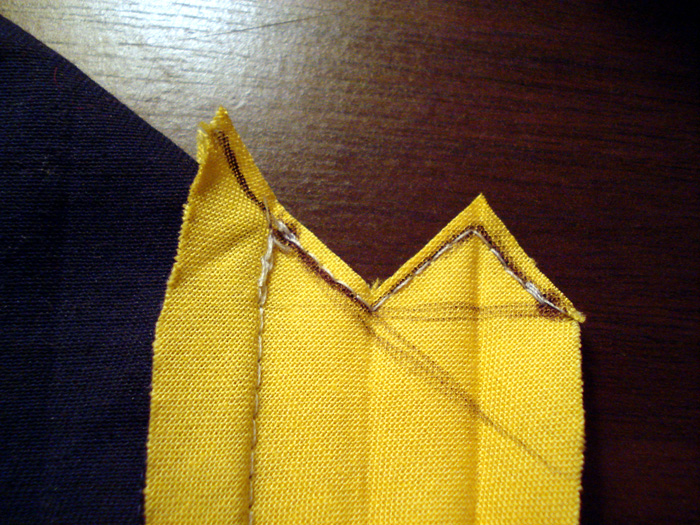
This is the part that is hardest to visualize, so I took photos from every angle imaginable. Before this step, your bias tape was folded and your fabric was flat. Now you reverse that relationship: the fabric folds out of the way while the bias tape lies flat.
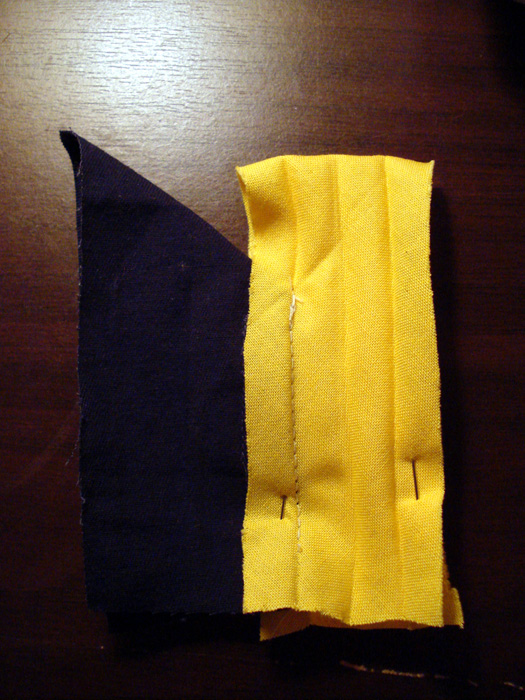
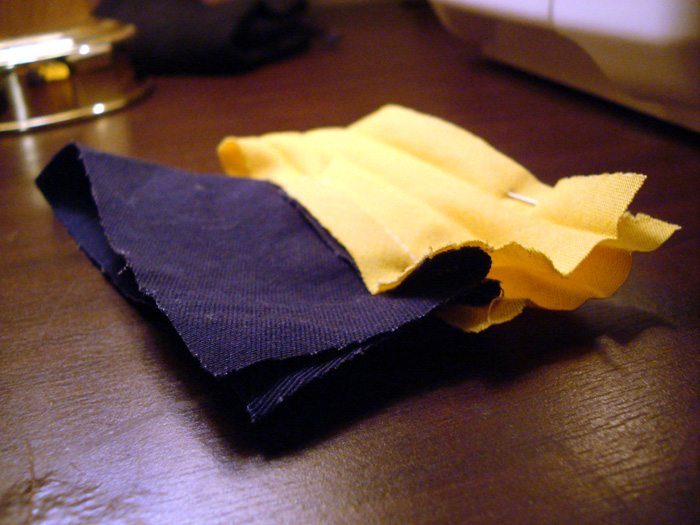
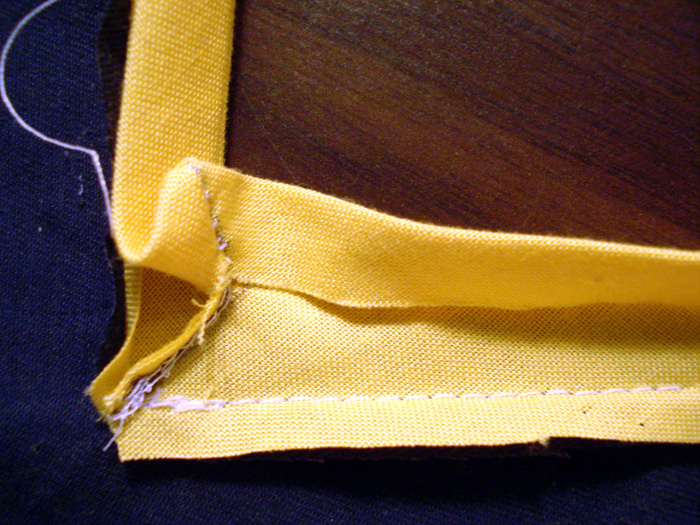
Bring the bias tape into alignment with itself, so the strip runs straight up and down as shown in the photos. It should look basically the same on both sides. The picture taken from the bottom should help illustrate how it’s folded - the seam allowances should all be facing away from the strip of bias tape. Pin them in place.
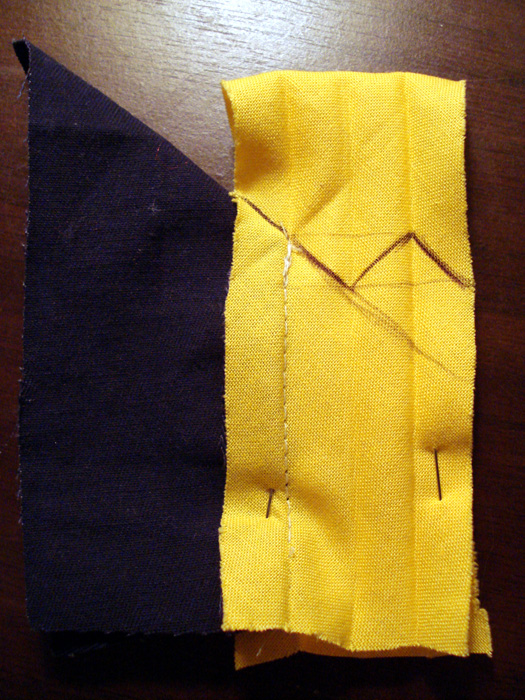
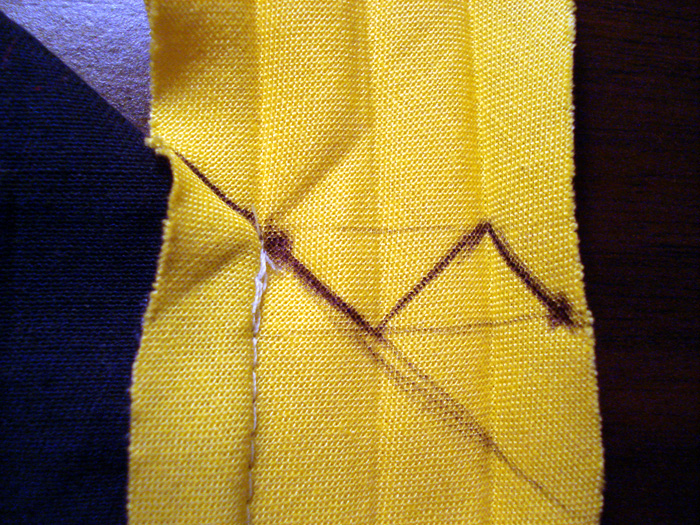
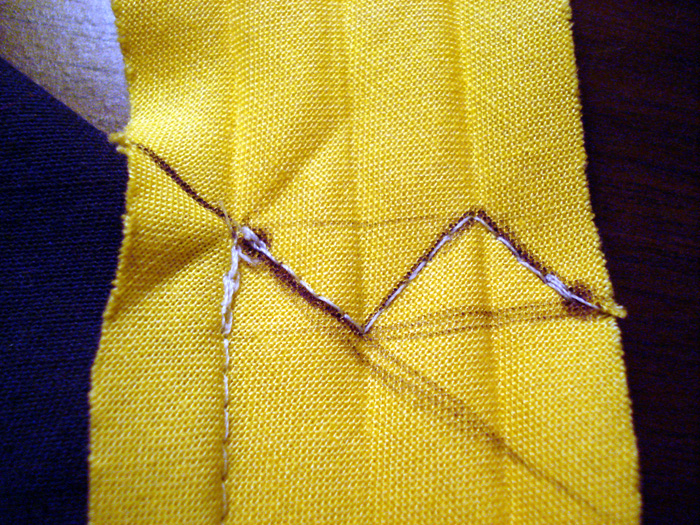
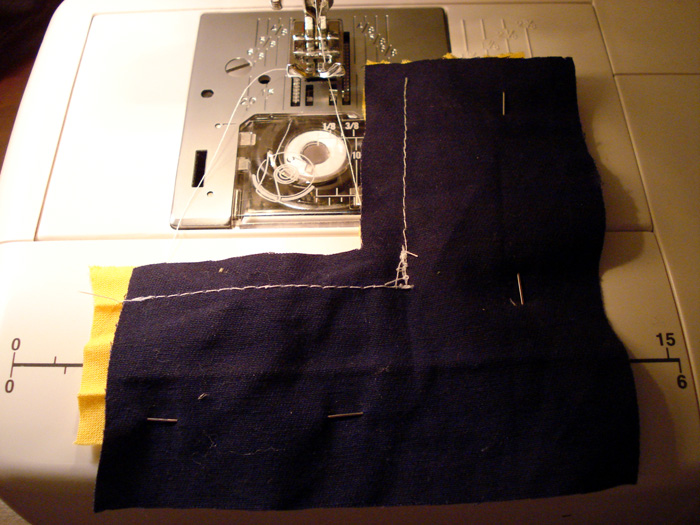
Next, take a ruler and extend the diagonal line formed by the blue fabric on down as if it continued through your bias tape. (This is the lightly penned diagonal line.) Then, draw the 45 degree angles like you would for an outer corner, but in the \/\ formation pictured above. The zig-zag path you have drawn lets you sew the miter seam from the inside. Stitch along the line as shown, then clip excess fabric.
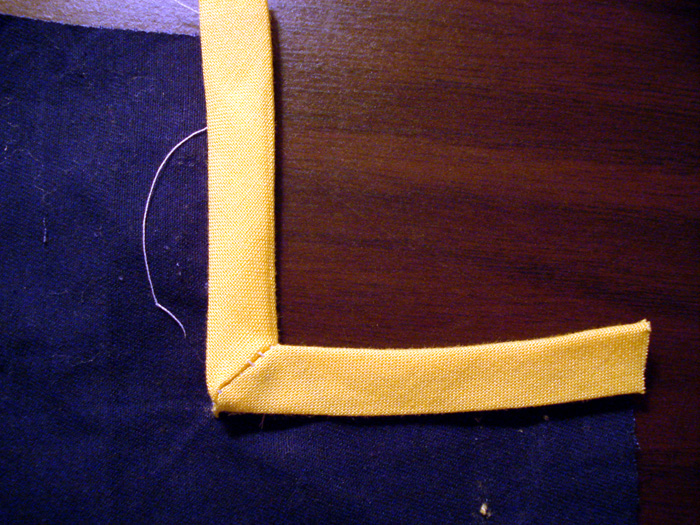
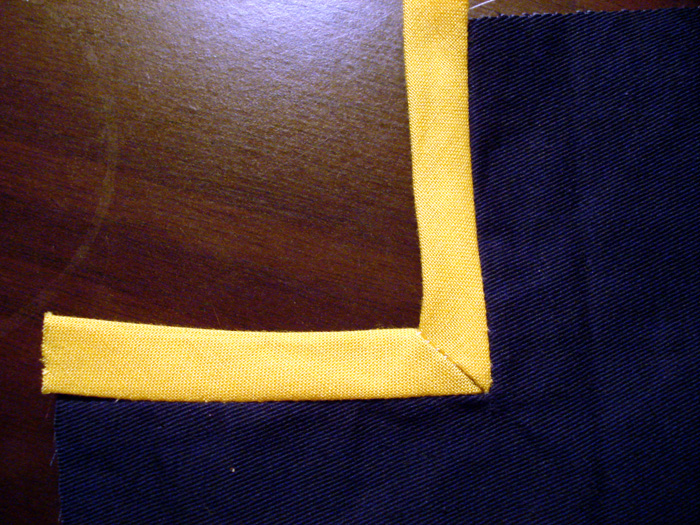
Flip everything to the inside and…congrats! You’re done. Finish the back with your method of choice. (Slipstitching, topstitching, etc.)
Final pro-tip: right-angle inner corners are the easiest to visualize because the 90-degree inset can be built from three 45-degree line segments. You can even reduce this to two 45-degree segments if you let the final outer fold of the bias tape stay closed, as shown in the “outer corner” tutorial.) However, obtuse and acute angles are also achievable with the same basic method; the seam angles just become greater or less than 45 degrees, proportional to the desired corner angle.