You’ve made it to the end of your bias tape. Now what?

Let’s look first at what you often see out in the wild. People get to the end, go ”?????” and then try to flip it to the inside, with varying degrees of success. Getting it to end exactly where your fabric does is nearly impossible; the back side will ALWAYS try to escape, and even in the best case, you will be left with an ugly gaping hole in the bottom.
To deal with the hole, most people will:
A) ignore it and hope no notices
B) stitch across it like a maniac to make sure it can’t escape (<---what I used to do)
C) glue it
D) hand stitch it closed
Is there a better way? Yes! It’s a little bit more work, but it will give you a much cleaner finish and is well worth the effort.
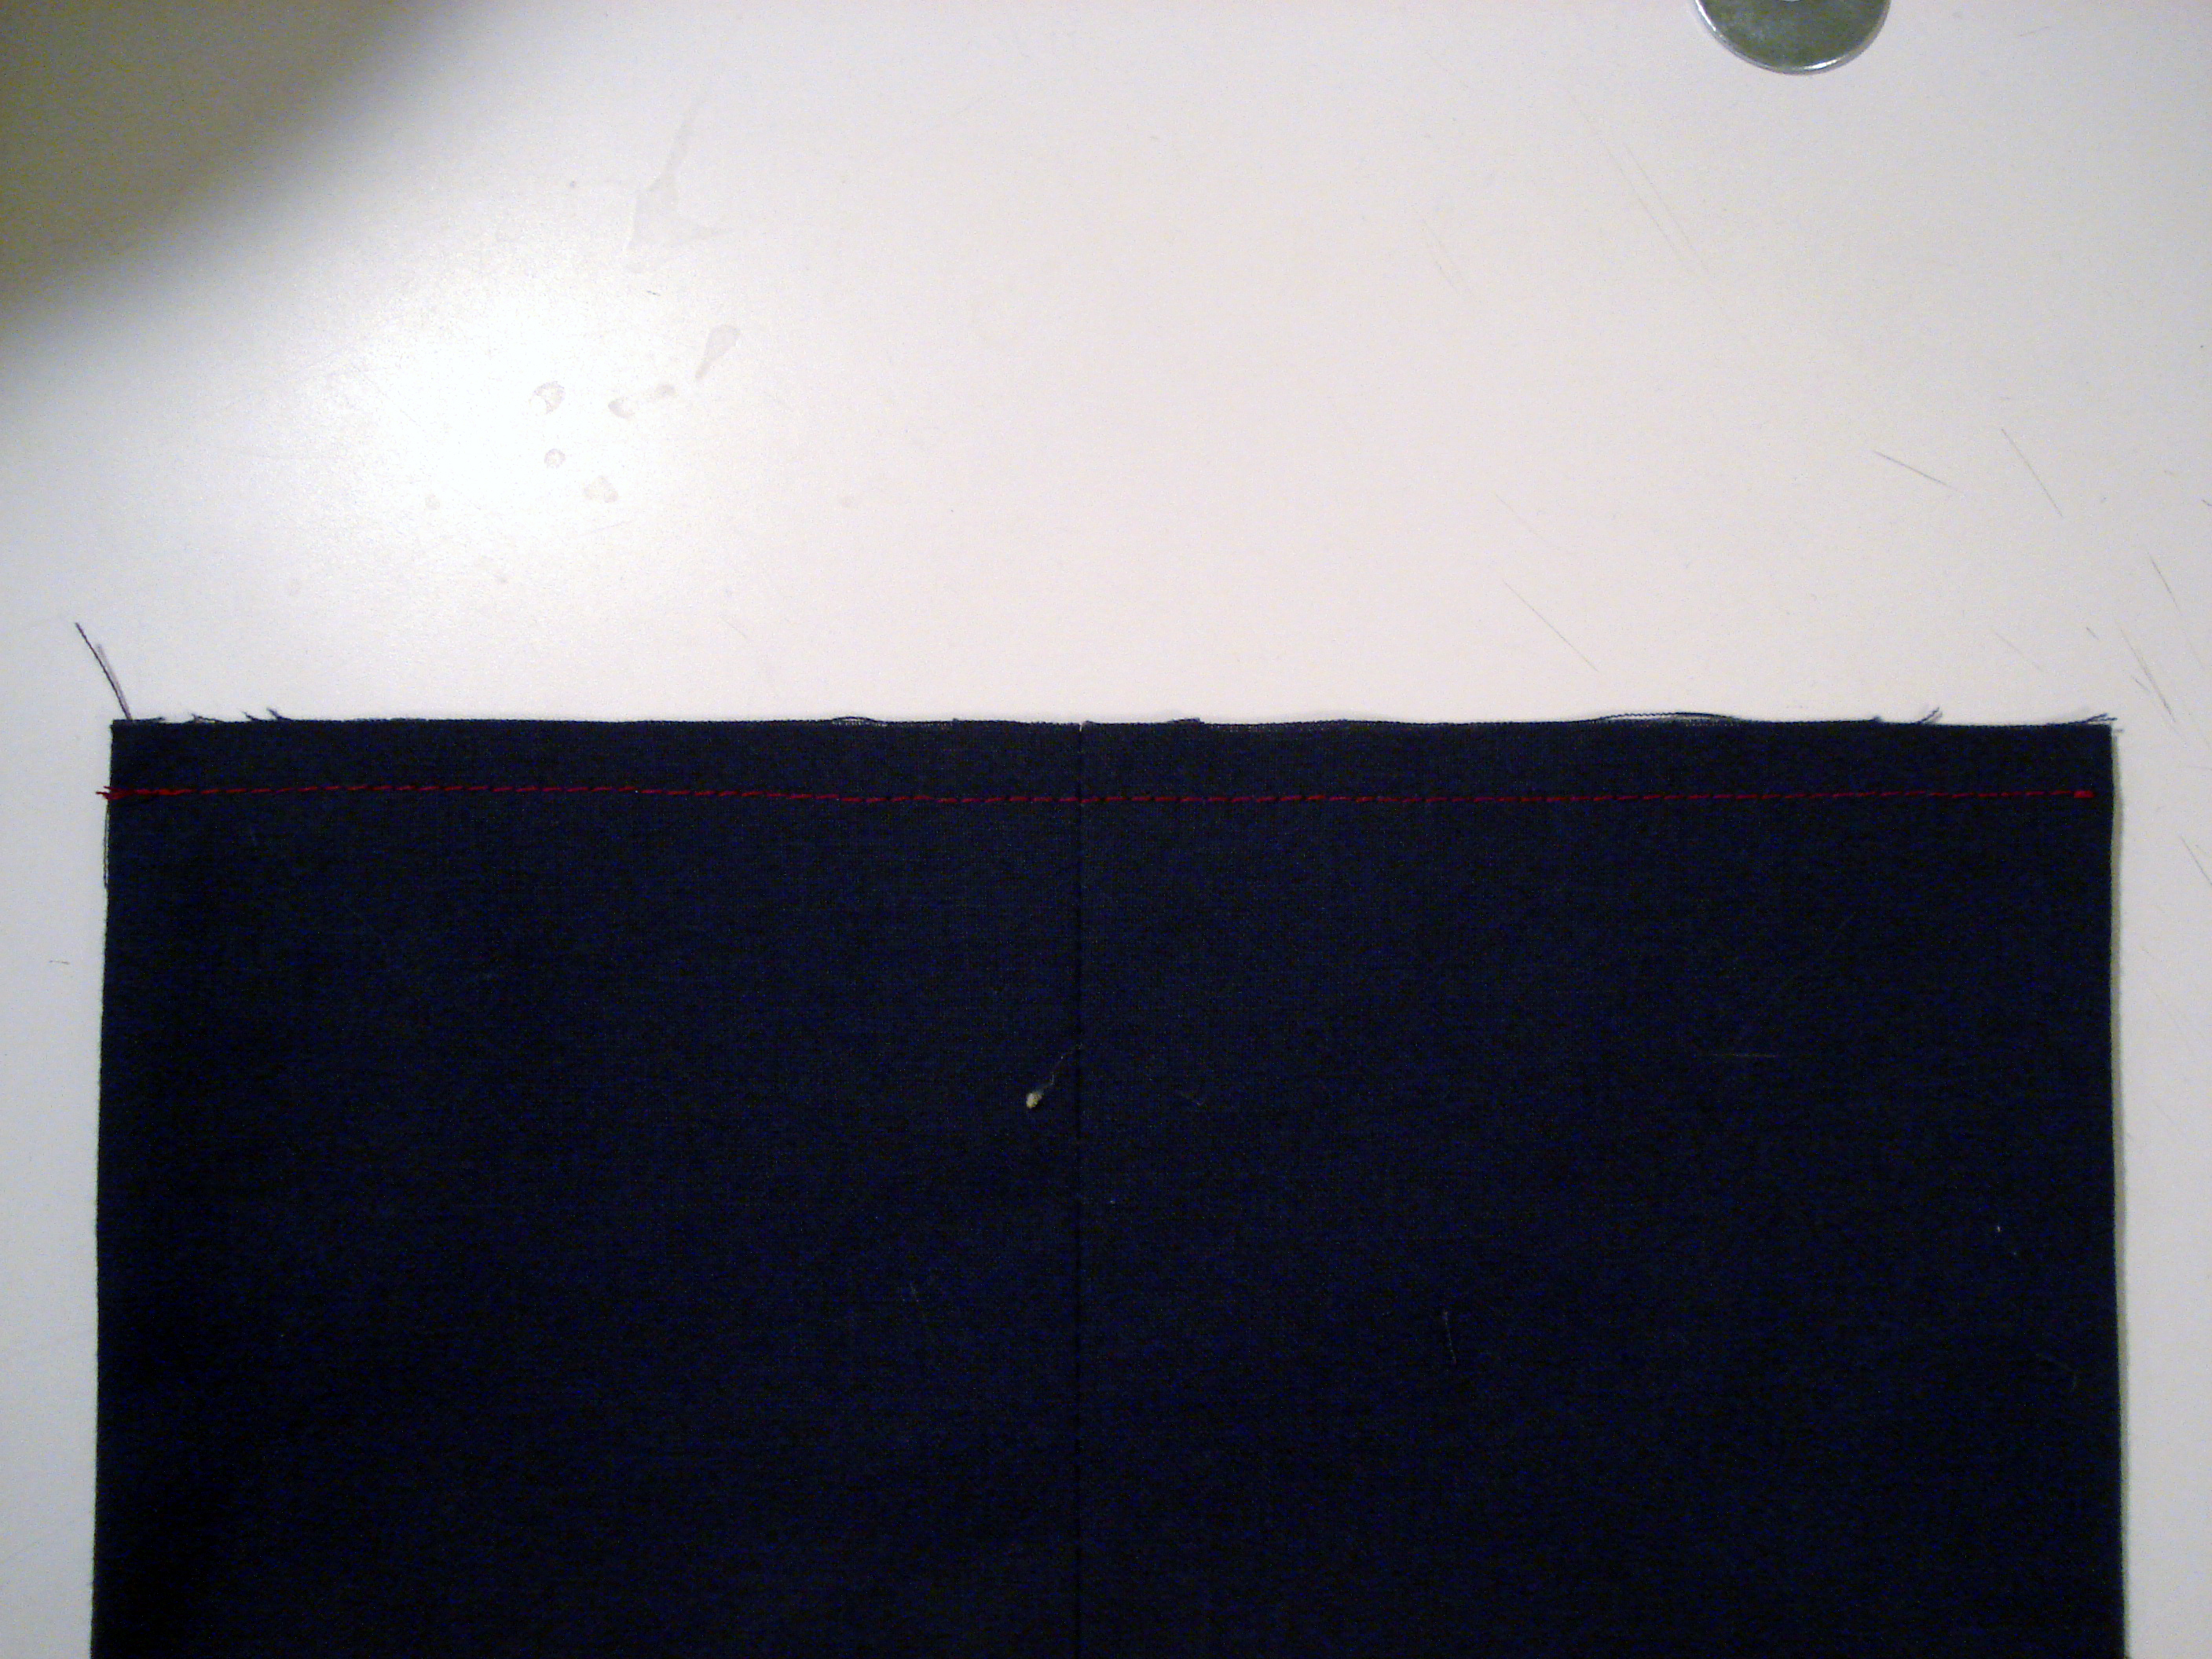
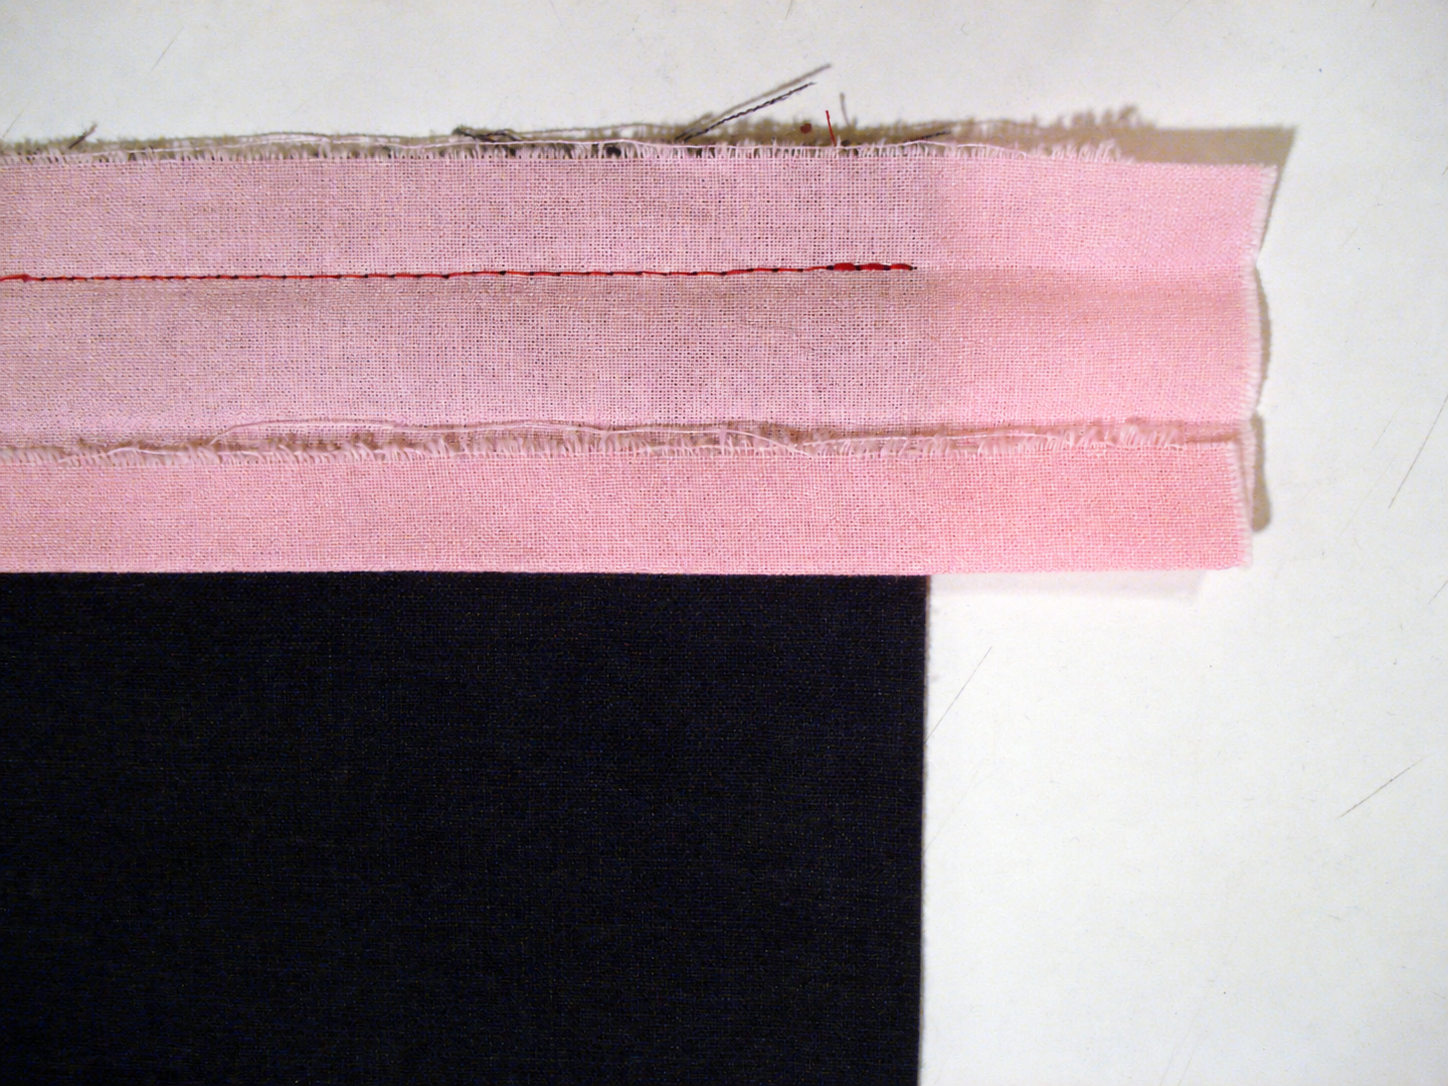
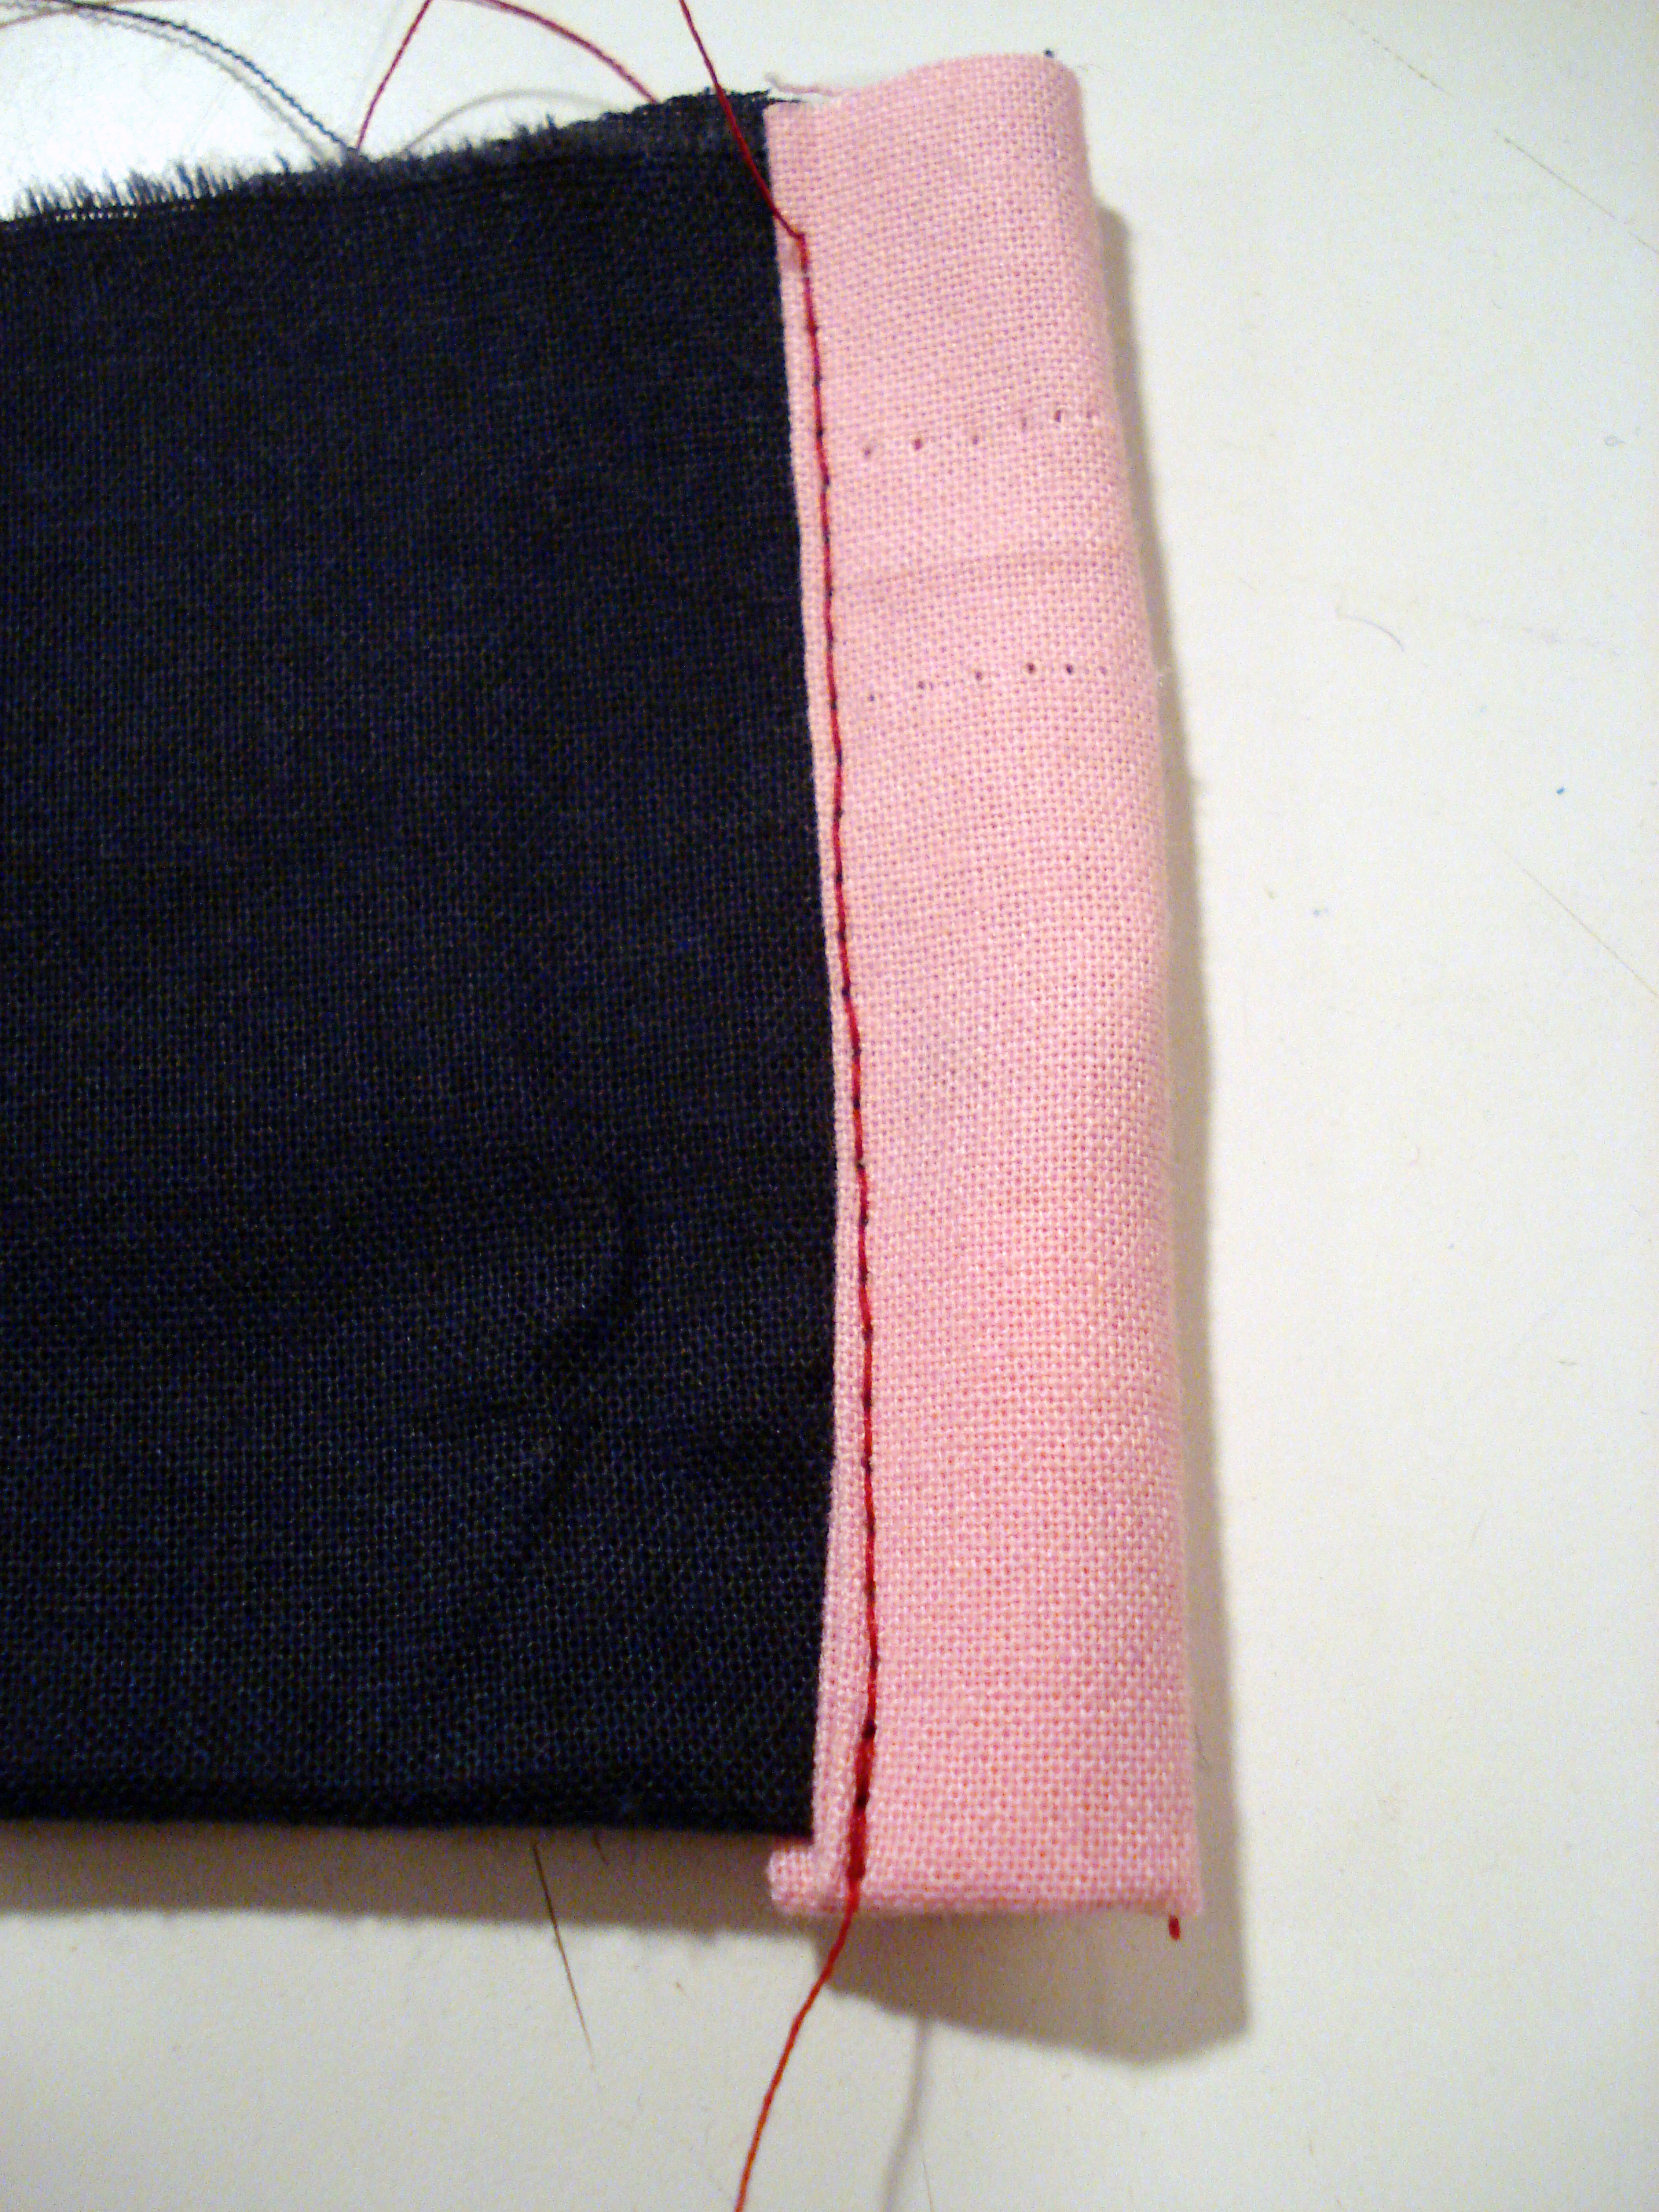
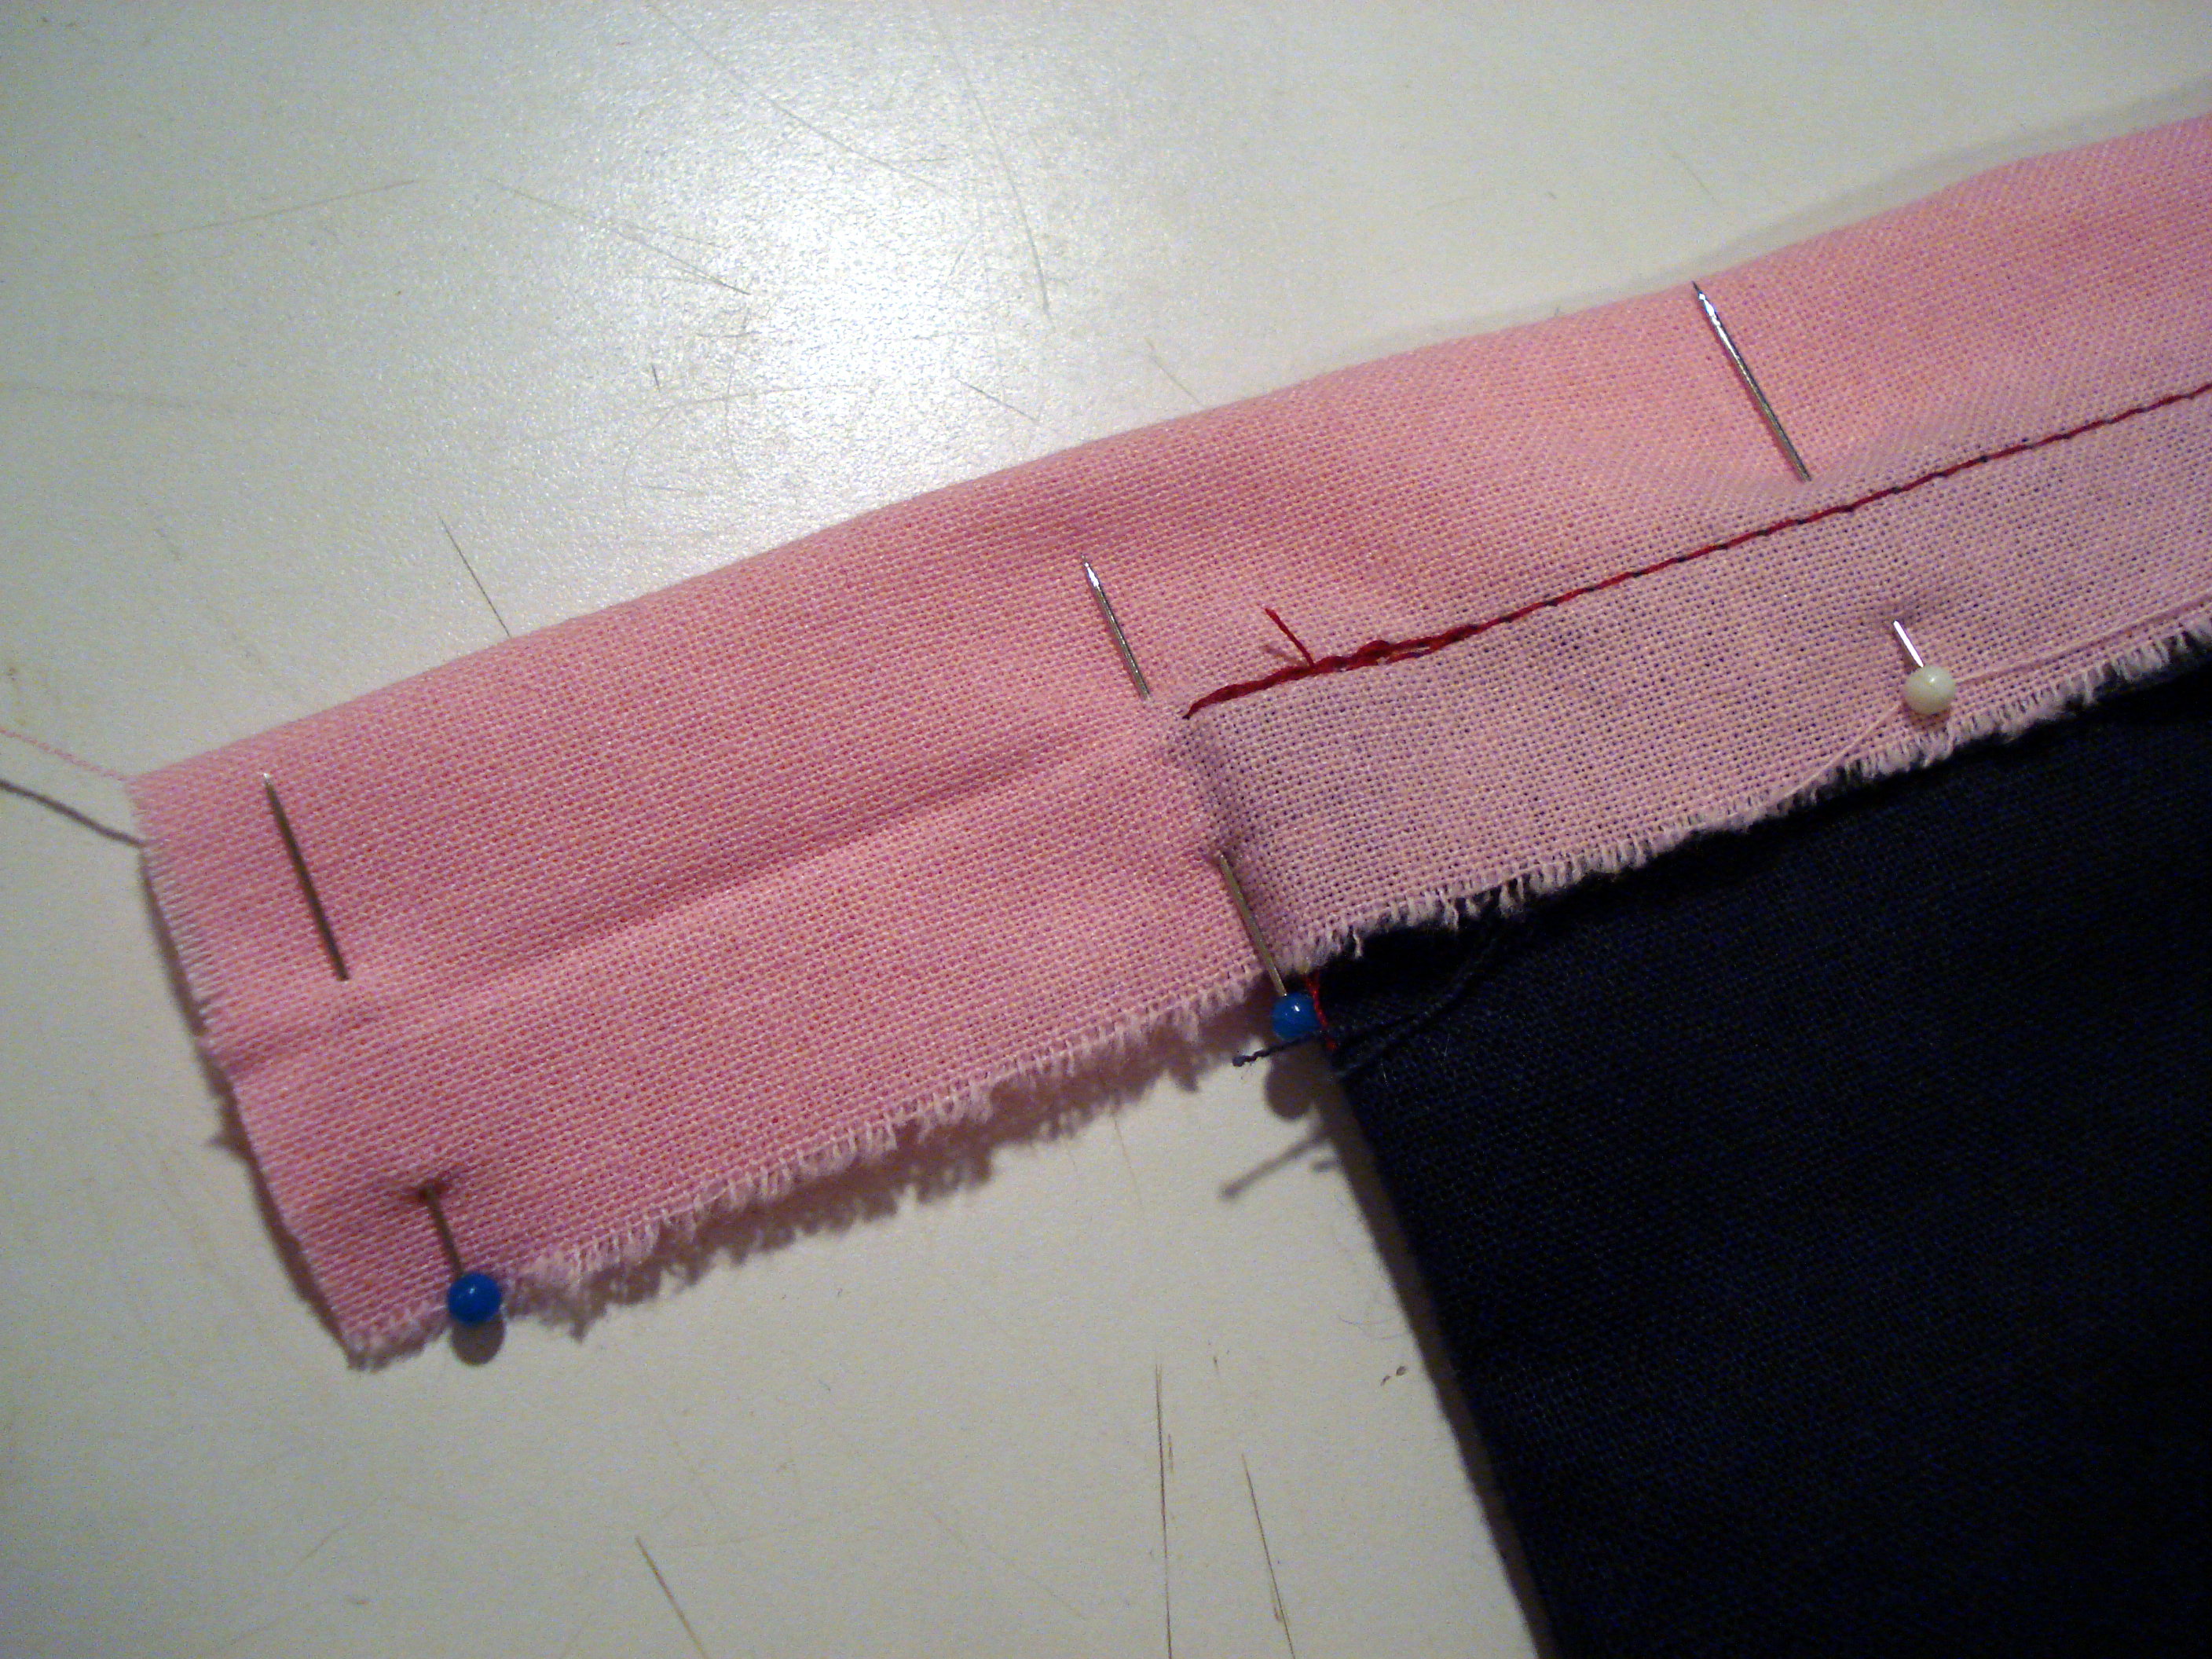
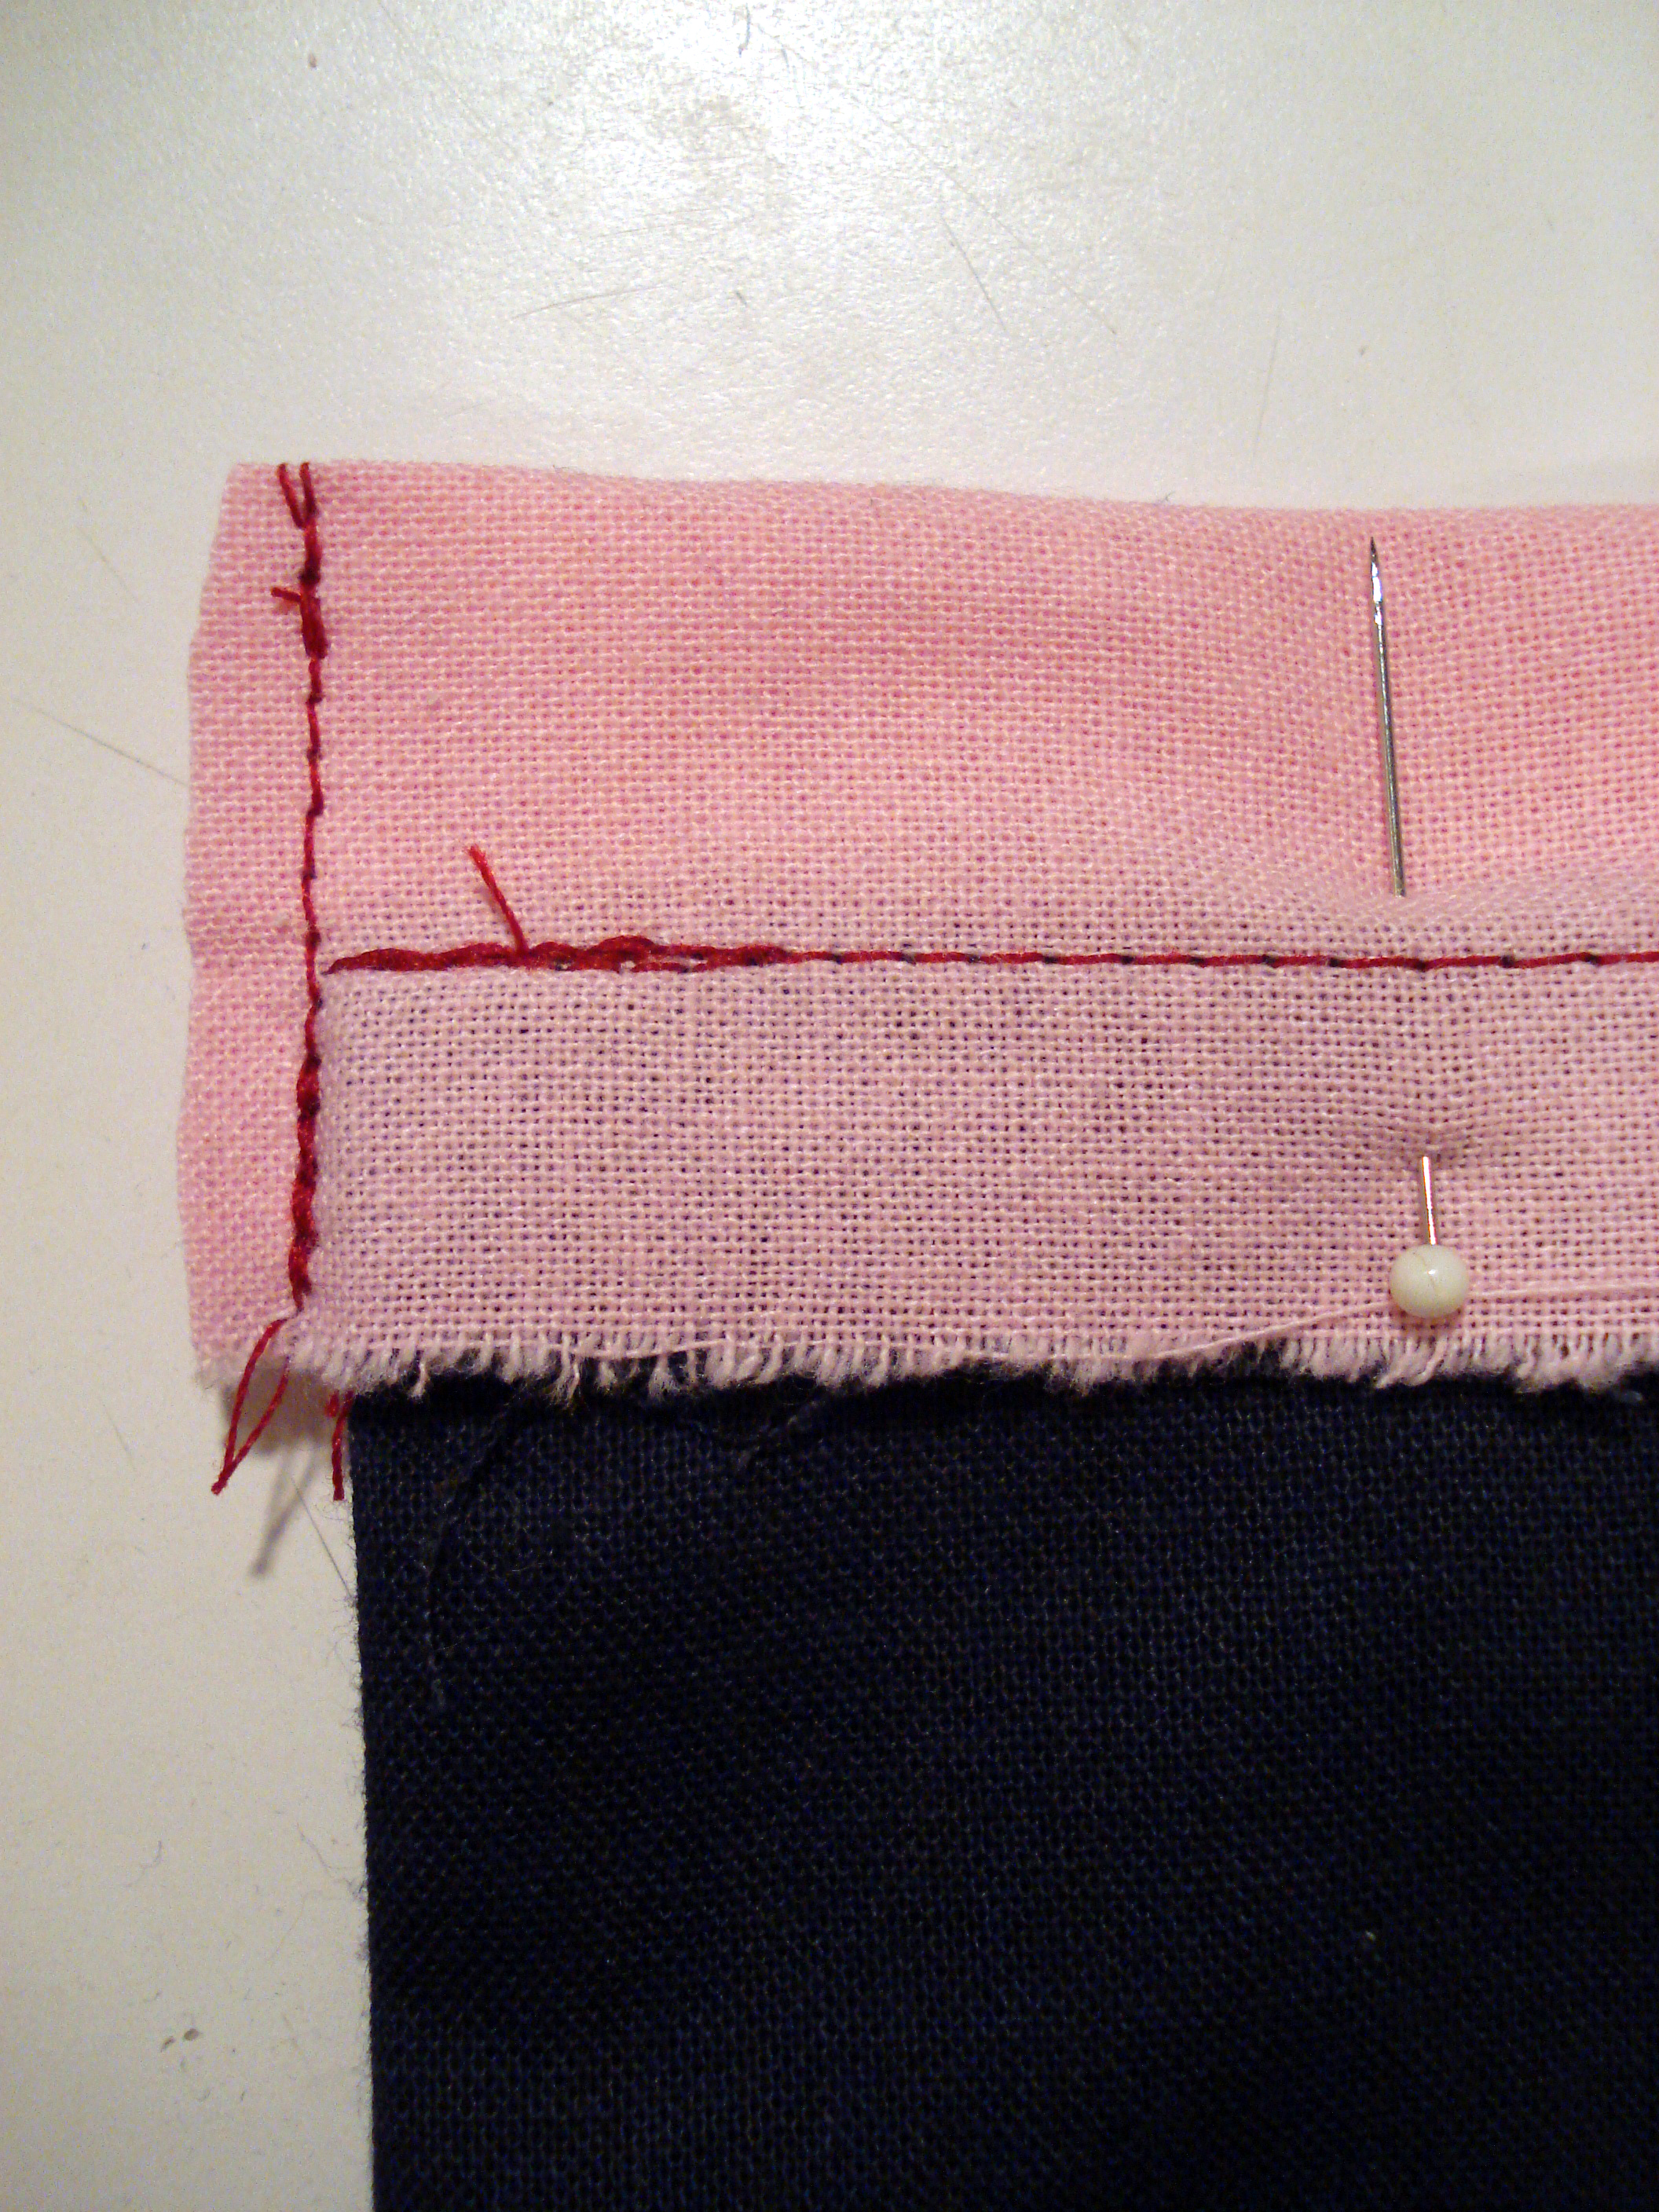
Lay your tape flat and stitch up to the exact edge of the garment fabric, stopping where the fabric ends. Backstitch.

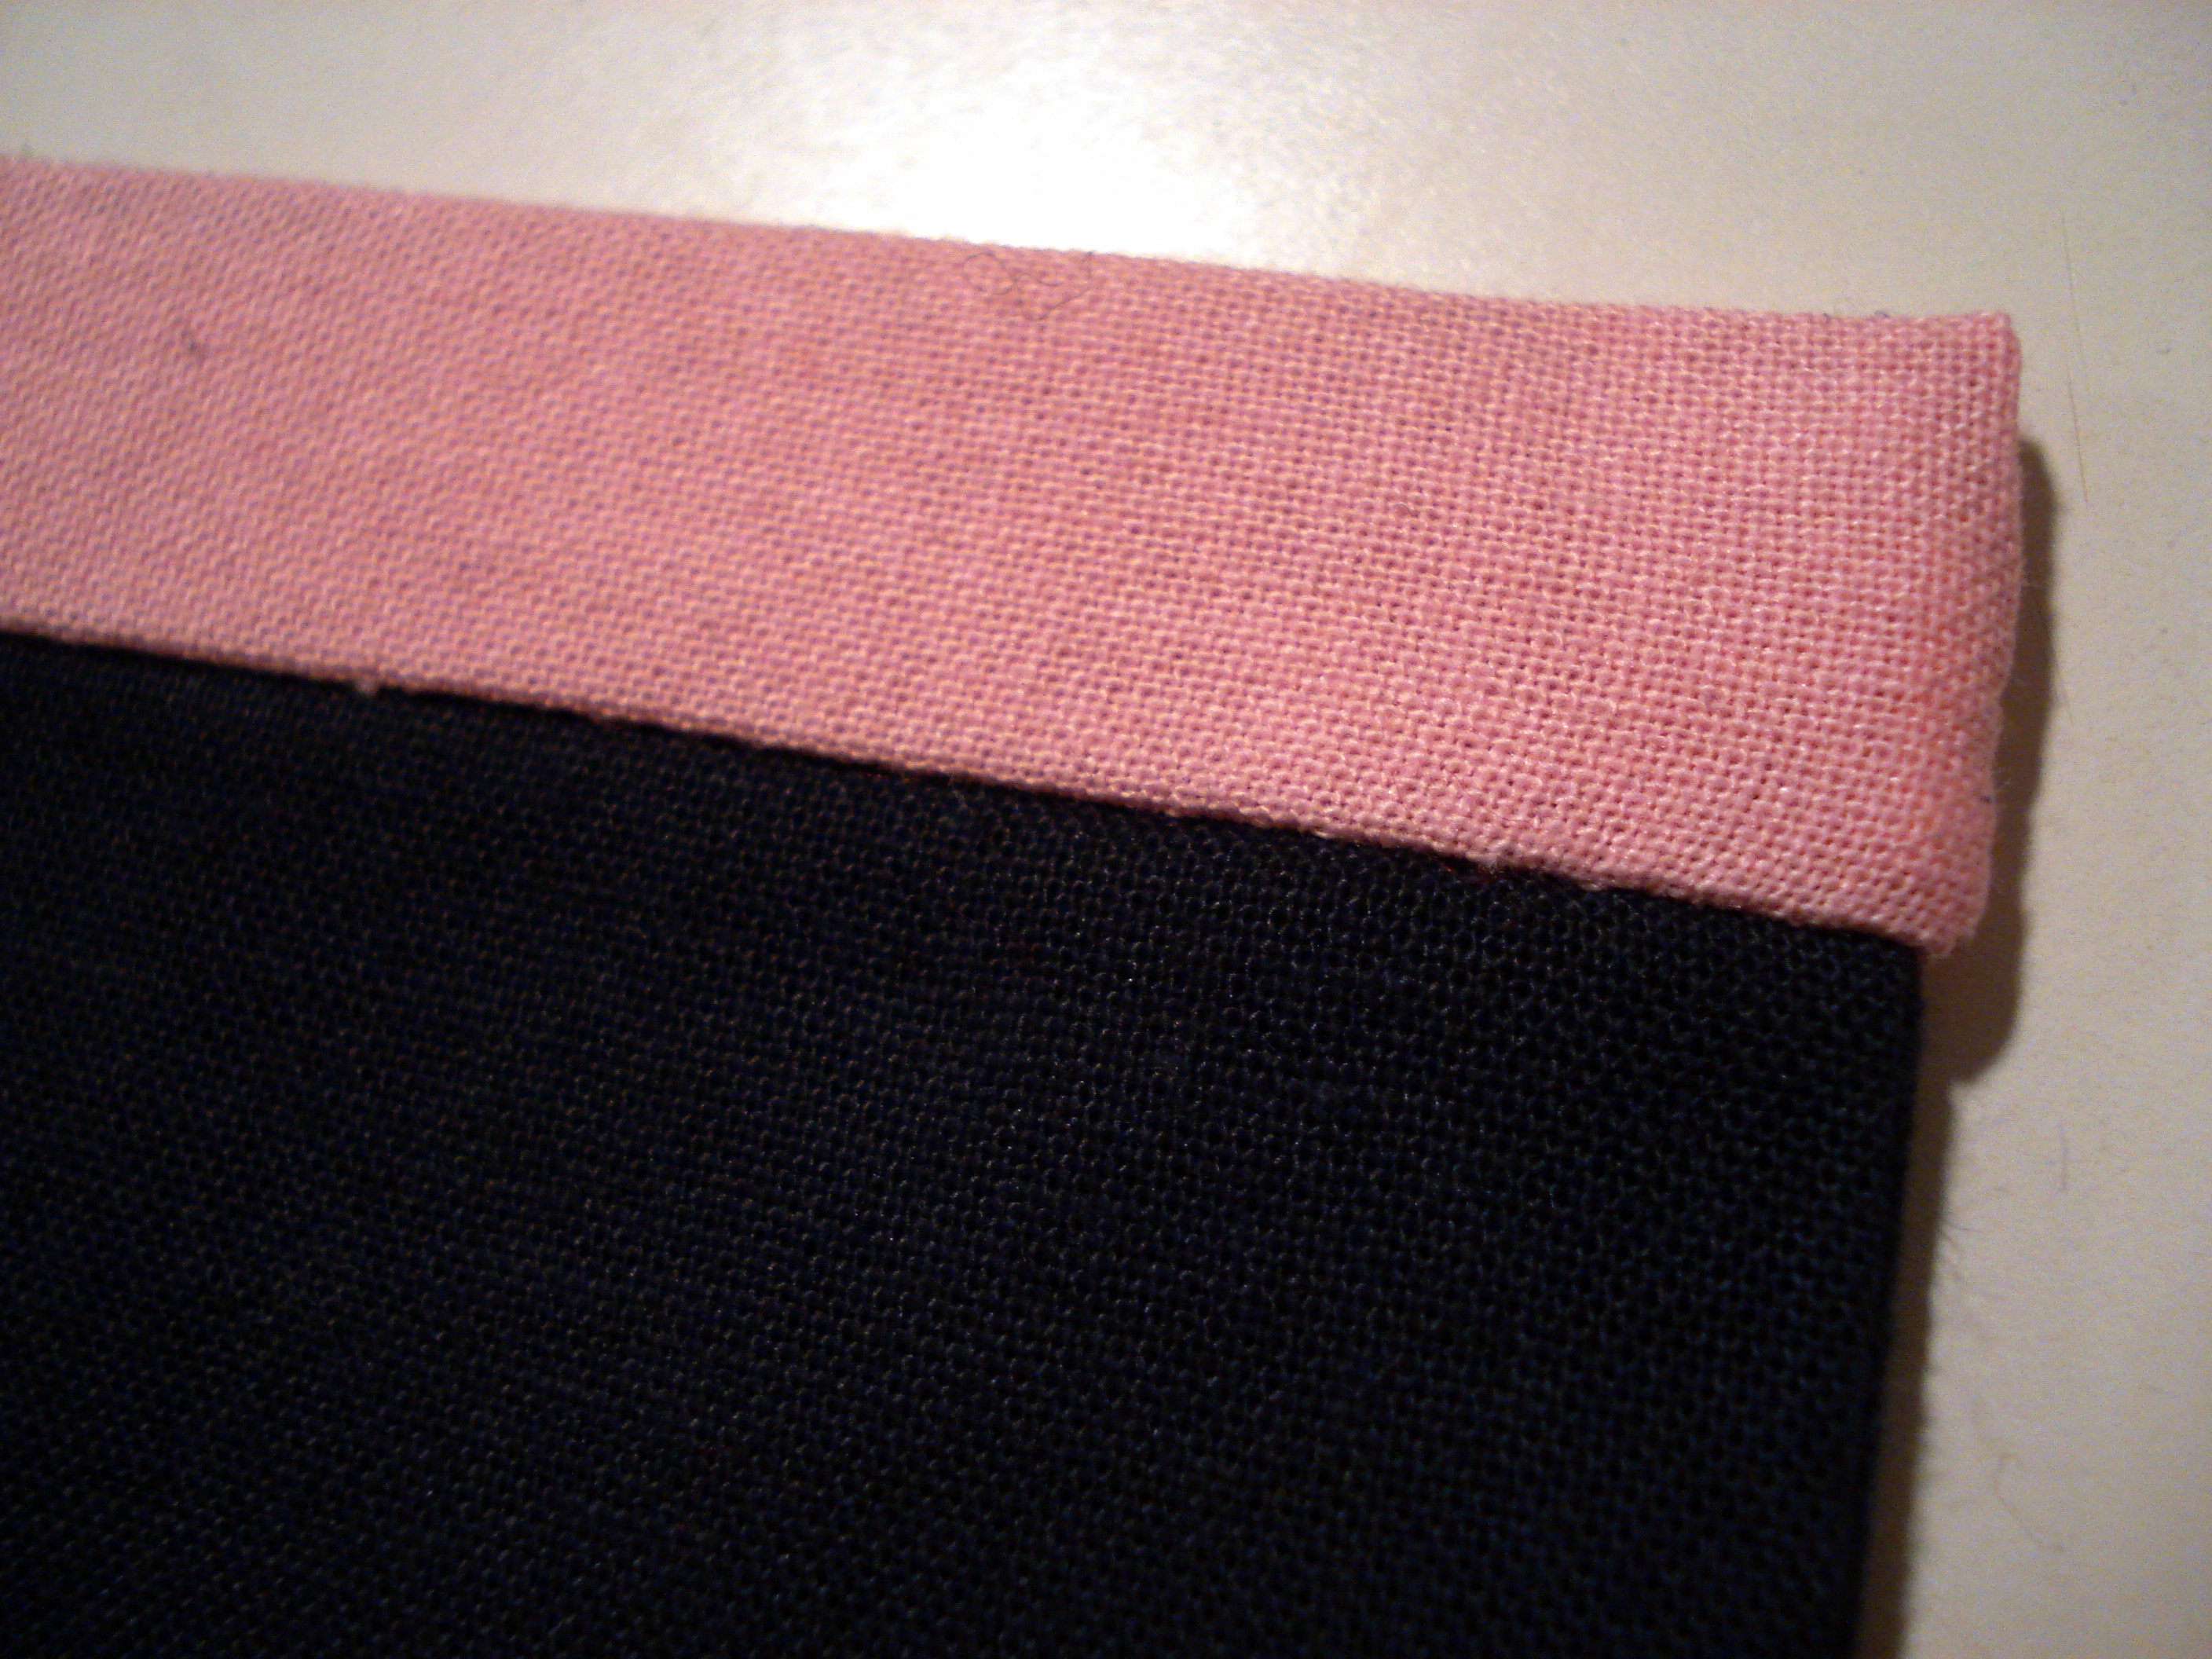
Now flip your tape over like so. It’ll look like this from the side.
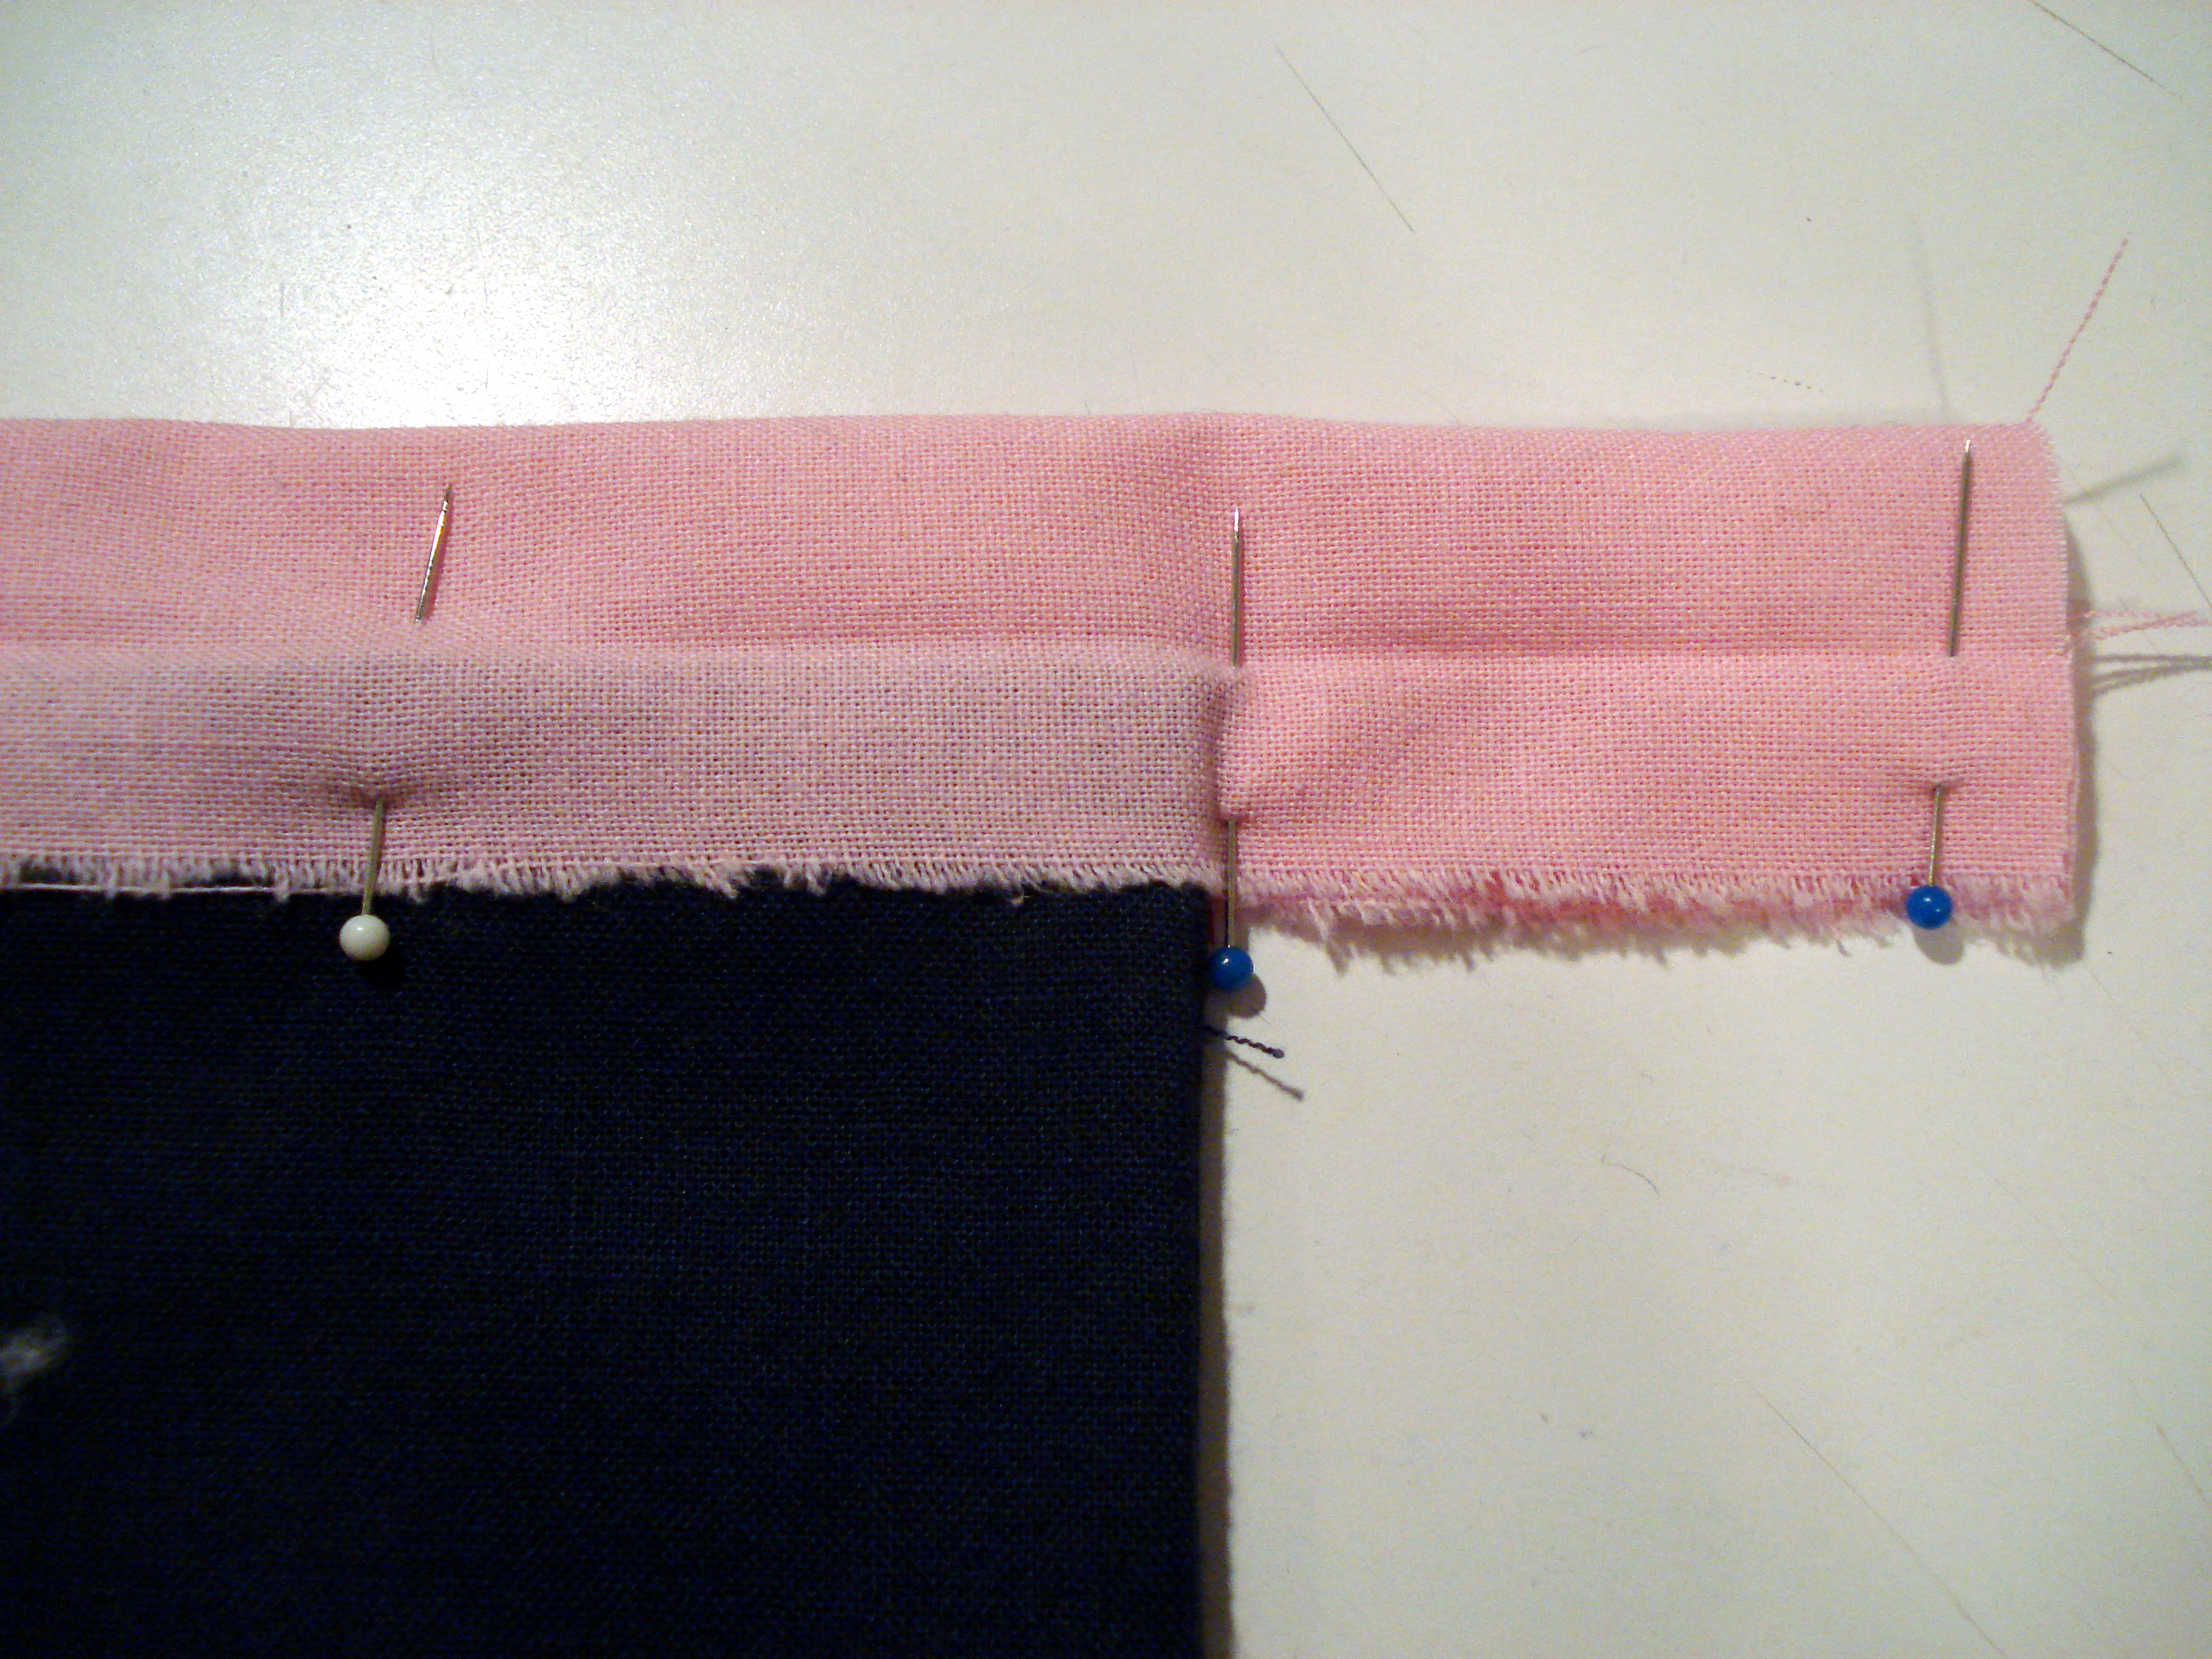
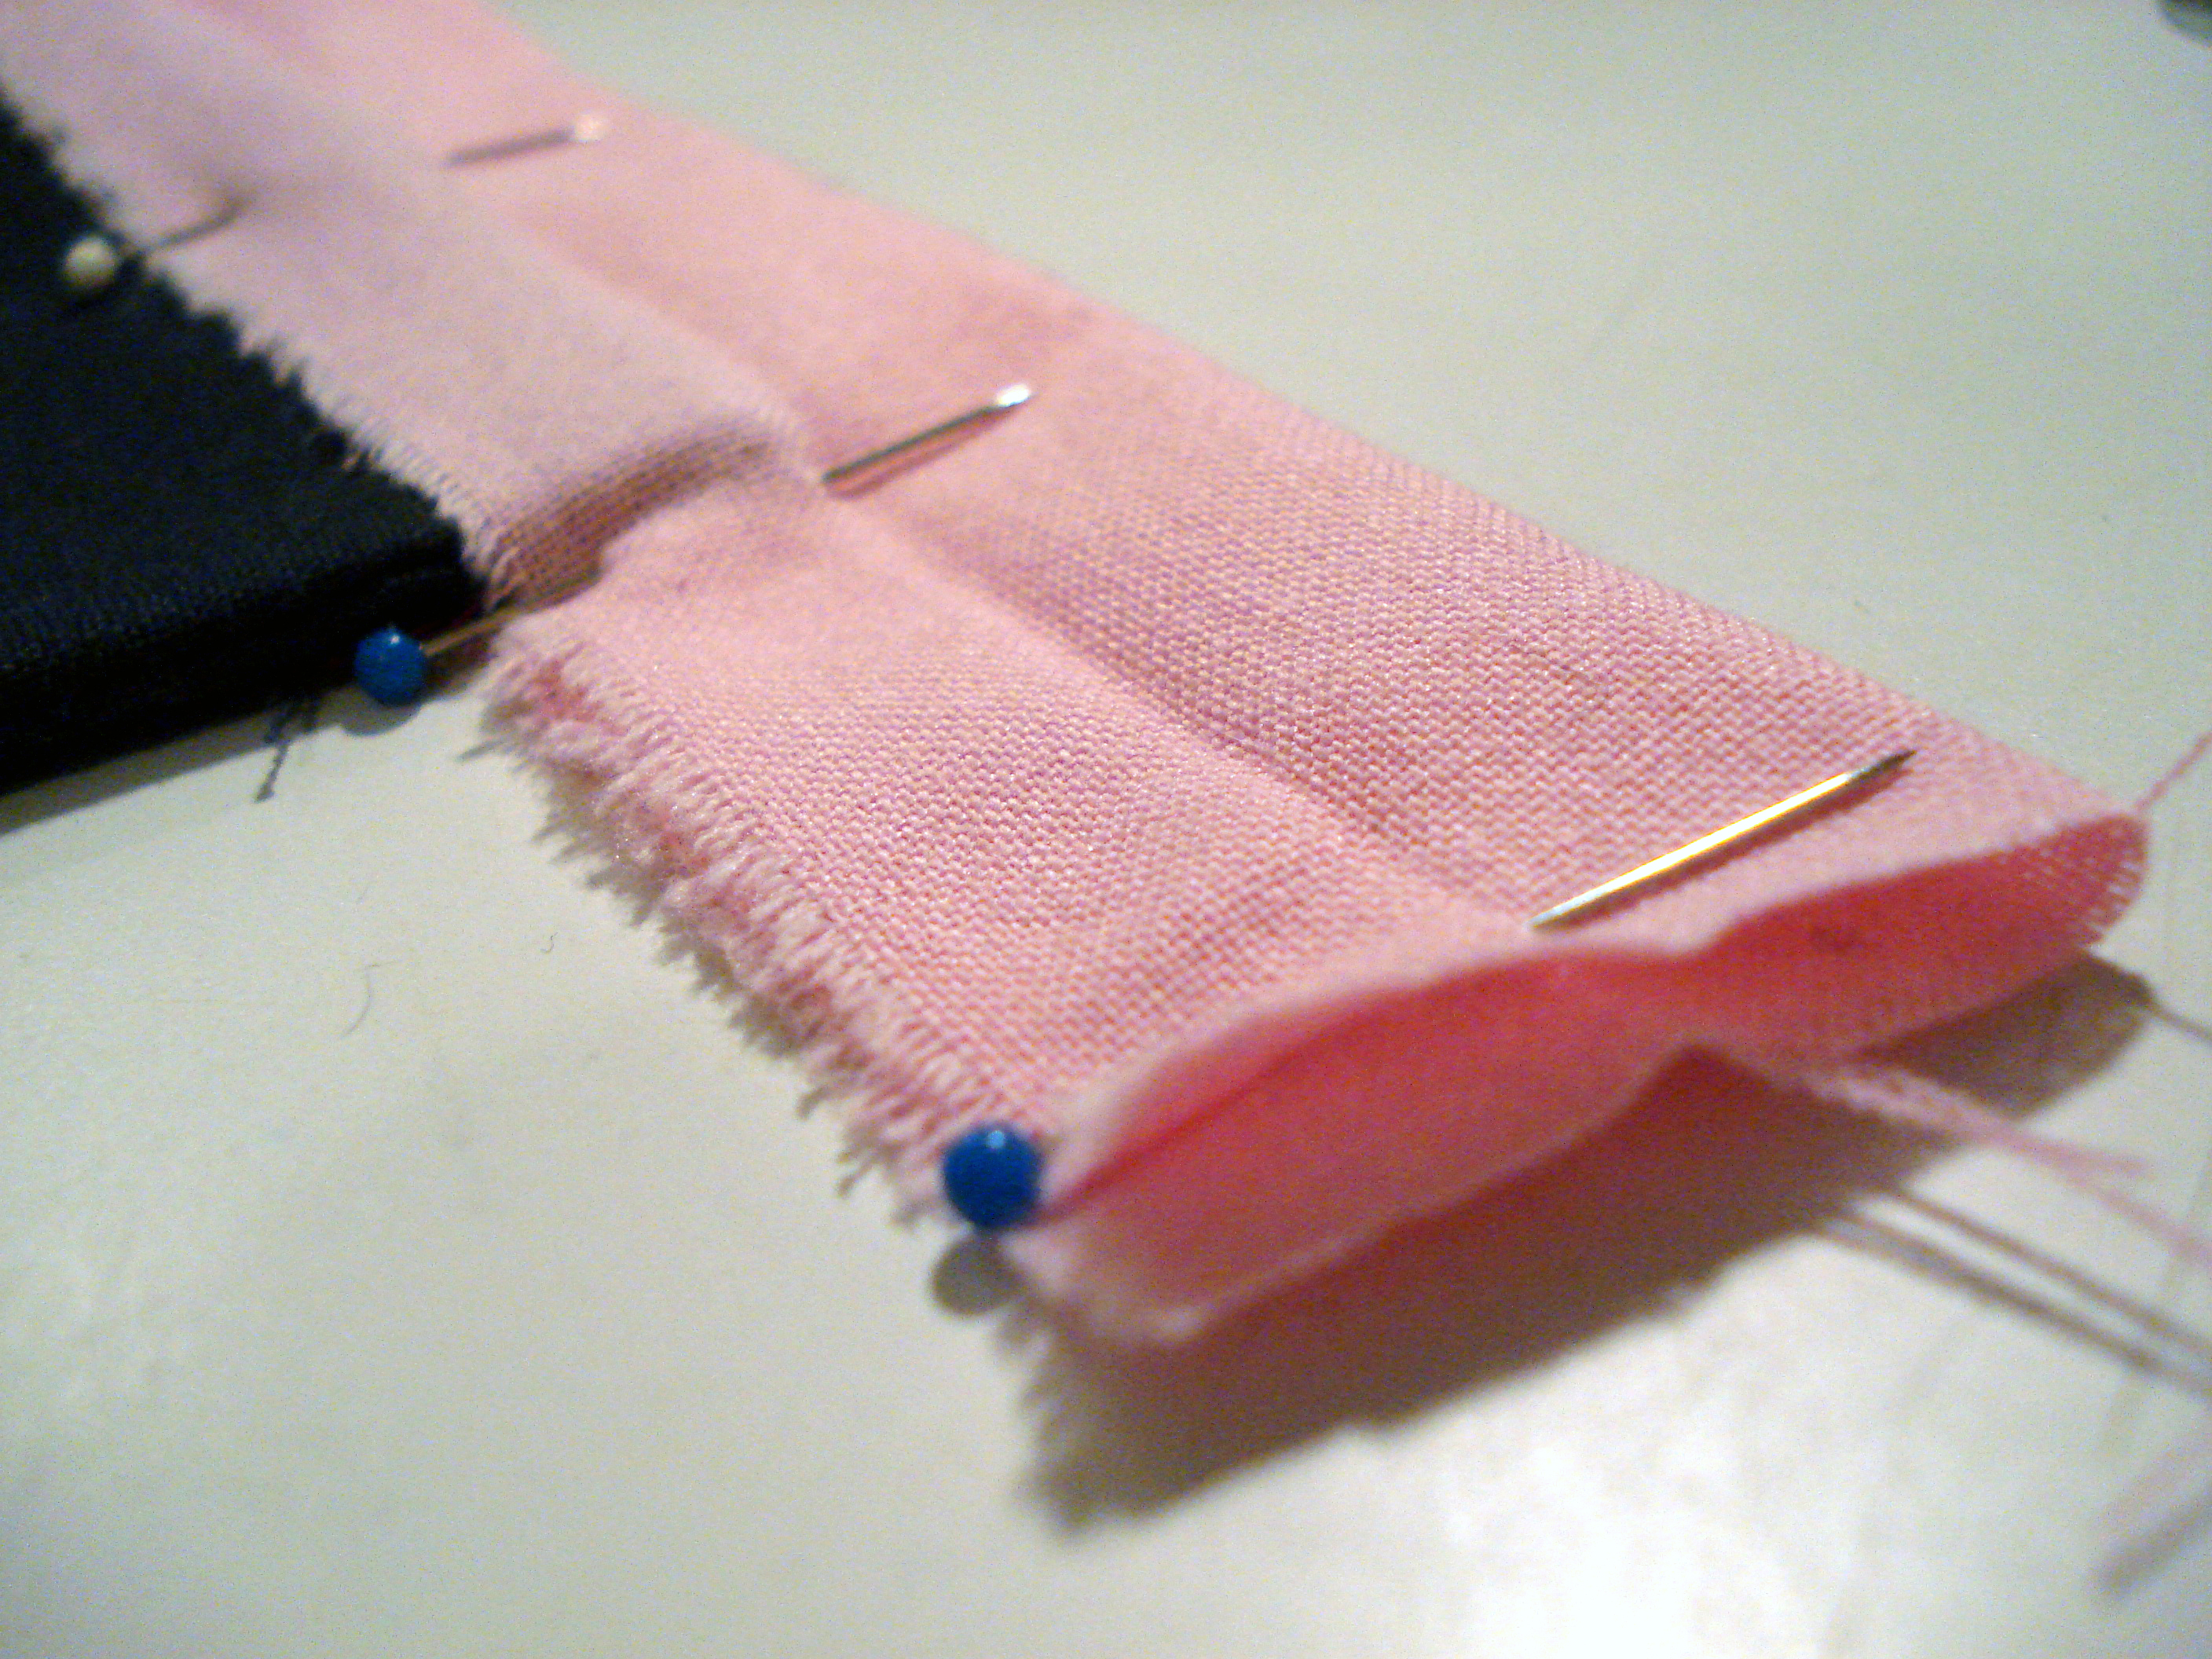
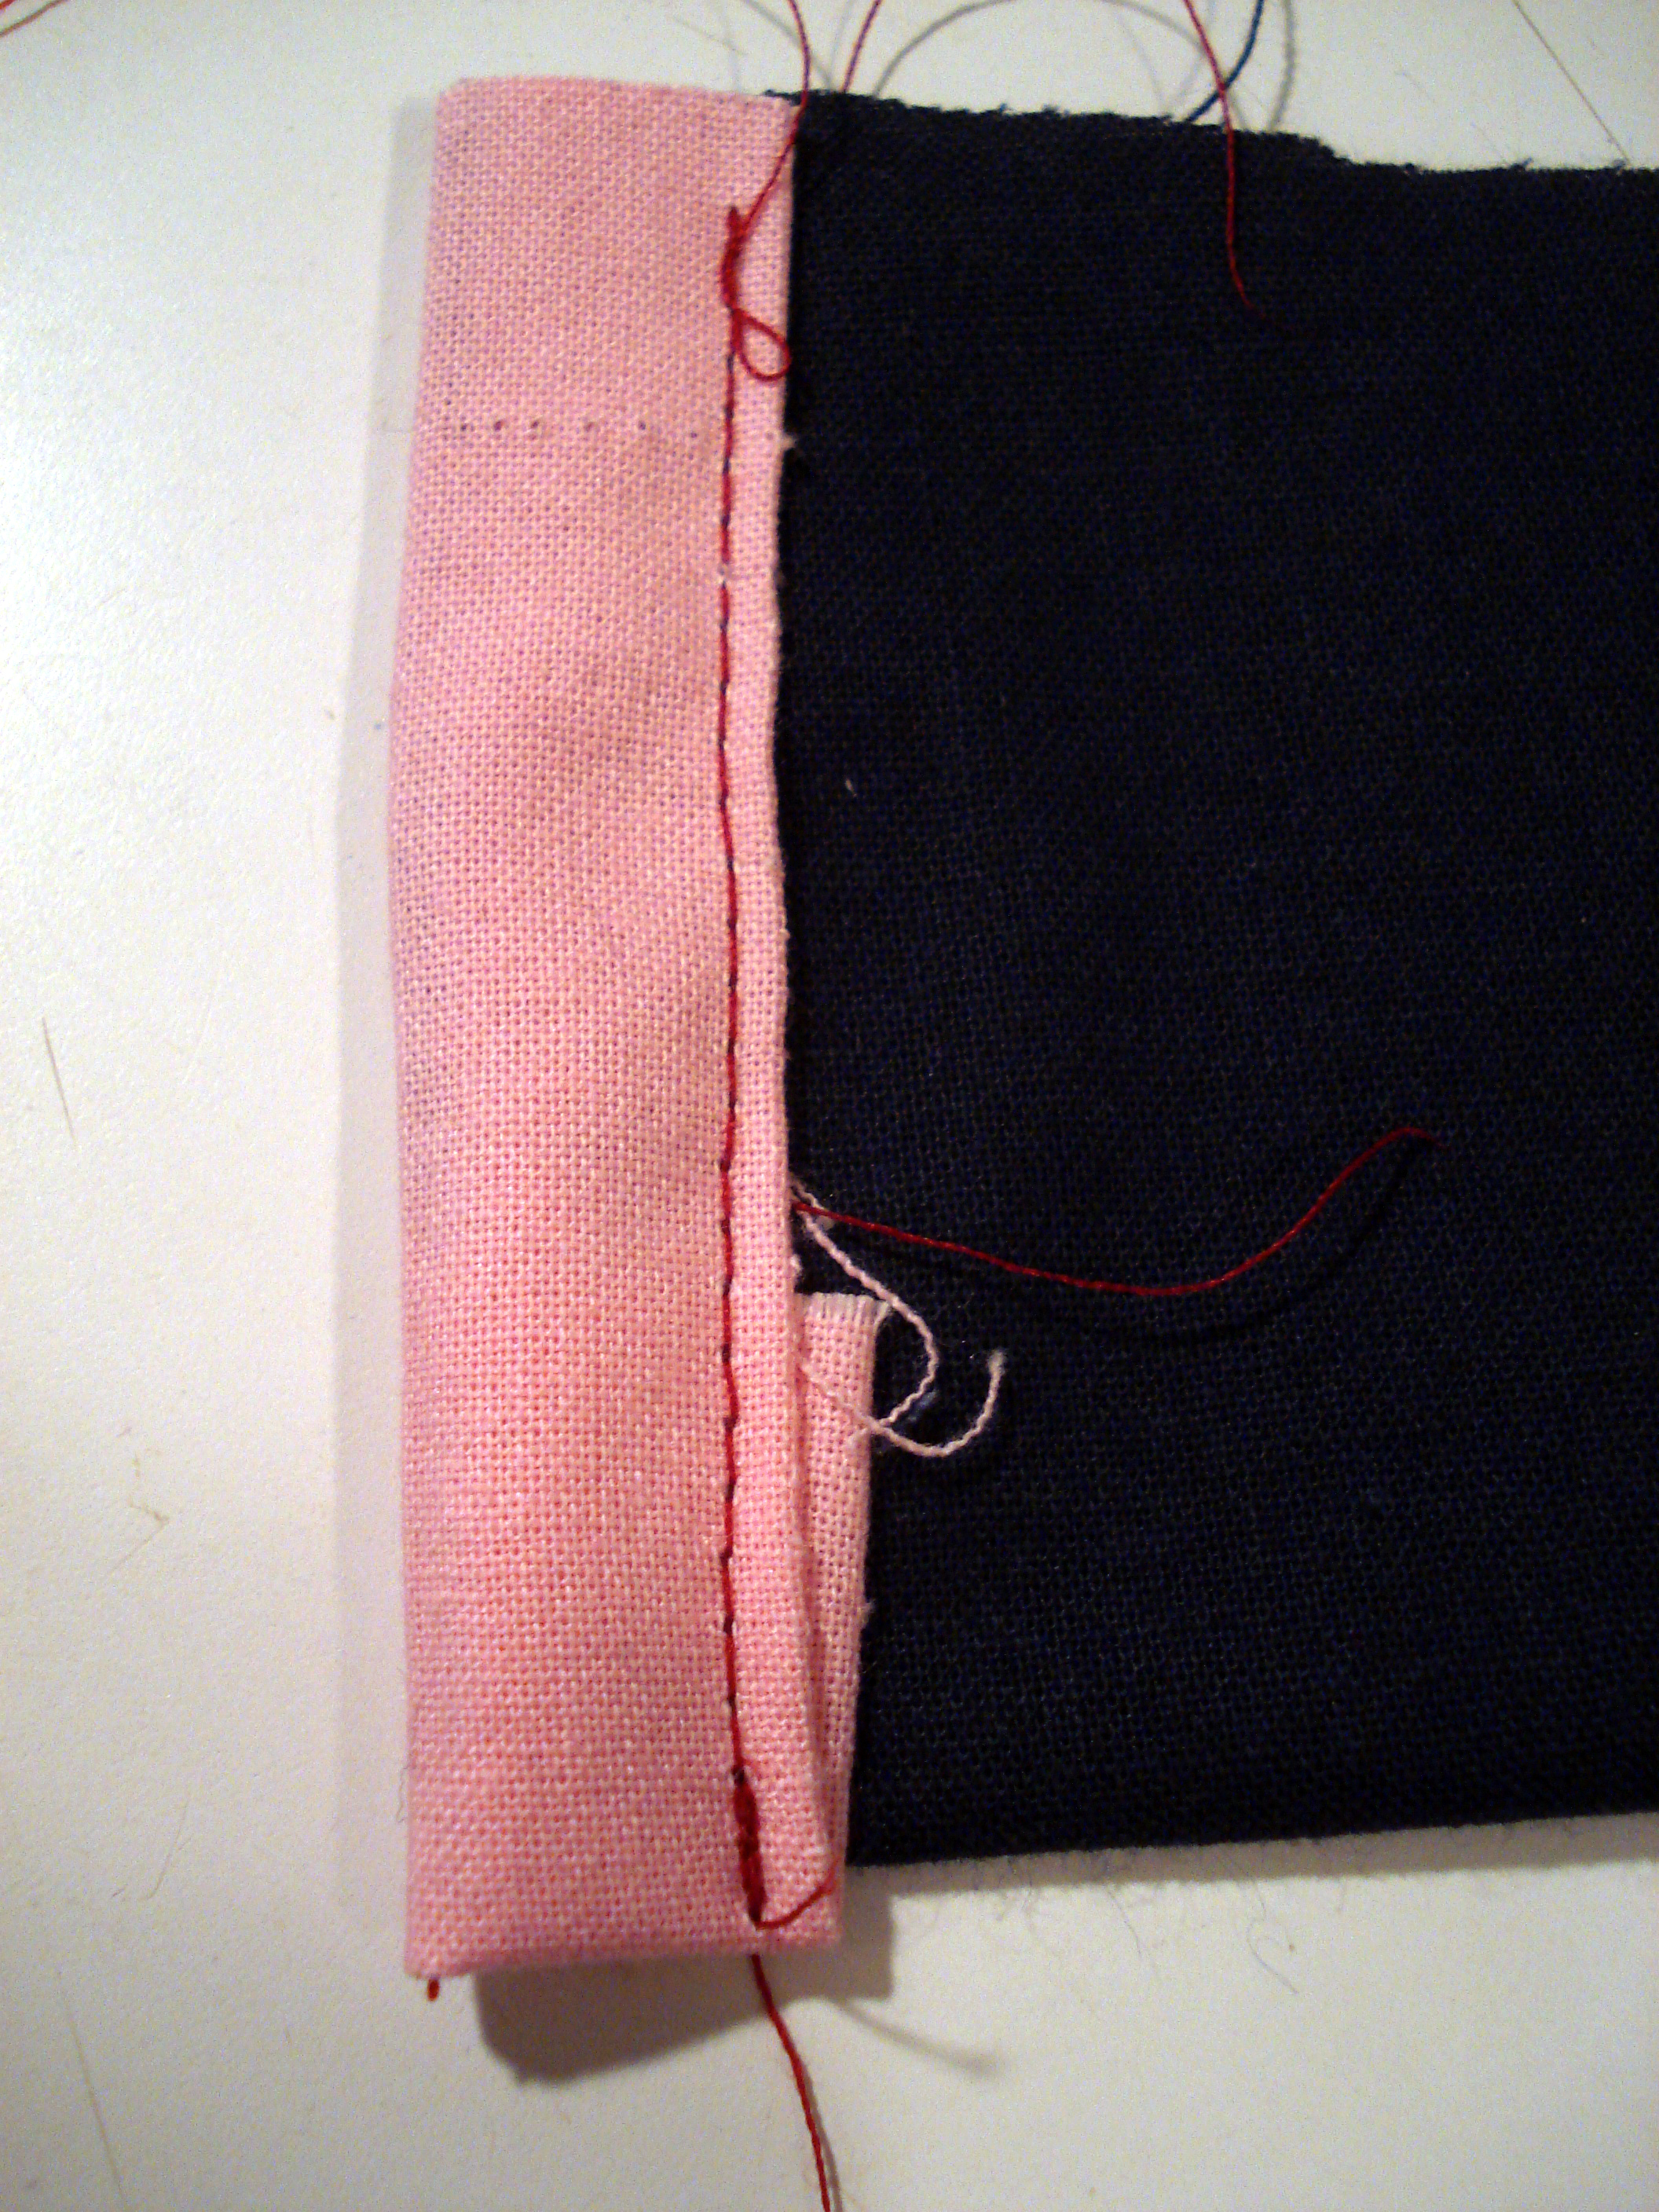
Take the top of your tape and fold it down over top of your fabric edge, forming a tasty fabric sandwich. Pin it in place.

Now flip the whole thing over. What’s the difference between the back and the front? Well, not much…except that you can see your previous line of stitching on this side, which will come in handy here in a second.
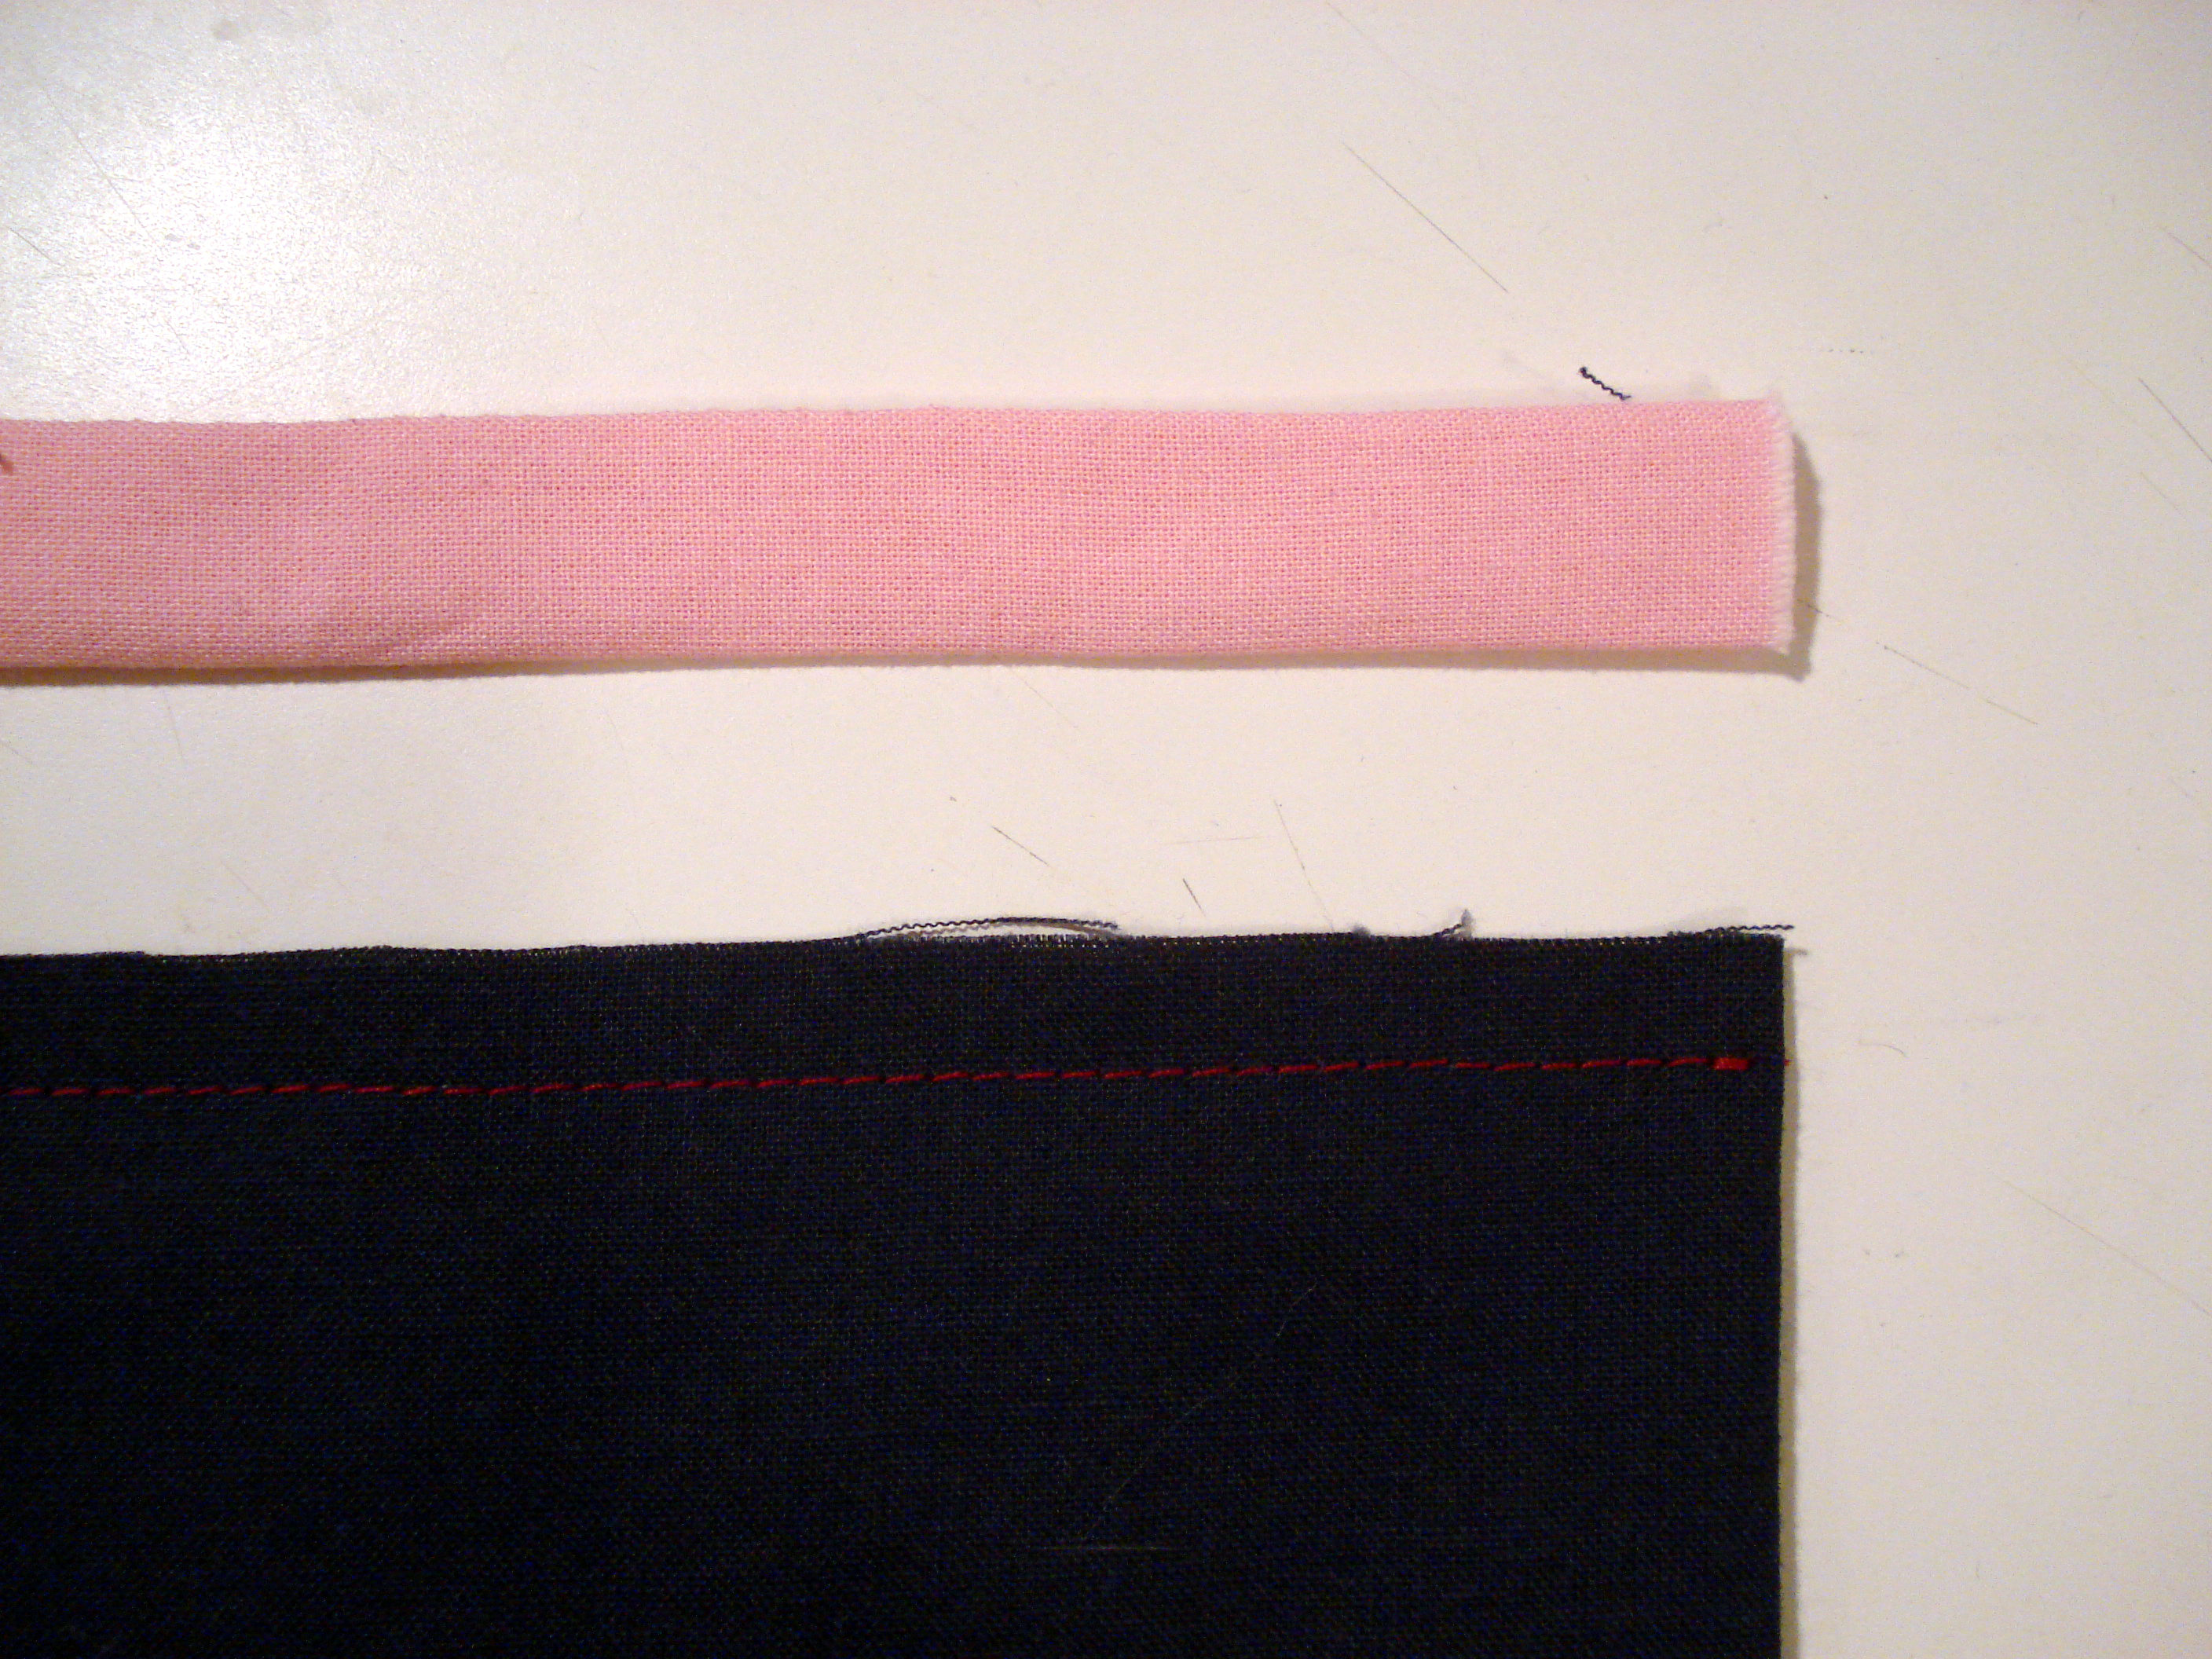
Stitch across the end of the tape, making sure not to catch your garment fabric in your stitching.
The closer you can get to the previous line of stitching, the better. If your fabric is very thick, using a zipper foot will help you get nice and close to the edge. In more extreme cases, you can use a hammer to flatten the fabric fibers before stitching.
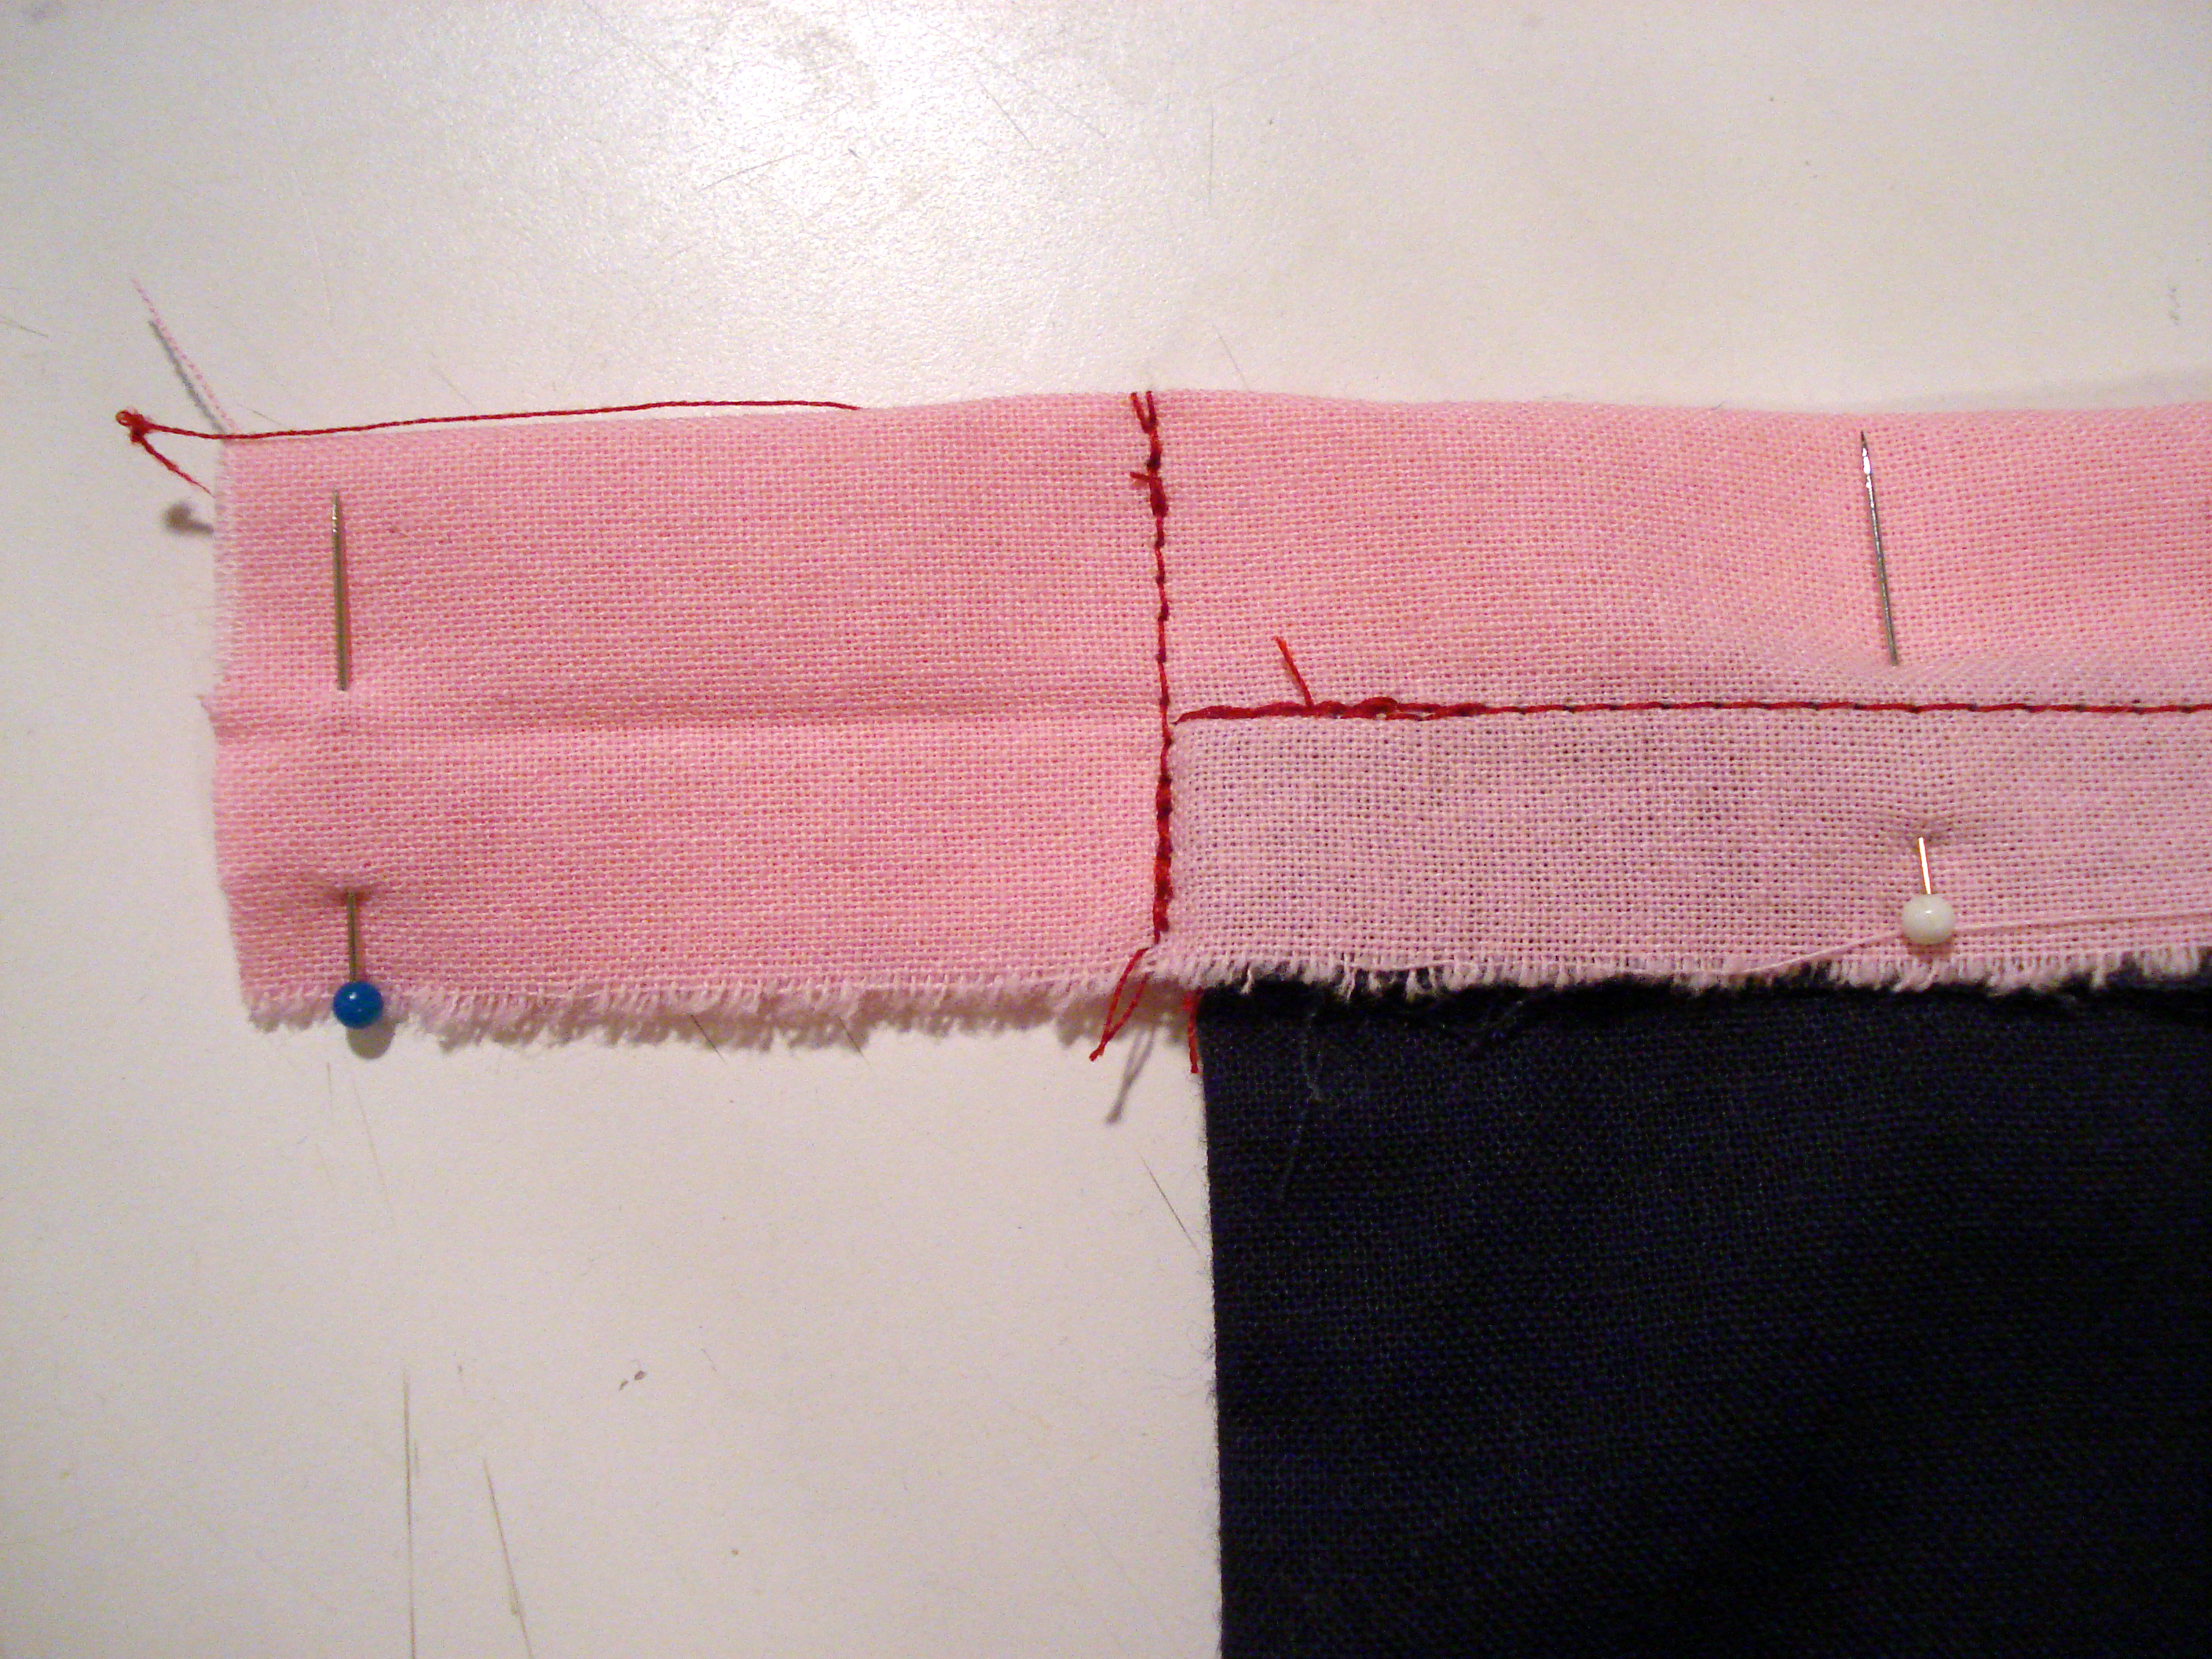
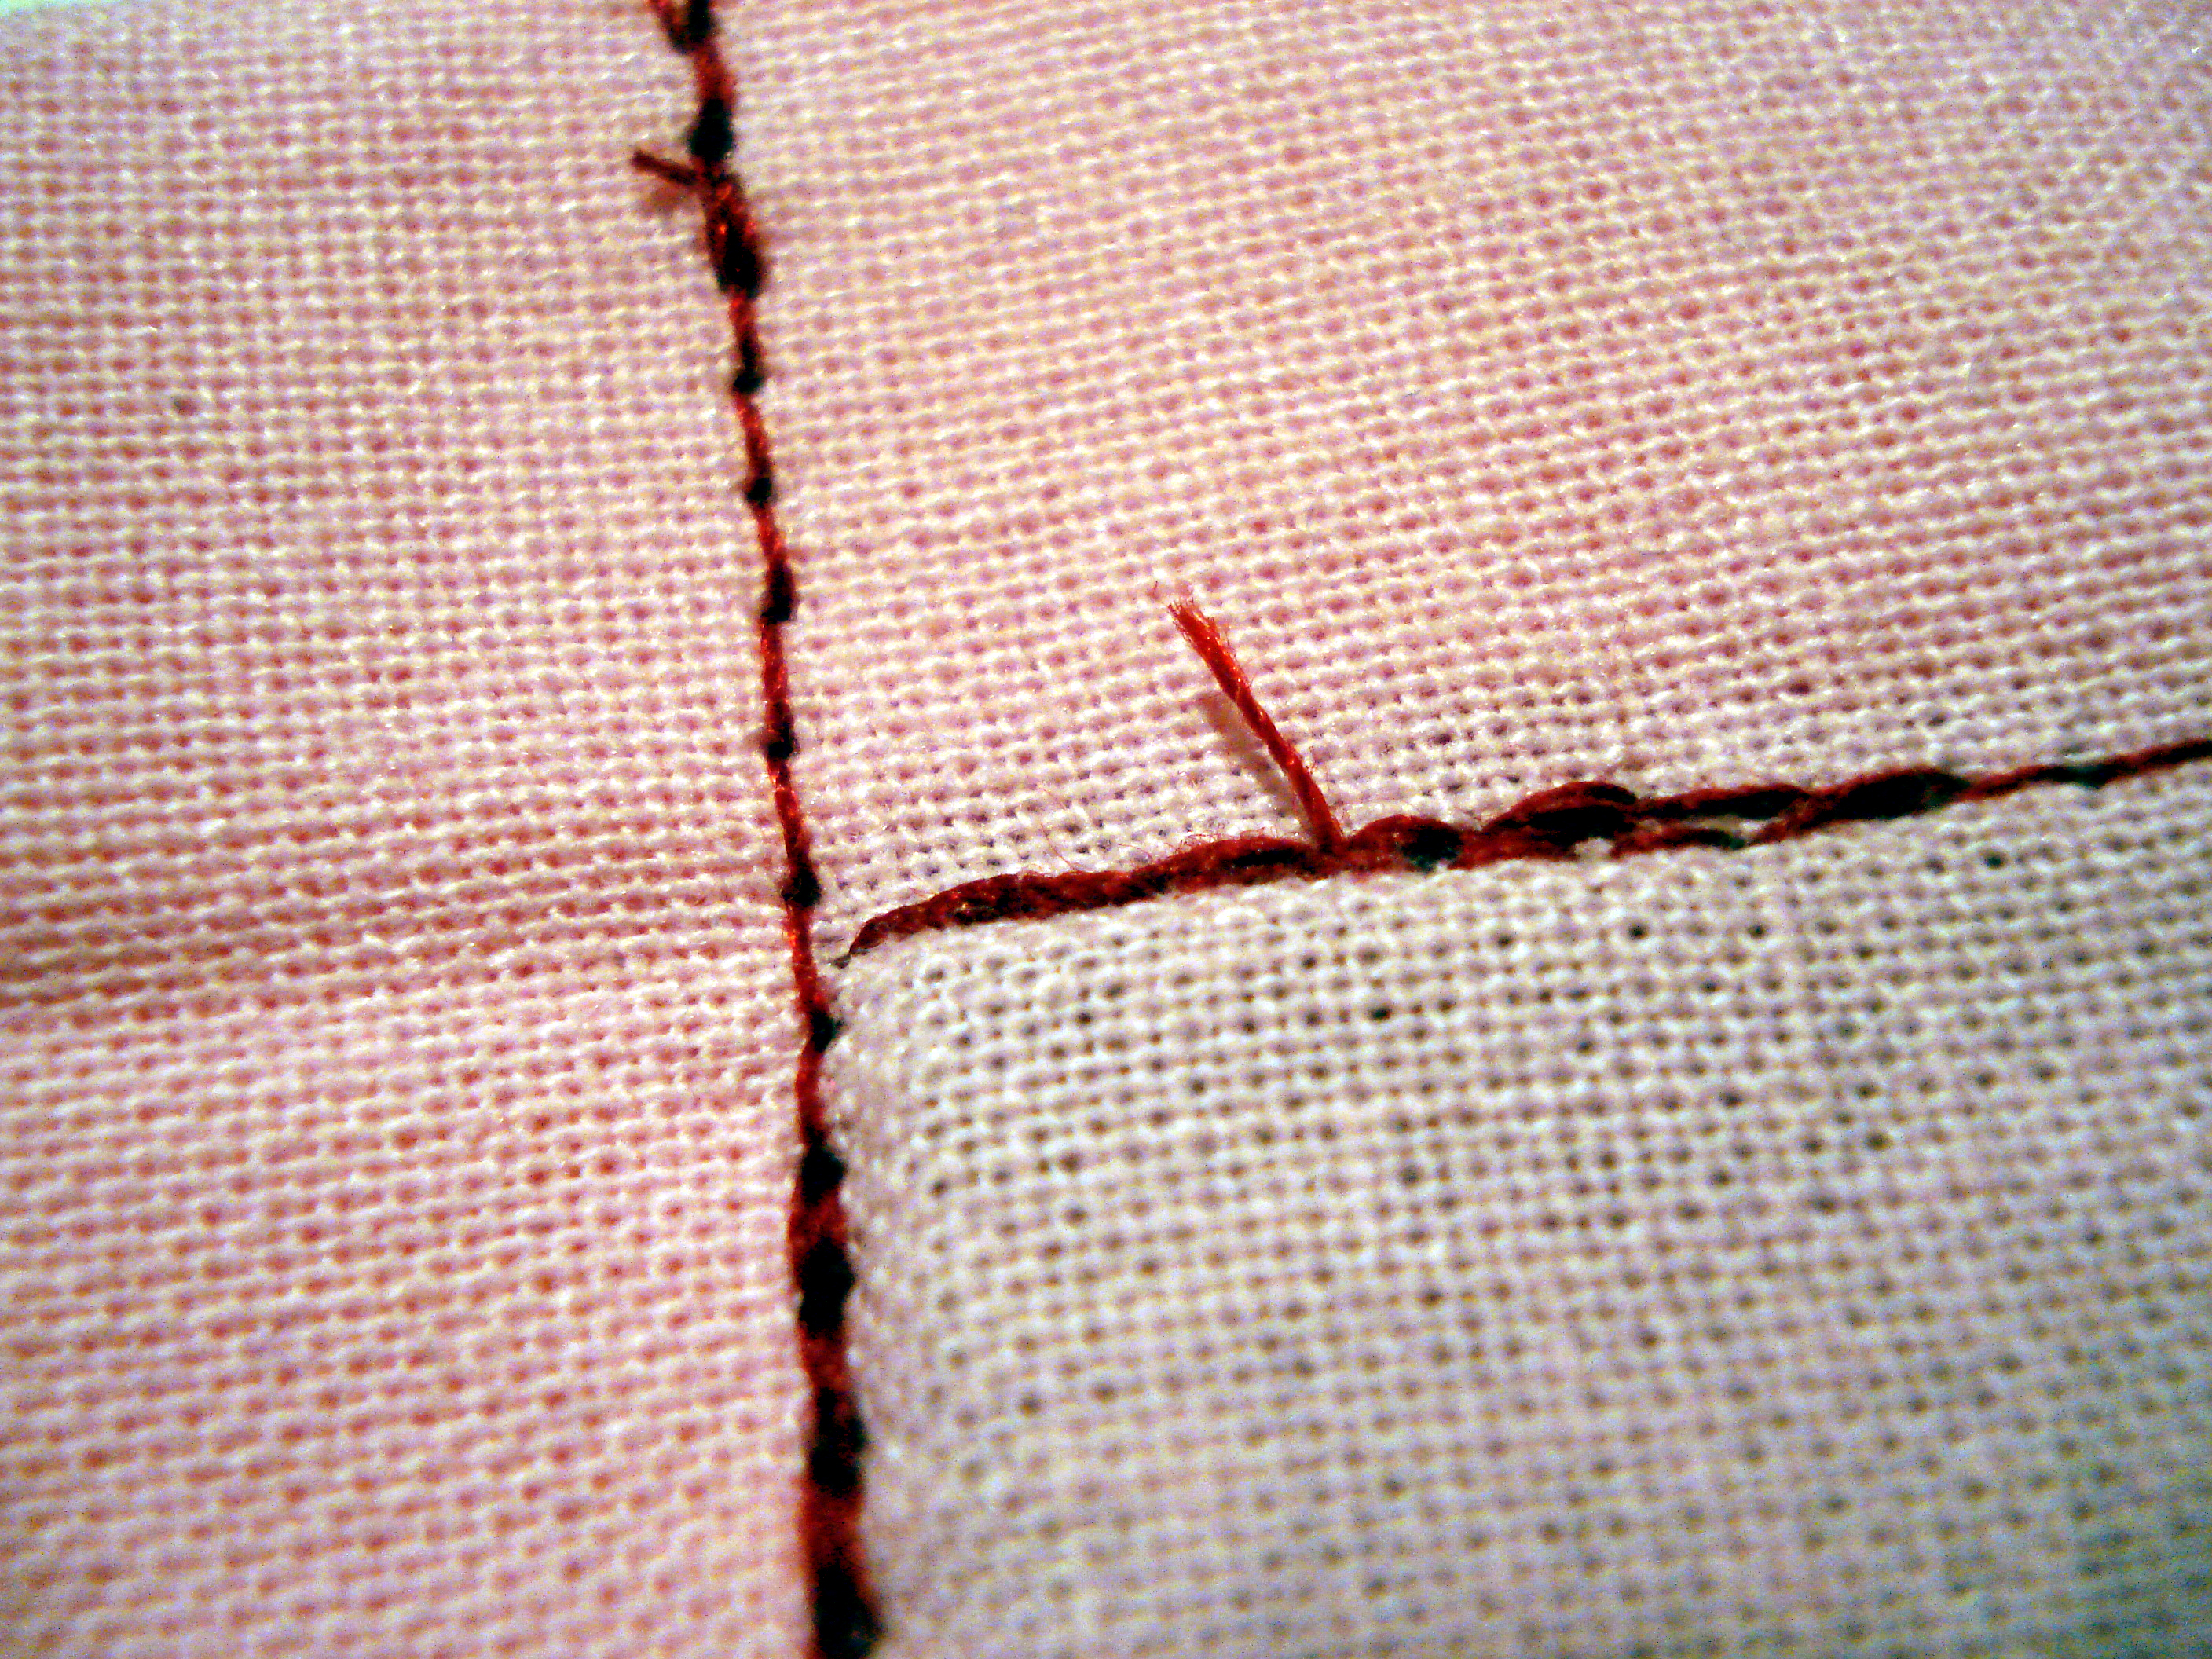
As you can see, the previous line of stitching will help you judge how close you can get to things. The more precise you are, the better it will look!
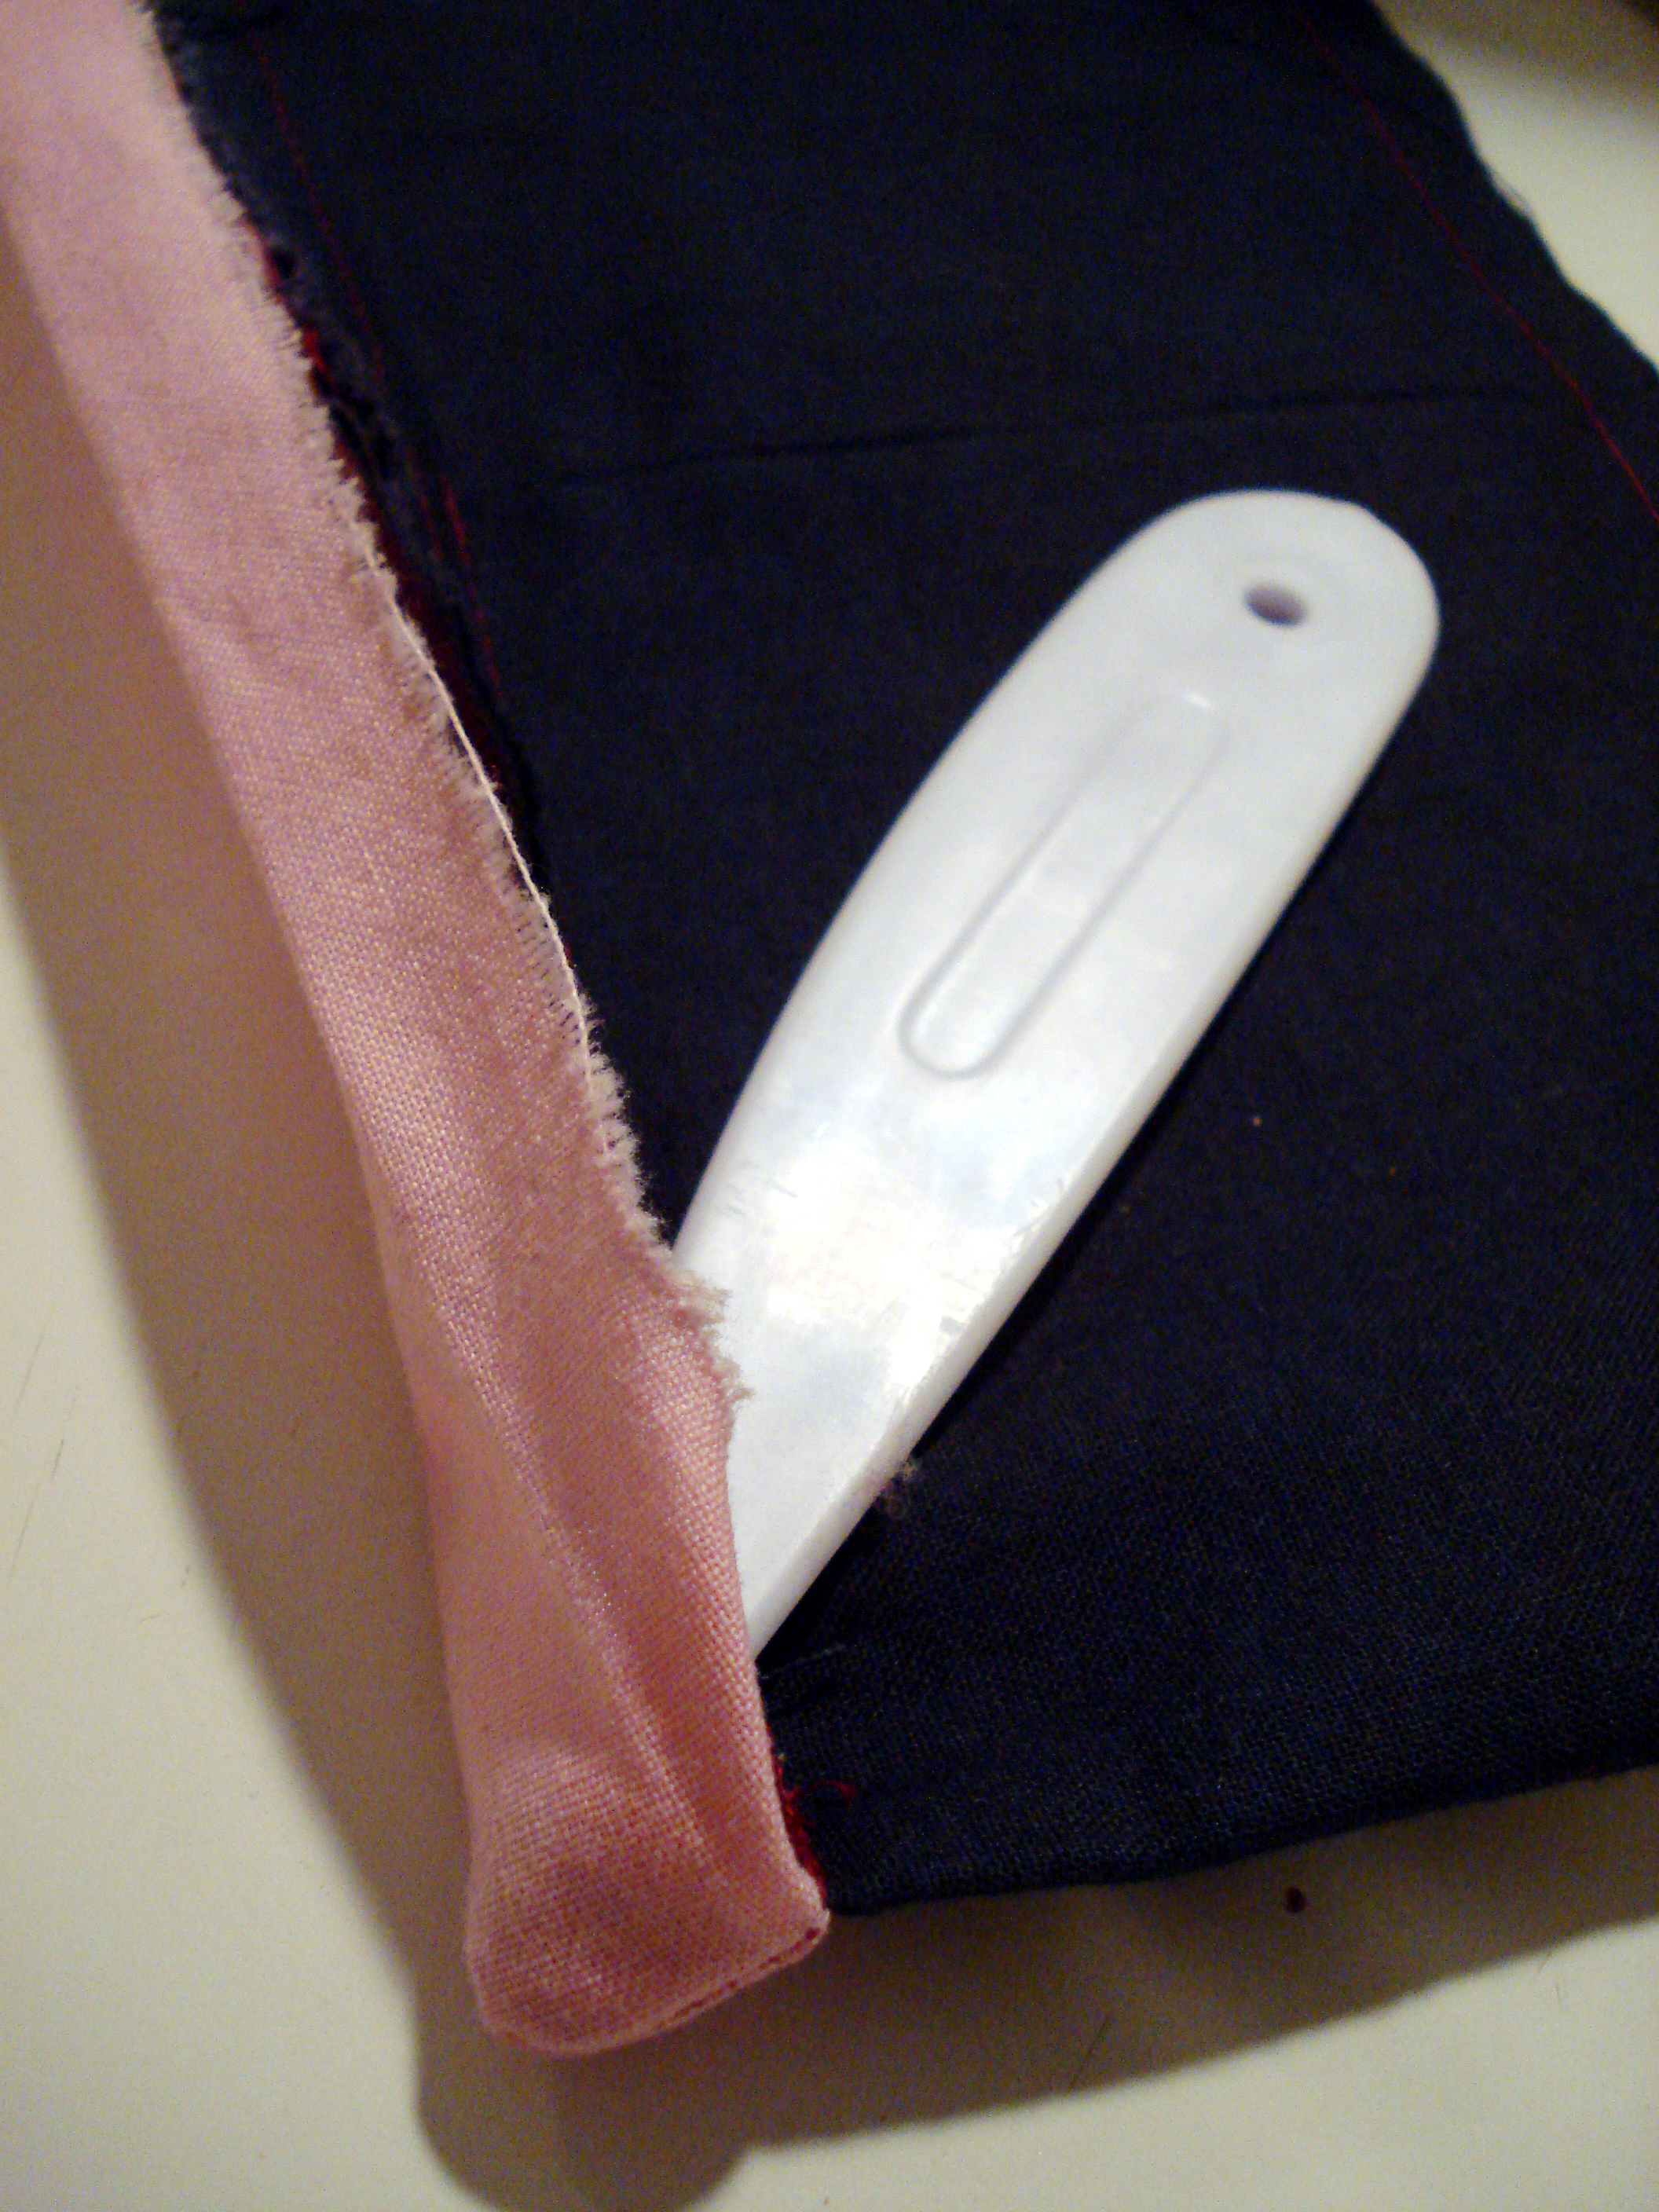
Trim your seam allowance. Use your adorable point turner (or similarly pointy device) to poke the corner into submission. At this point, the end of the bias tape is basically a tiny closed pocket that can be flipped over the fabric edge.
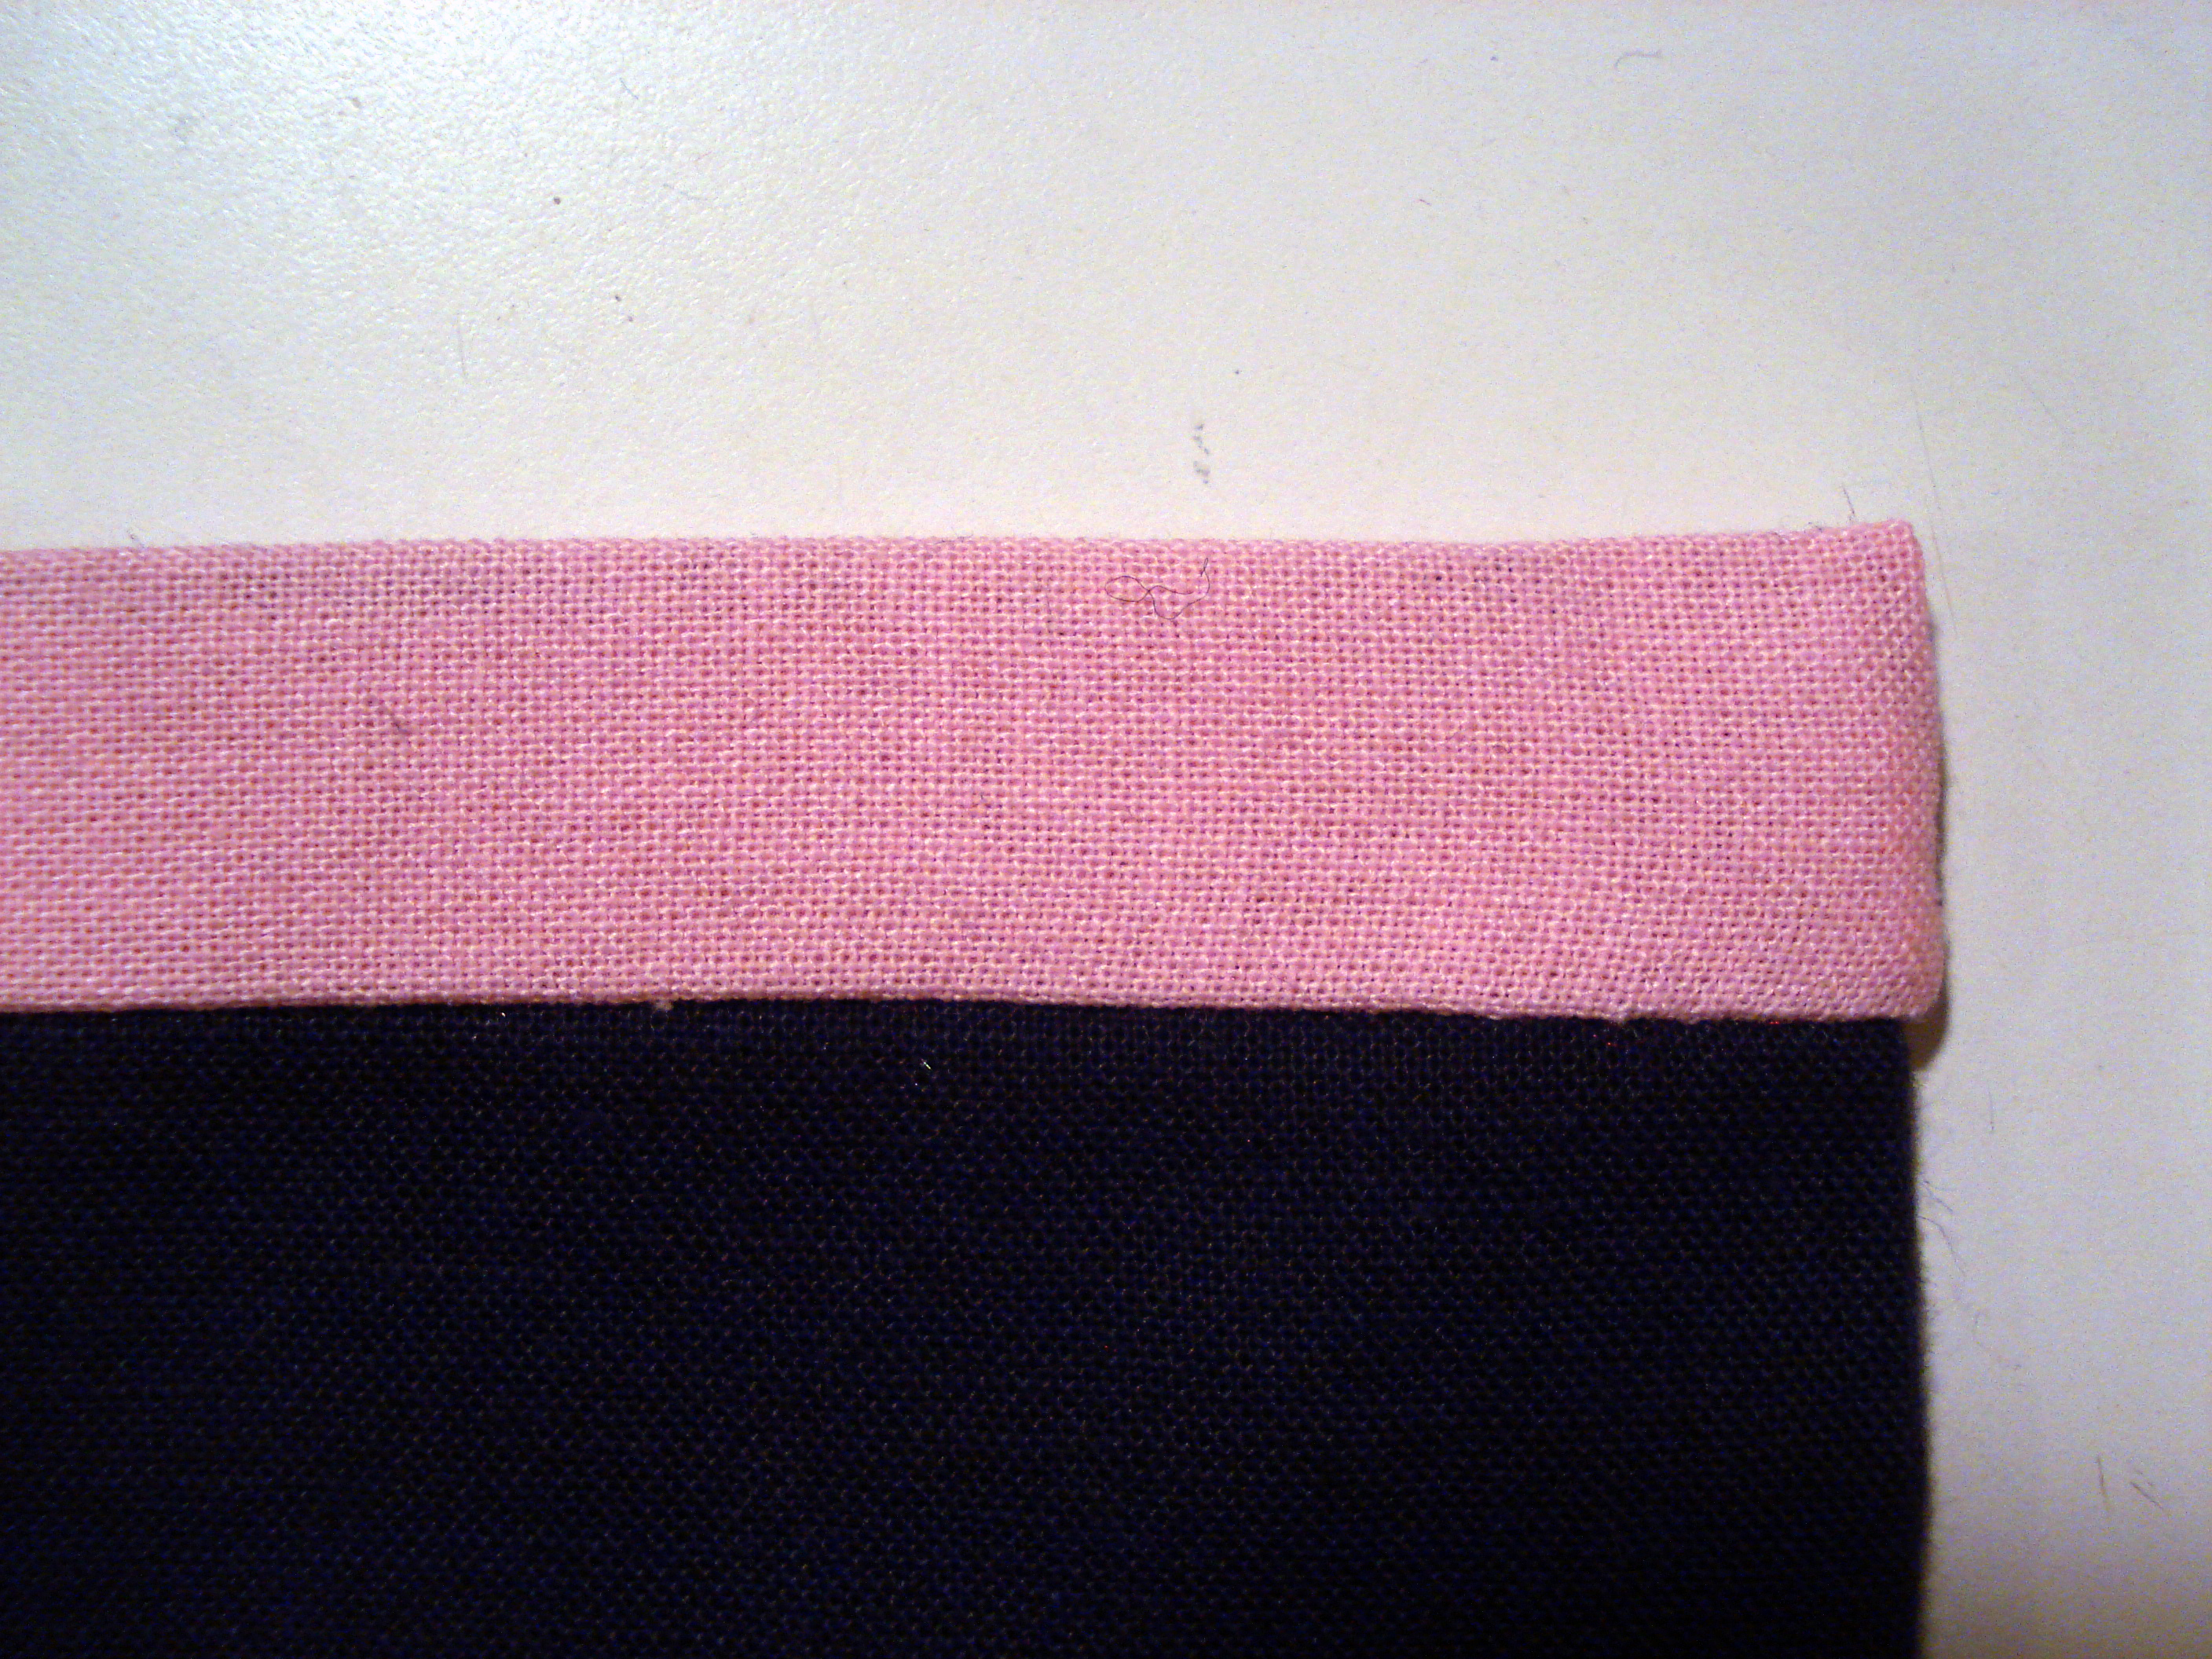
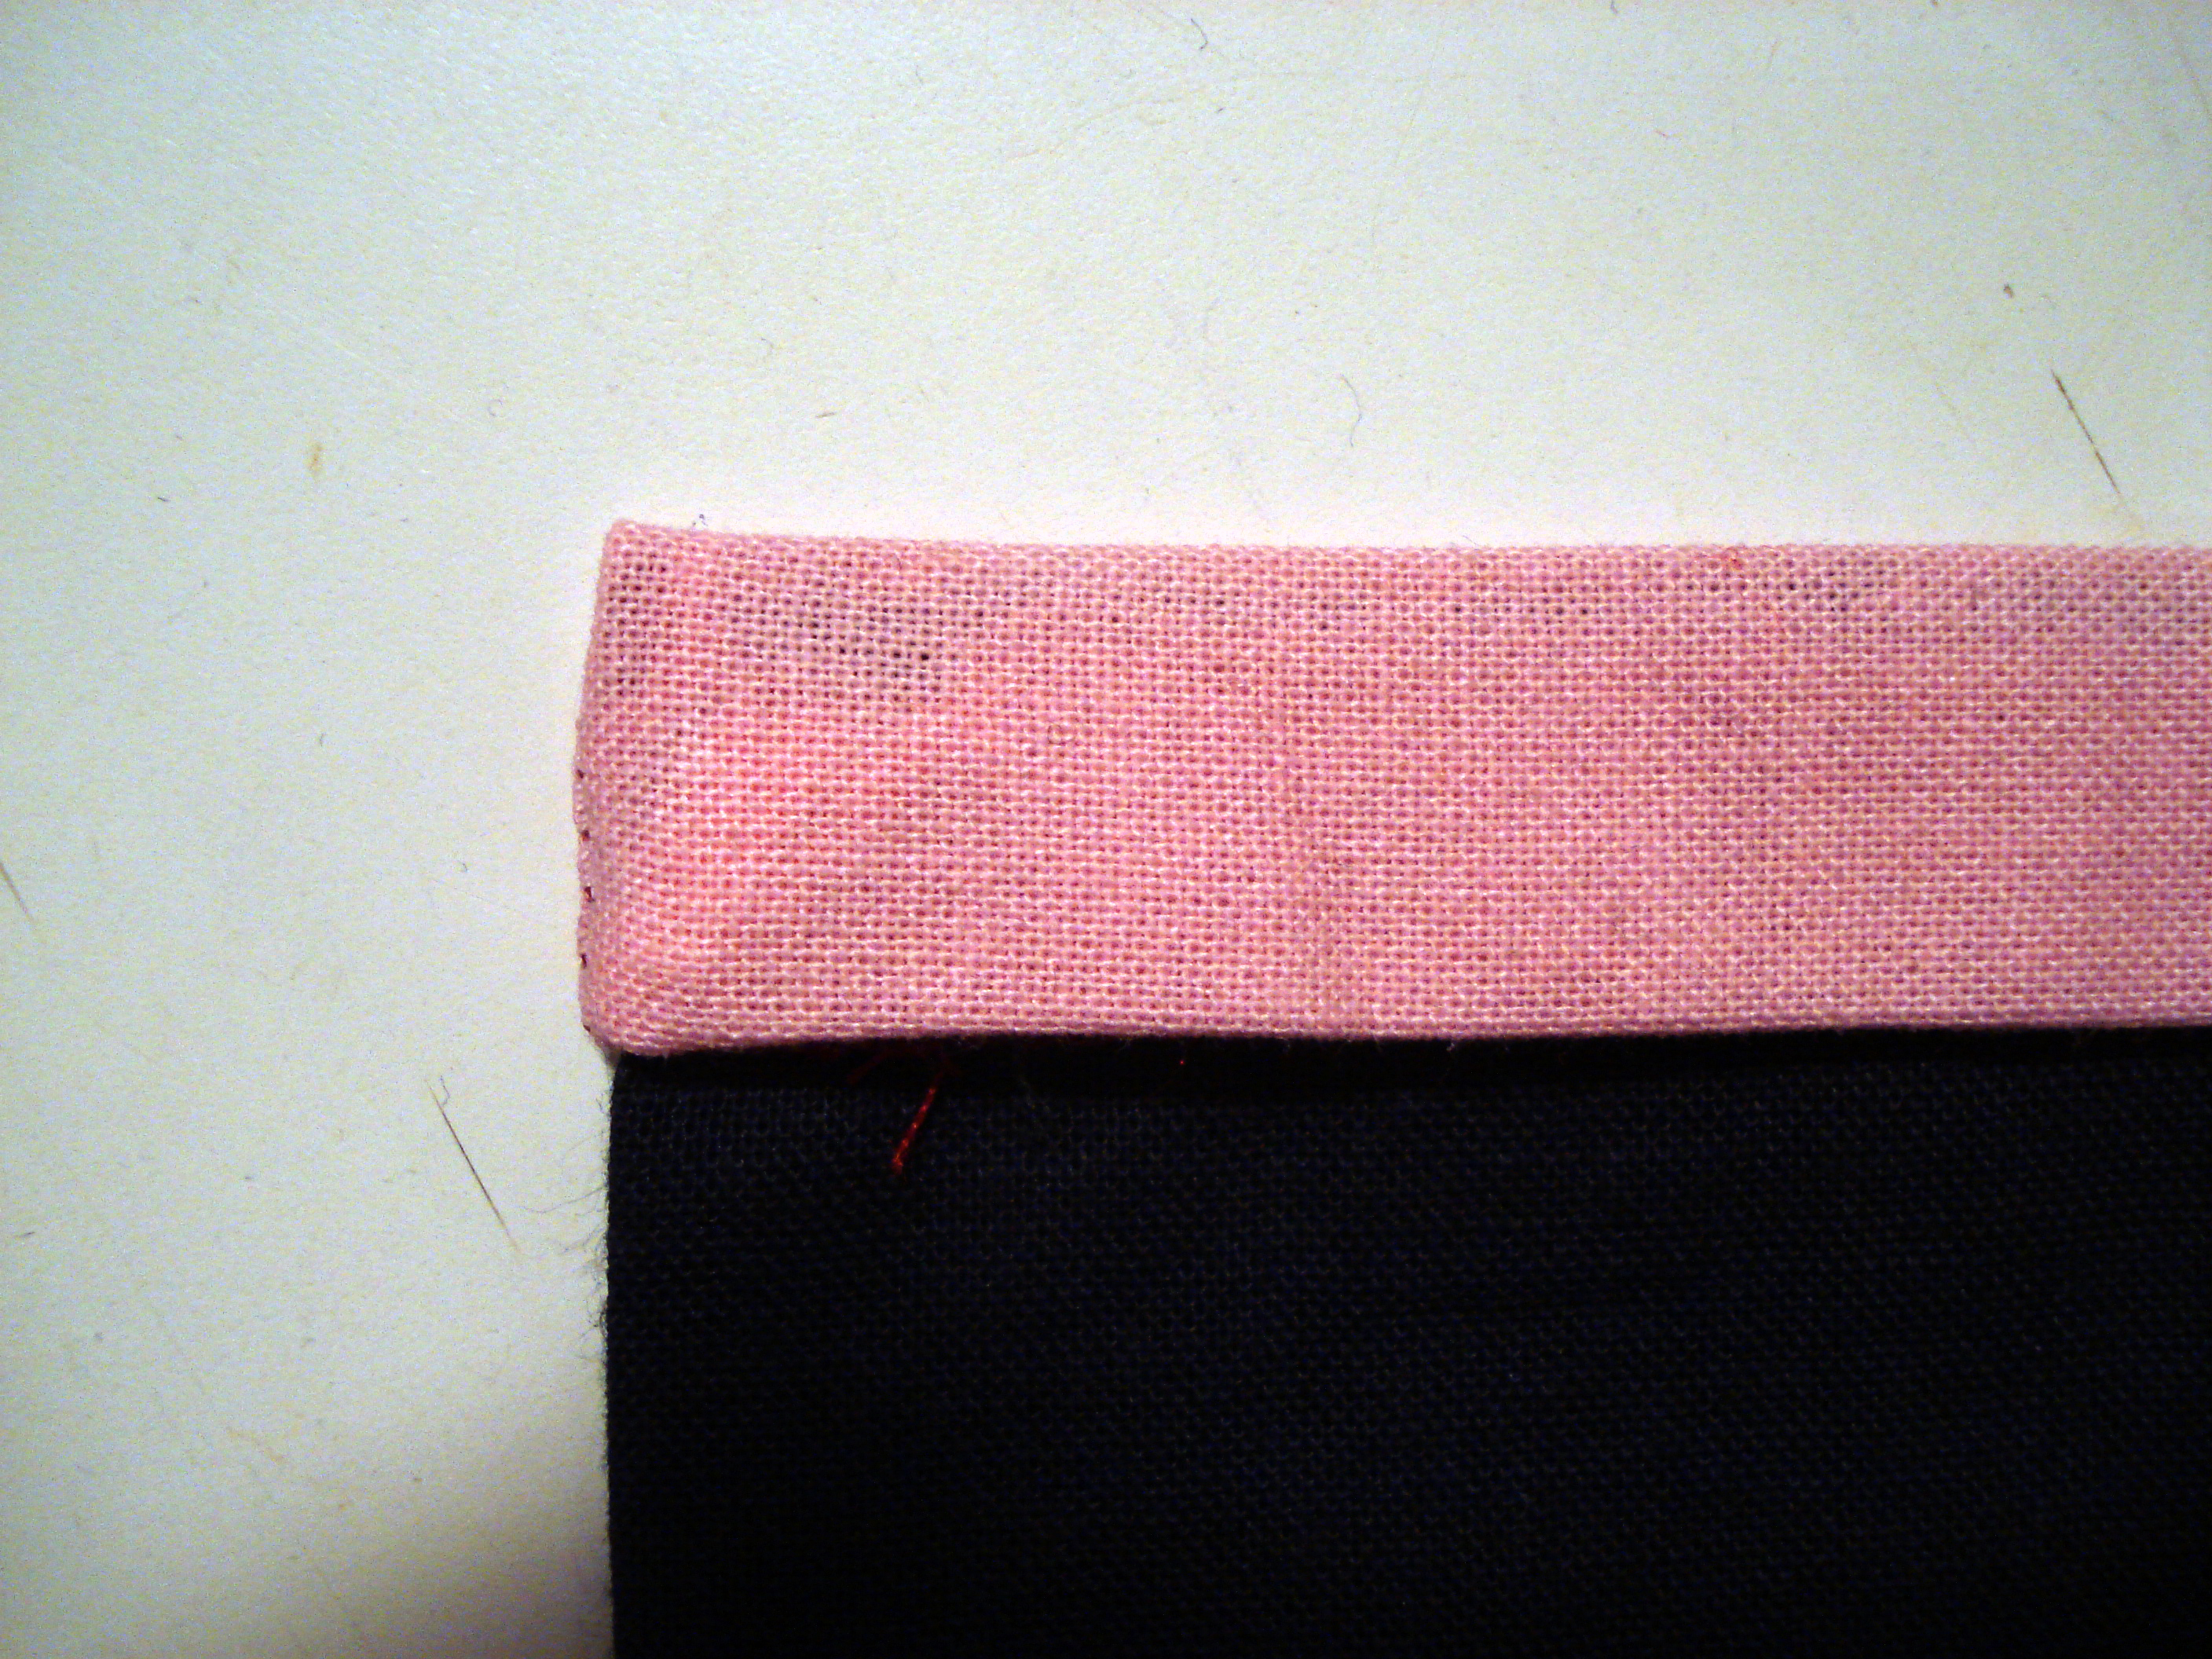
Now it will look like this on the front…like this on the back…
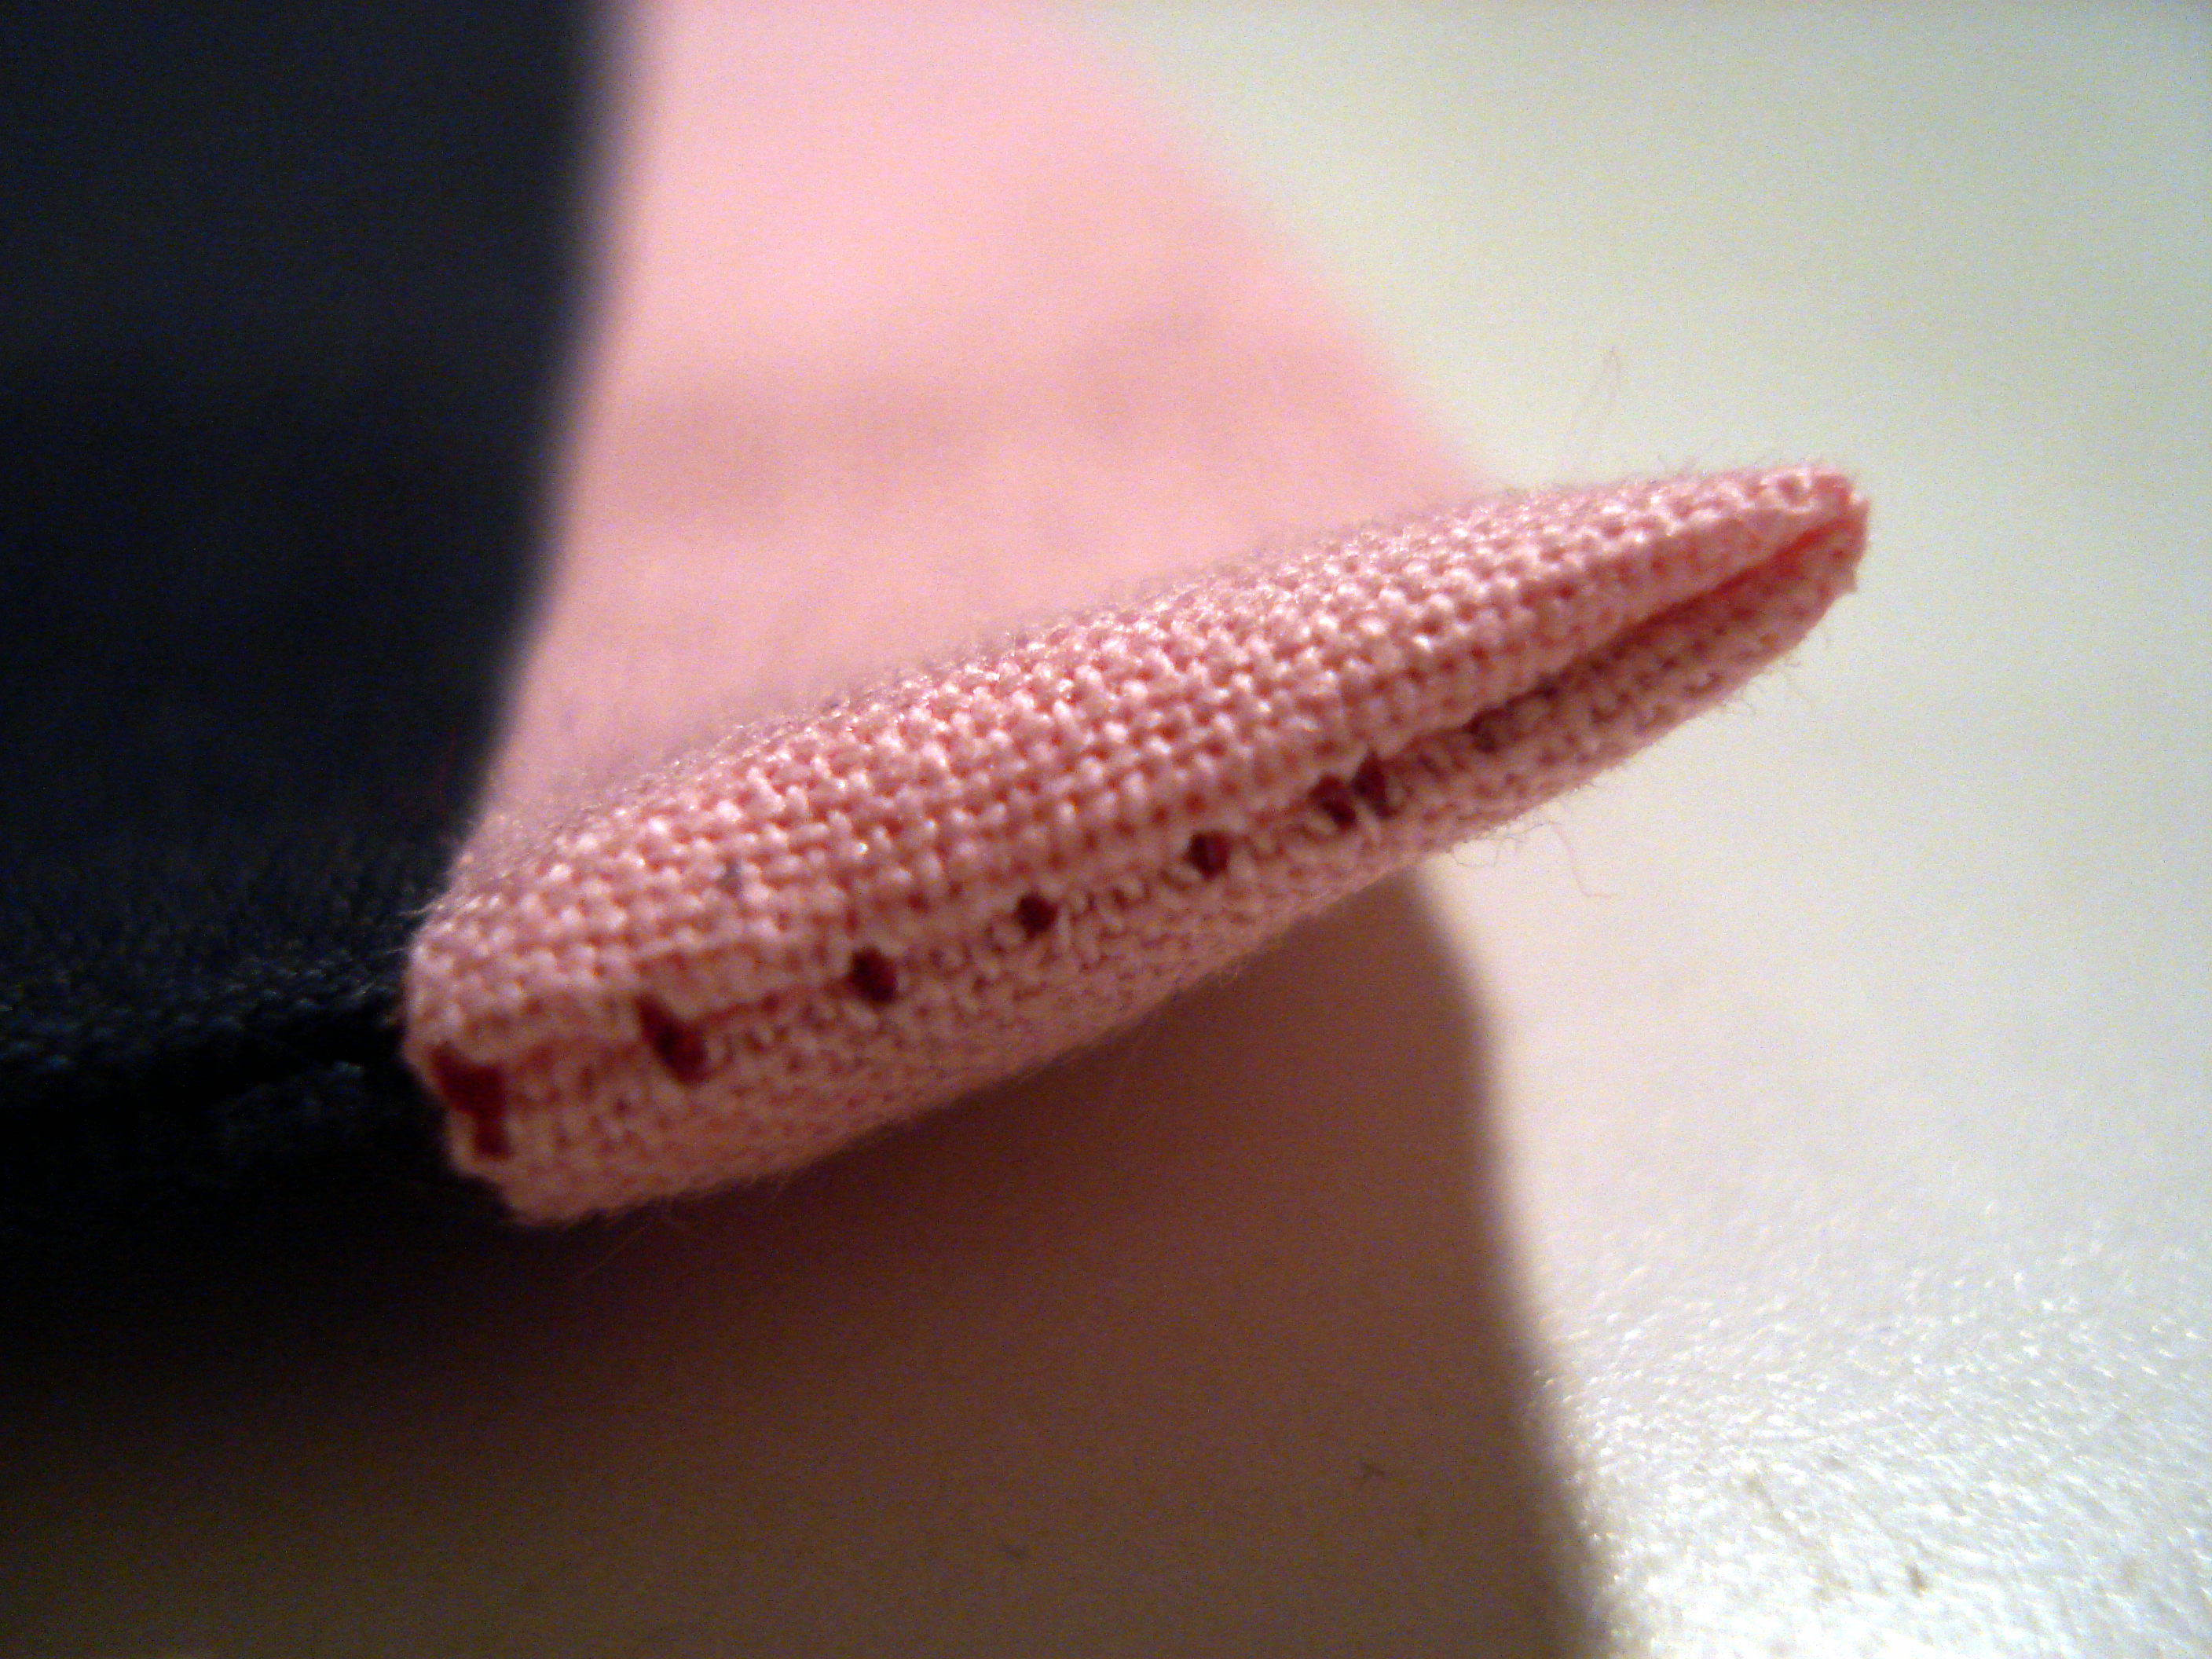
…and like this on the side. It’ll be more or less invisible when you use matching thread and a small stitch length. You can secure the back with your preferred finishing technique. (Slipstitch it to the lining, topstitch it, etc.)
Note: I used random strips of straight-grain fabric ripped from a scrap of cotton for the above photos. Real bias tape is cut on the diagonal, which gives it a bit of stretch and makes this kind of finish lie much more smoothly.