Now, you may (or may not) be thinking…I can sew bias tape in a straight line, but what am I supposed to do at the corners?
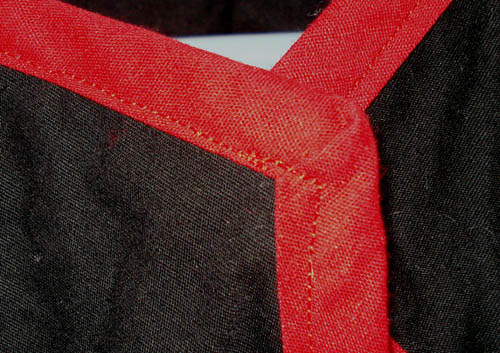
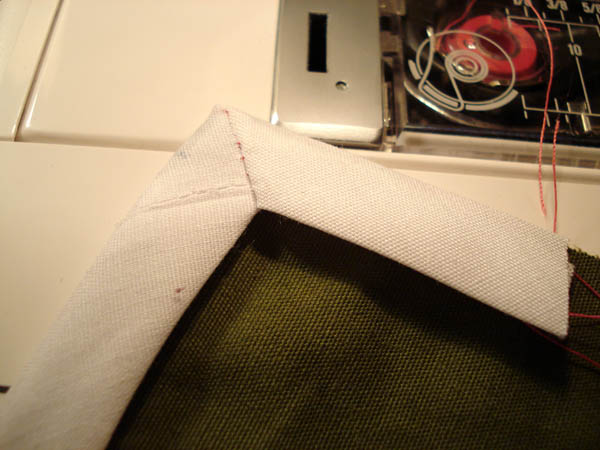
This is what I usually see, and what you don’t want to do. This was my first sewing project, a Kamui jacket, and as you can see, I didn’t know what to do either. So I just mowed over it with my sewing machine and hoped for the best. Unfortunately, even if you somehow nail the top (which I did not even manage to do successfully here), the bottom will rarely be as cooperative.
This micro-tutorial will show you how to instead create something called a mitered outside corner. (If you need to do an inner corner, check out the inner corner tutorial.)

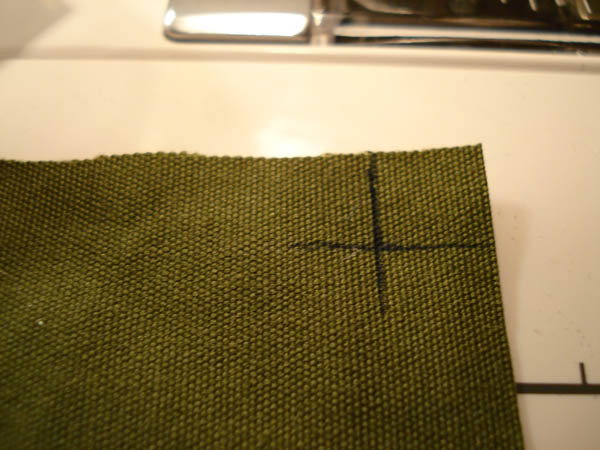
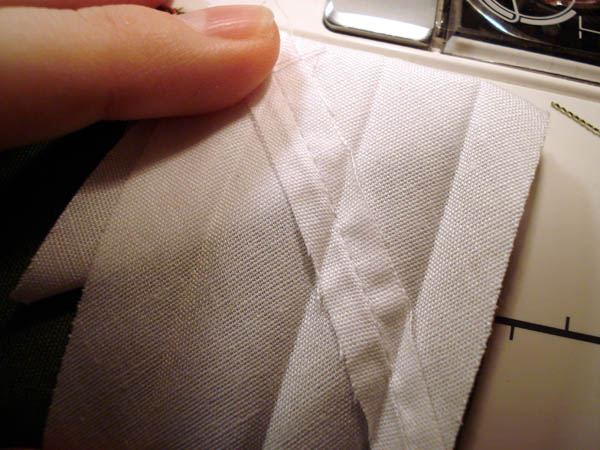
I’ll be drawing on the fabric with a pen to help make things more explicit. It’s worth marking these guide lines the first time you try this, but once you have the hang of it, you can skip the pen and just eyeball it. Take your bias tape, line it up with the edge, and mark where the seam will be on your fabric corner. Do the same from the other direction, and you will have two lines guiding you for the next step. (Caution: bias tape is slightly asymmetrical. Make sure you are doing this with the “front” side, which is the slightly narrower one. The “back” side is slightly wider because it is meant to make it easier to secure to the back later on.)
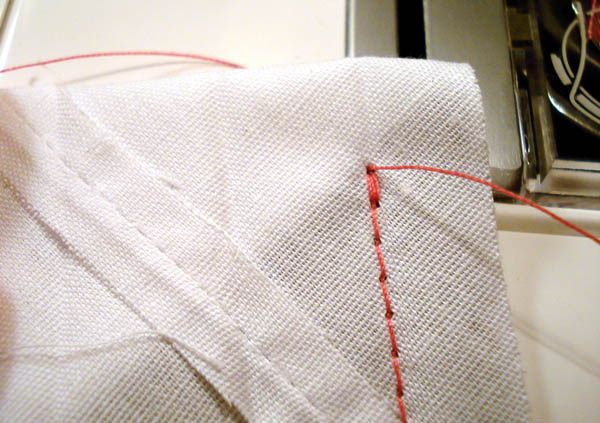
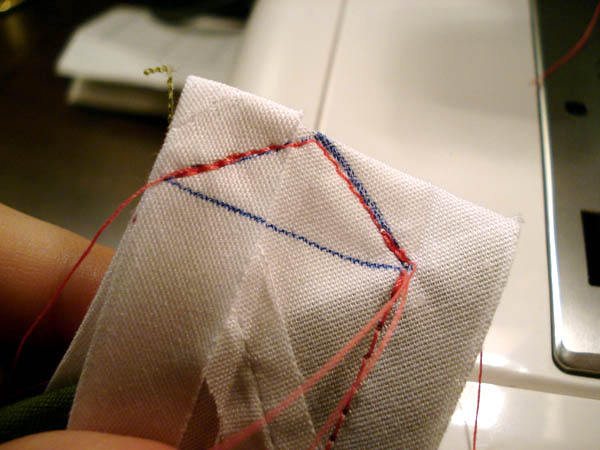
Take your bias tape and stitch along the fold line. Stop exactly at the intersection you just drew. You may want to decrease your stitch size as you get close. Precision is key here.
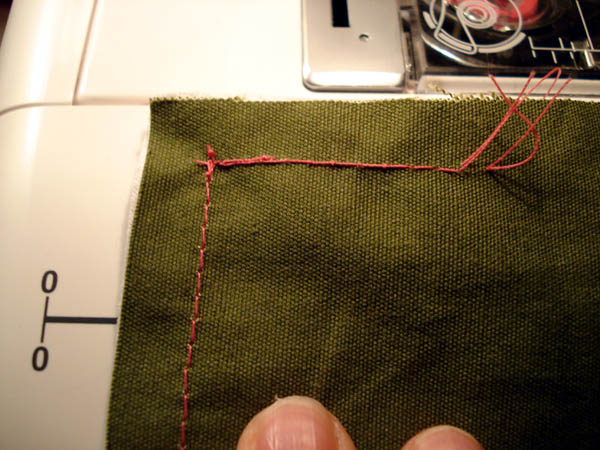
Take the unstitched side of the bias tape and fold it at a 90 degree angle at the corner. This should align the rest of your bias tape with the other edge of the fabric. Stitch up to the intersection, just like you did before. (Ignore the weird seam at a diagonal - I was using a scrap of store-bought bias tape and this is where the two lengths were spliced together.)
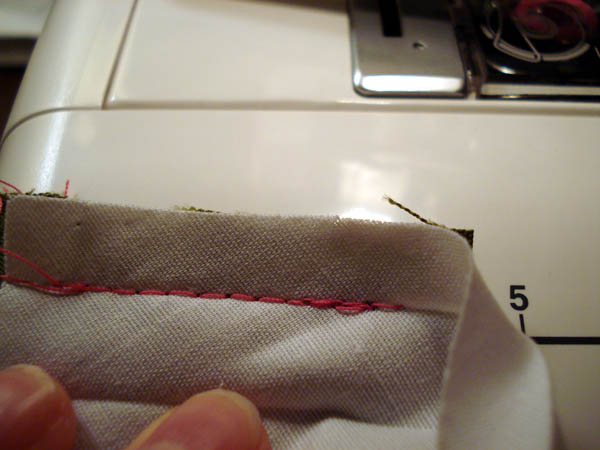
It should look like this from the bottom.
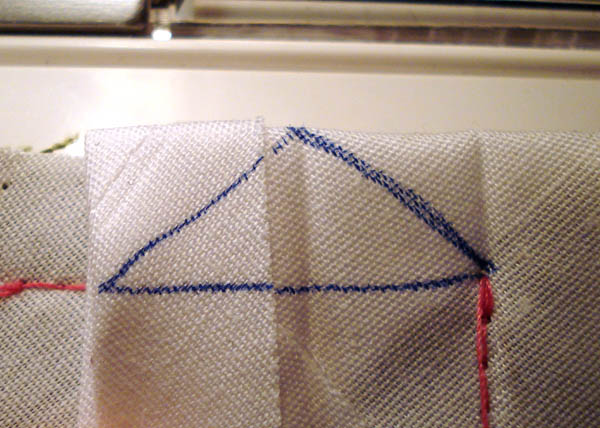
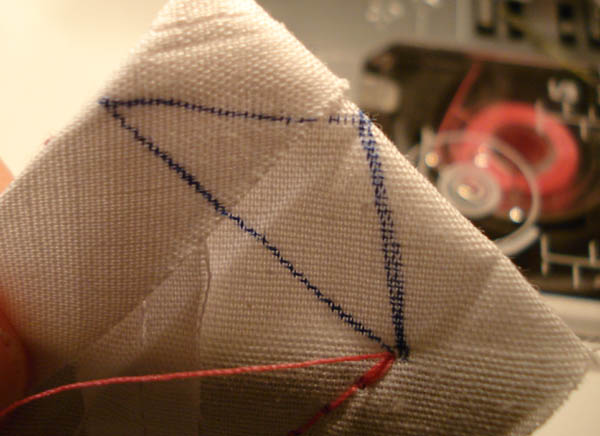
Keeping the corner folded the same way it was for the second line of stitching, draw a line across the bias tape that lines up with your first seam. Then draw two diagonal lines to form a triangle.
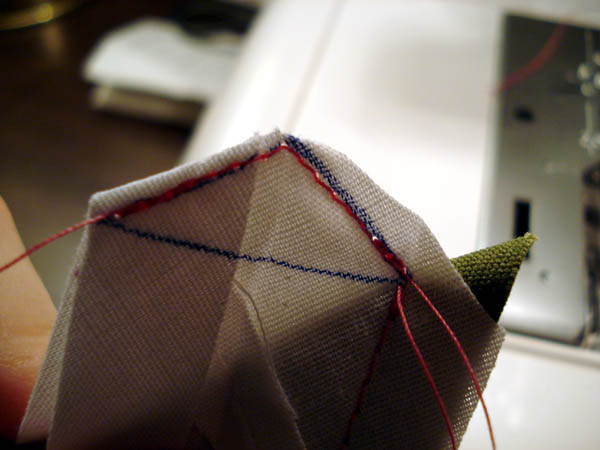
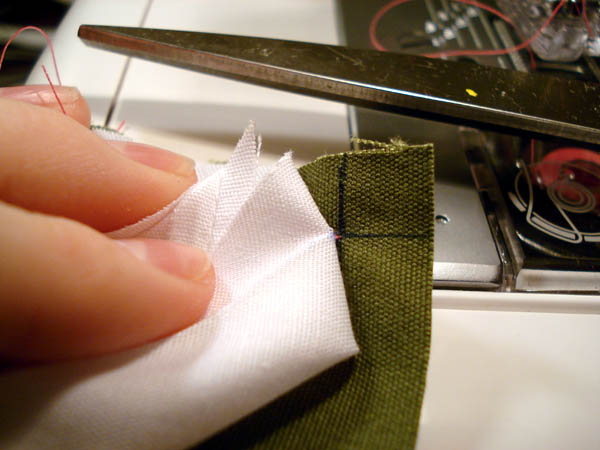
Fold the garment fabric out of the way so that only the bias tape layers remain under the needle. Stitch along the top two triangle legs to secure the corner fold. Check the fit if you like, then trim the excess fabric away so it can lie flat. (If you are feeling particular, or if your fabric is fussy, you can unfold the end fold of the bias tape and extend the triangle one seam line farther. Instead of making a two legged /\ shape, this will make a three legged \/\-shape, which will enclose the trimmed end completely. See the inner corner tutorial for an example.)
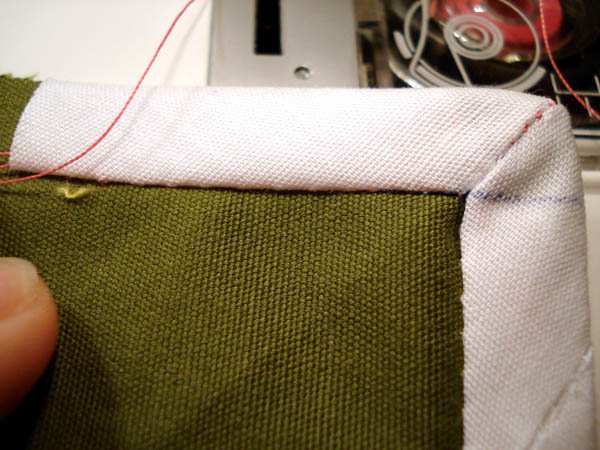
Fold your bias tape over the corner. Using a point turner will help make sure that the tip of the corner is crisp. It should look like this on both sides.
At this point, your bias tape is attached to the front and the folds are secured in place, but you still need to do something to secure the back. Typical options are:
a) slipstitch it (prettiest method, but most time consuming)
b) stitch it down normally (much easier now that everything is already in the right shape)
c) “stitch in the ditch” (this is why bias tape is fatter on the back side)
d) fabric glue/Stitch Witchery (best avoided unless truly desperate)
For the cleanest finish, slipstitch the back by hand. For speed, machine stitching is fine.
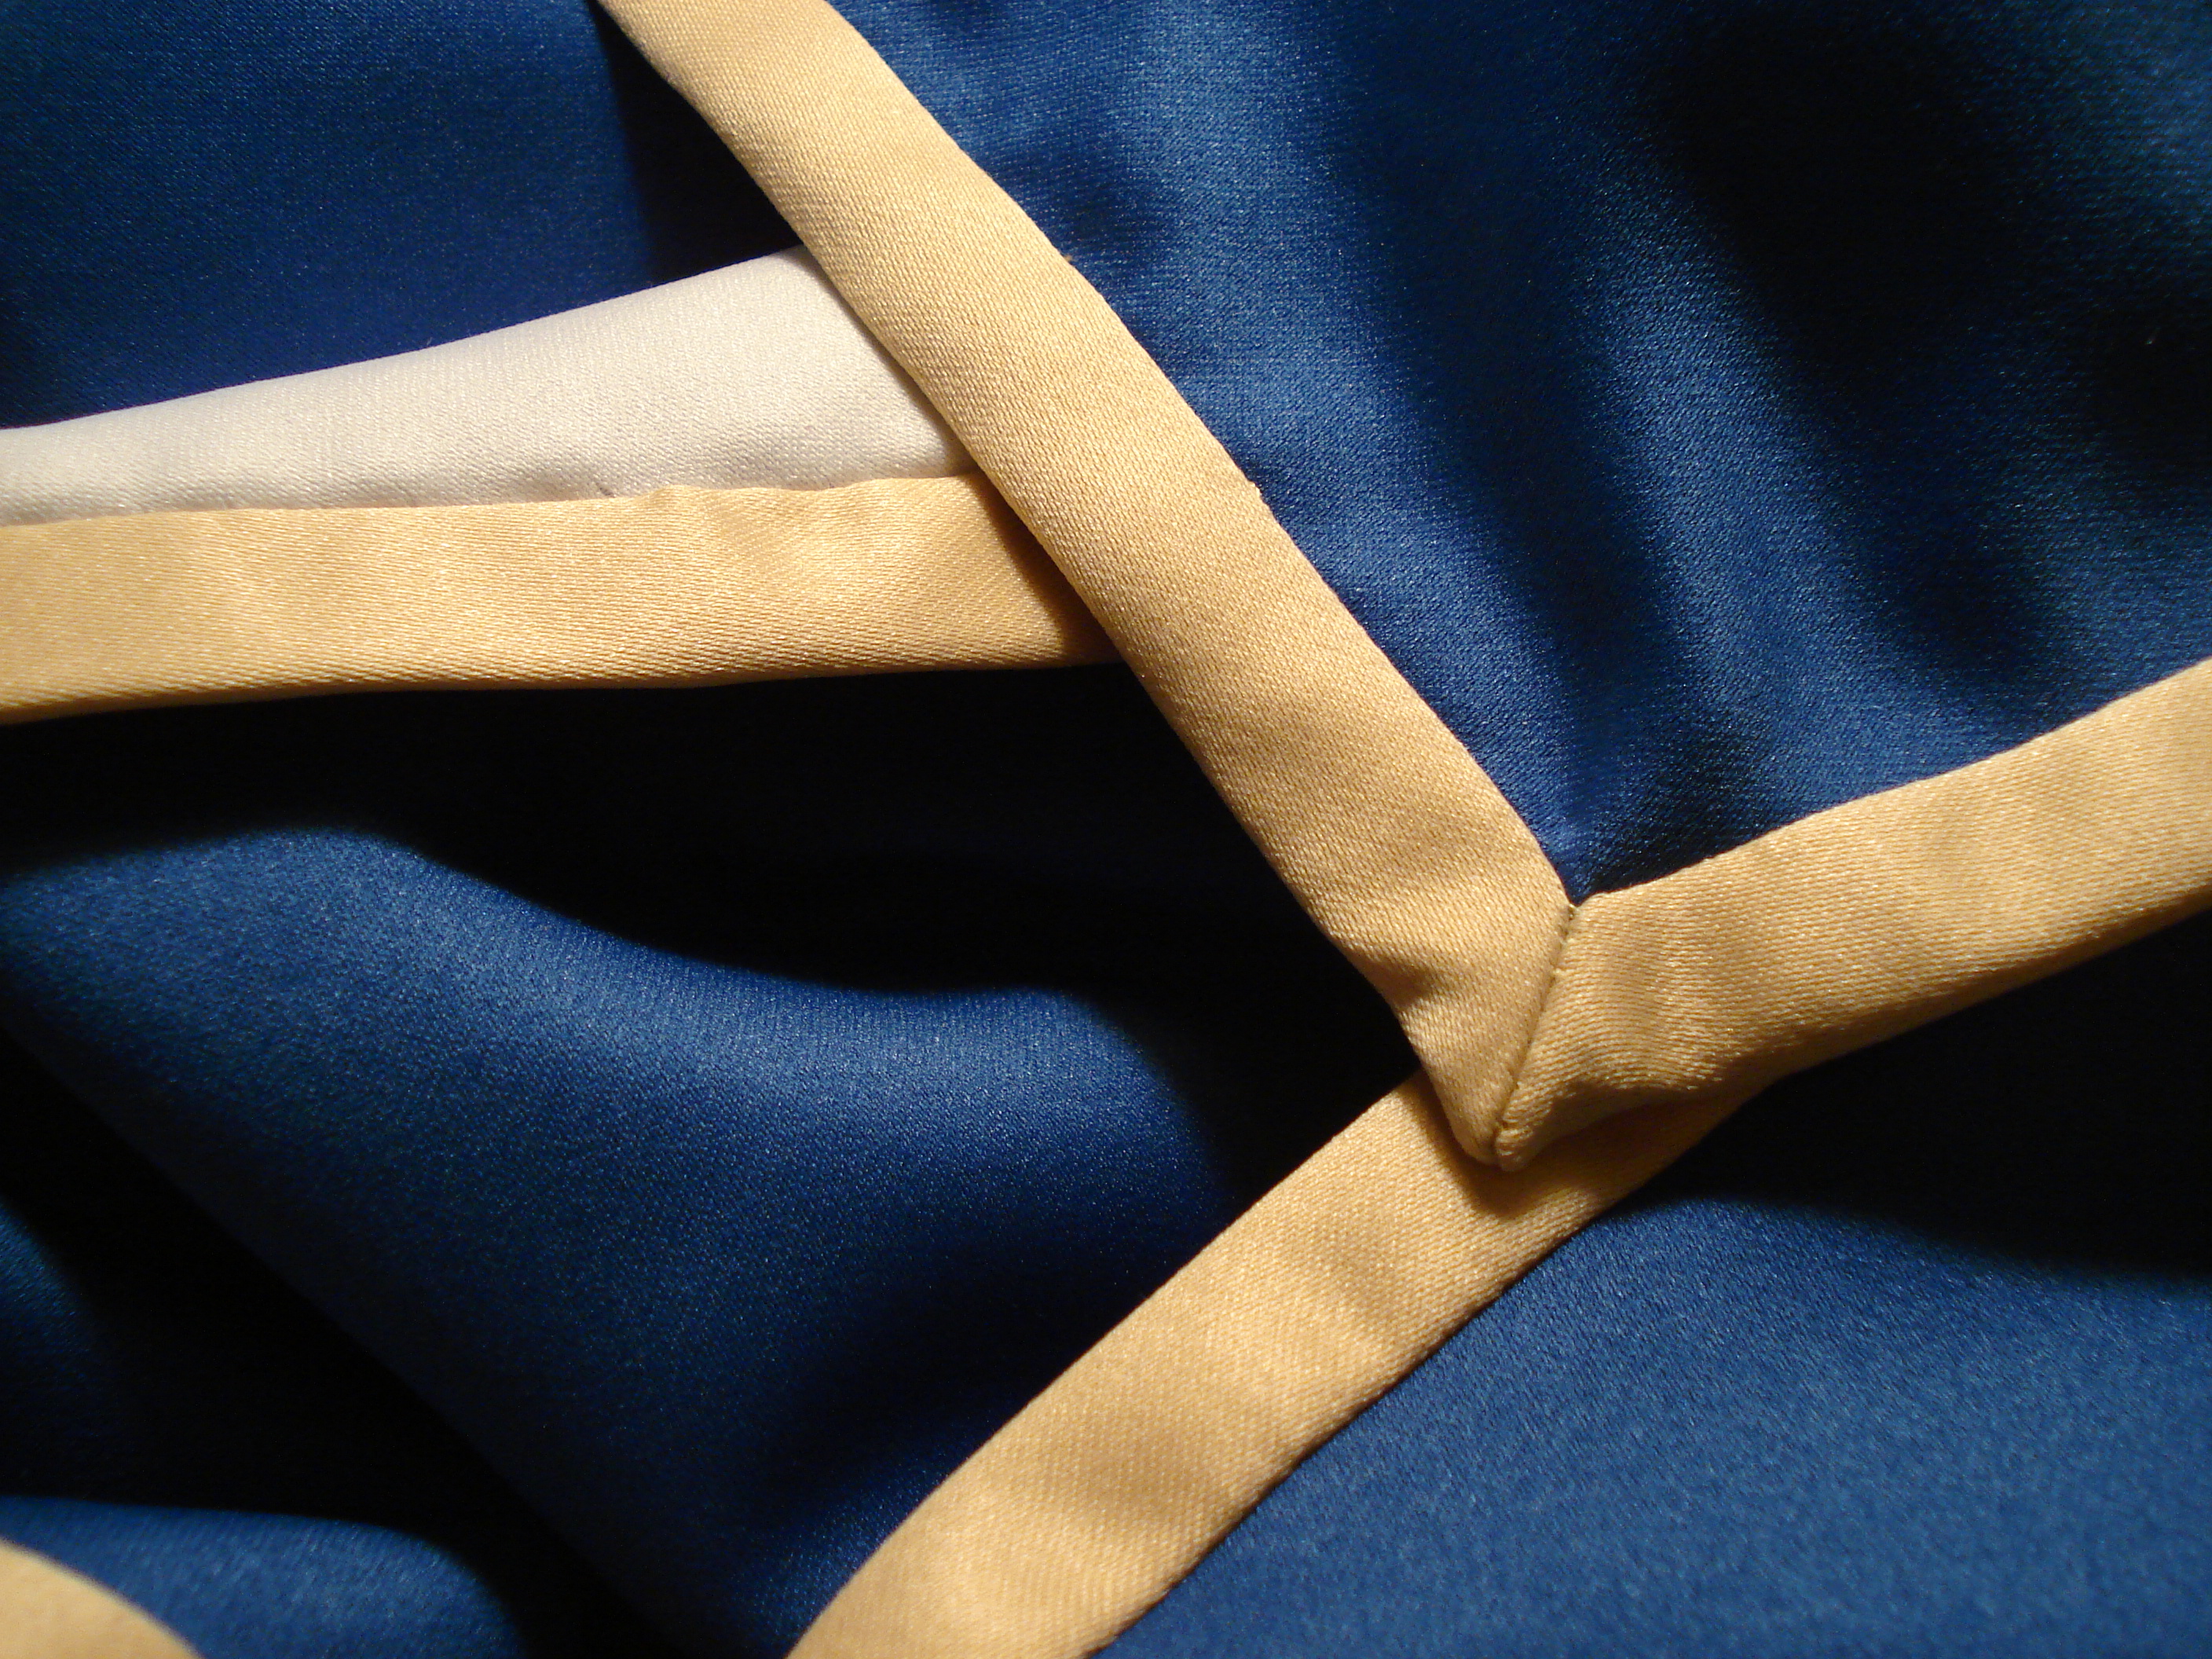
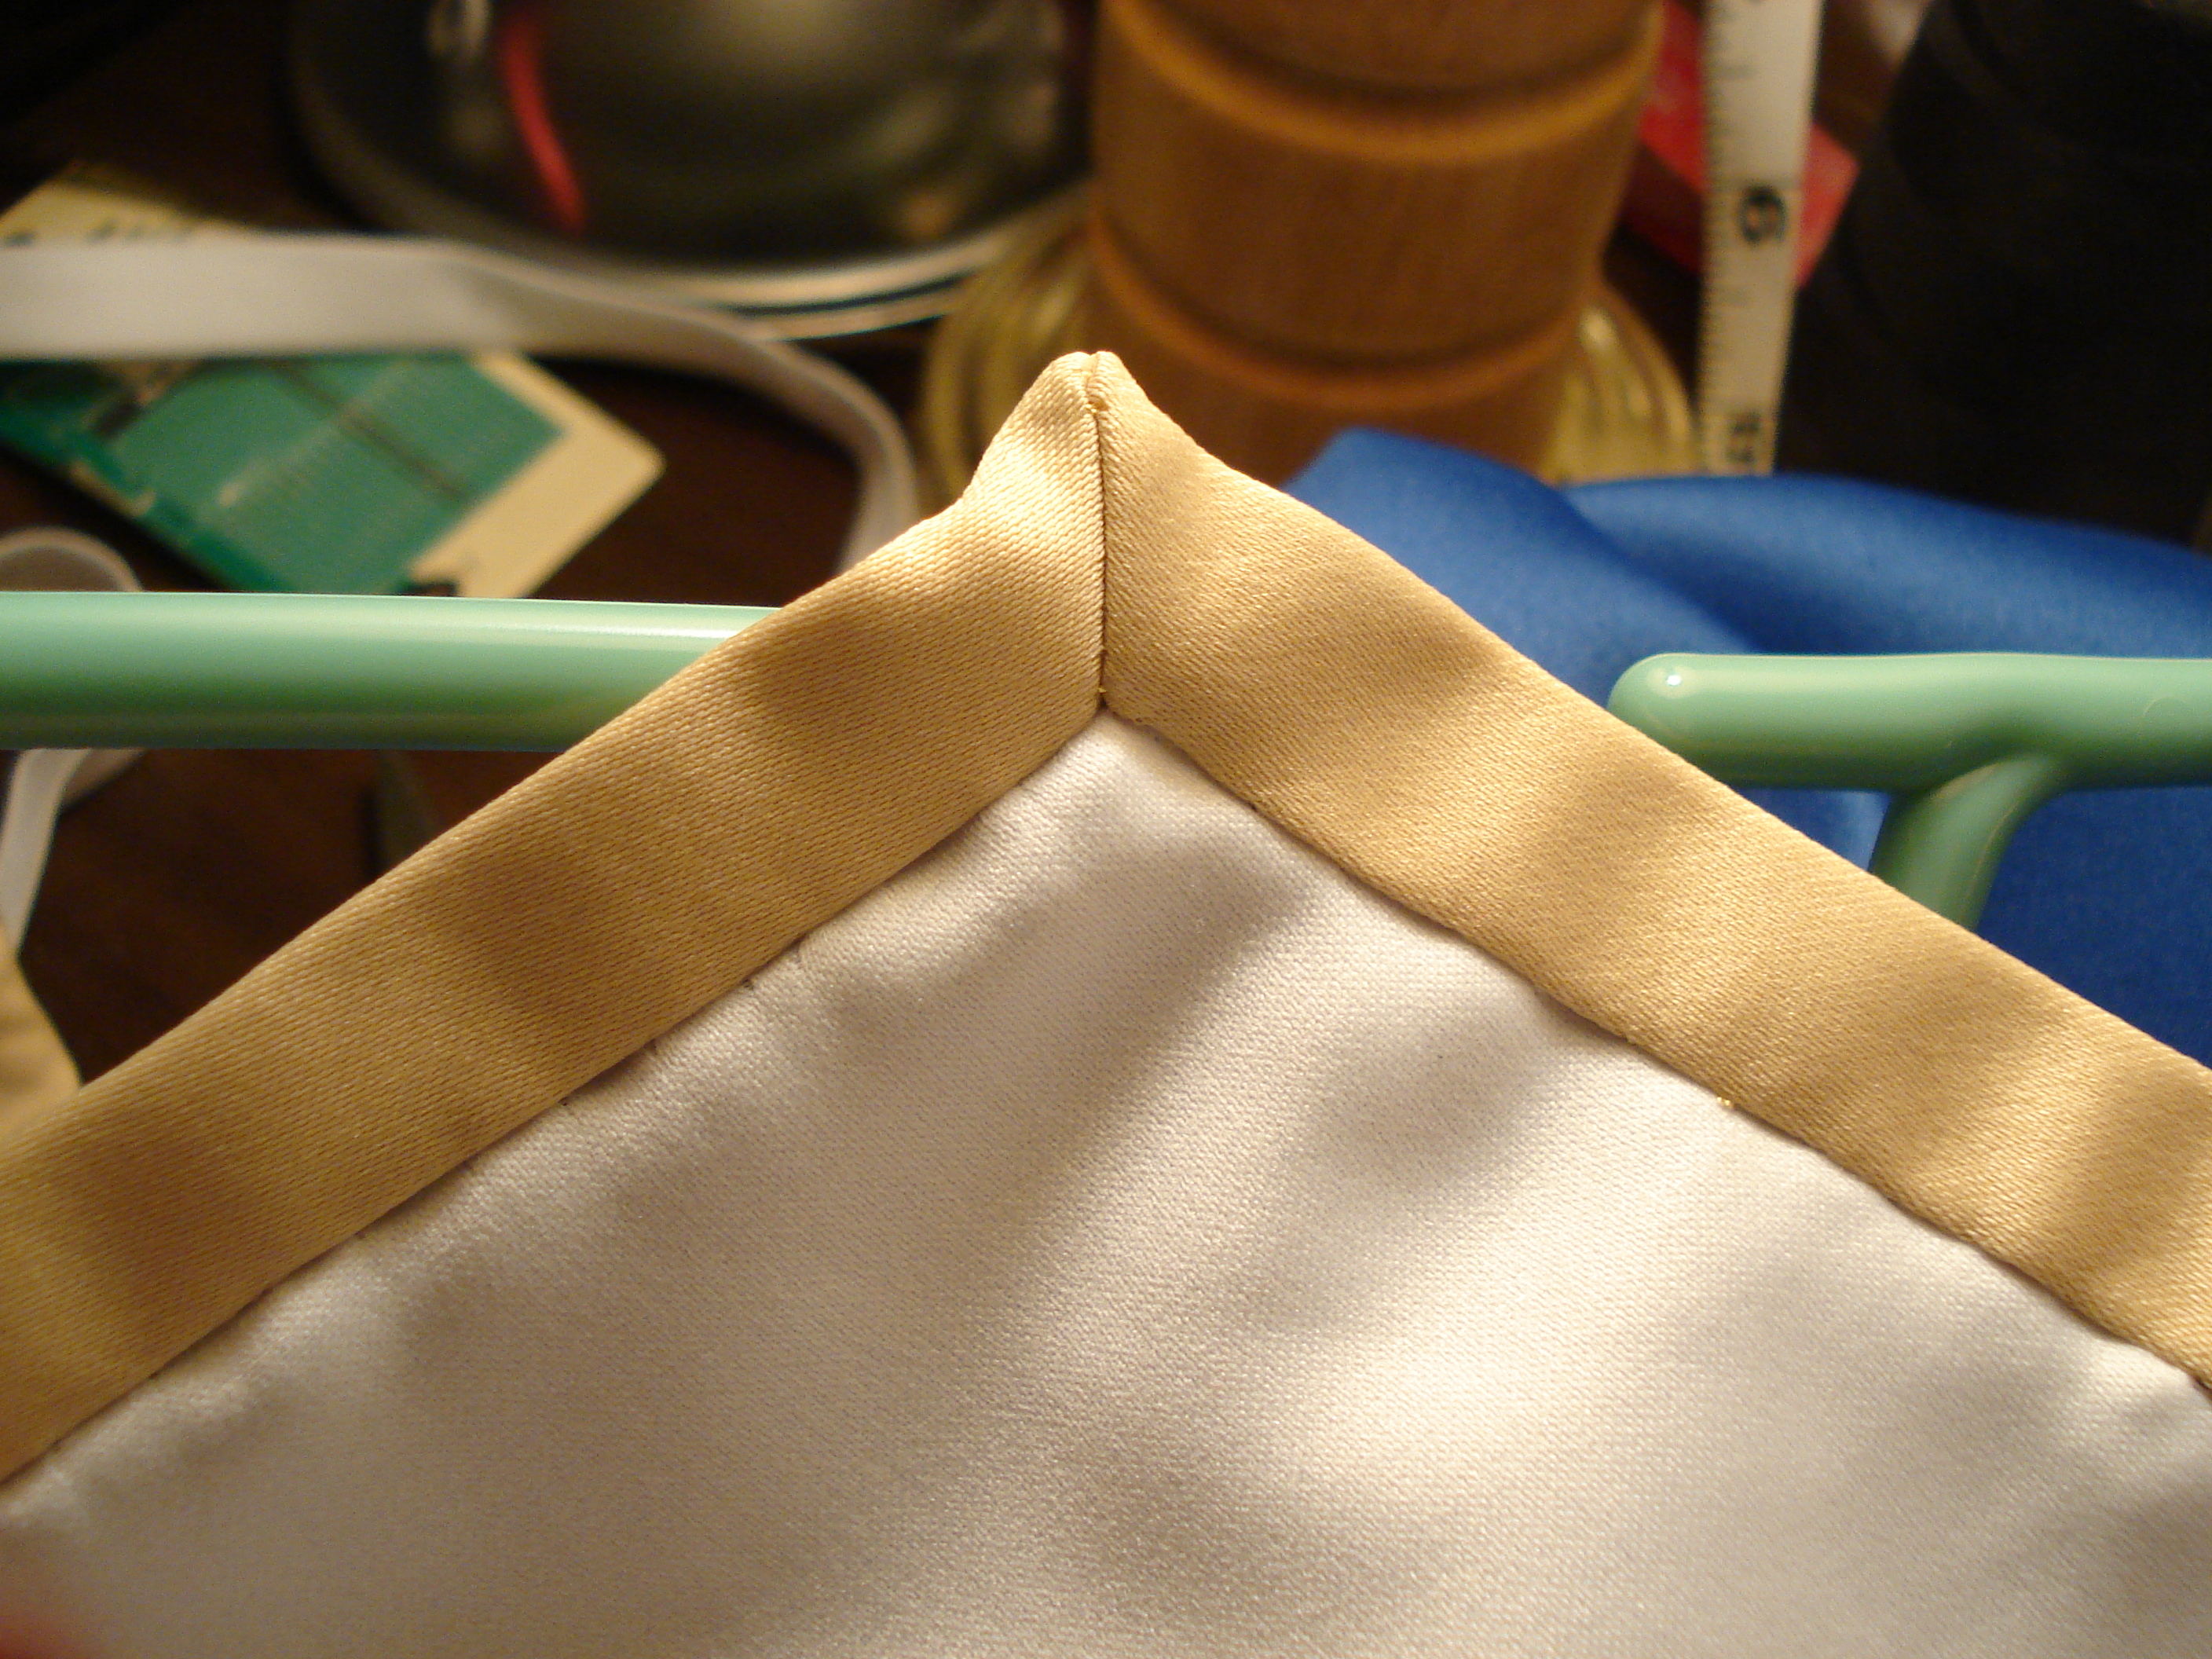
Now your bias tape looks great from both sides!